Creating reports
Scheduler can generate a report for you on any of the resources which it knows about - a person, a pupil, a classroom or property. The report will list all the events scheduled for that item over whatever period of time you choose.
Broadly speaking there are two ways to create reports - you can put your requirements into a form, or you can construct a custom URL. The former way is much easier, but you can do just a tiny bit more using the latter way.
Note that the form constructs the URL for you, so you can always start by using the form, then tweak it (or create a bookmark) to get exactly what you want.
Using the form
To use the form, start by watching the item for which you want a report. See “Quick tour” for details of how to pick what you’re watching. Then click on the coloured box for your chosen item in the left hand column. That will give you a screen like this - I’ve chosen to work with the school’s public calendar.
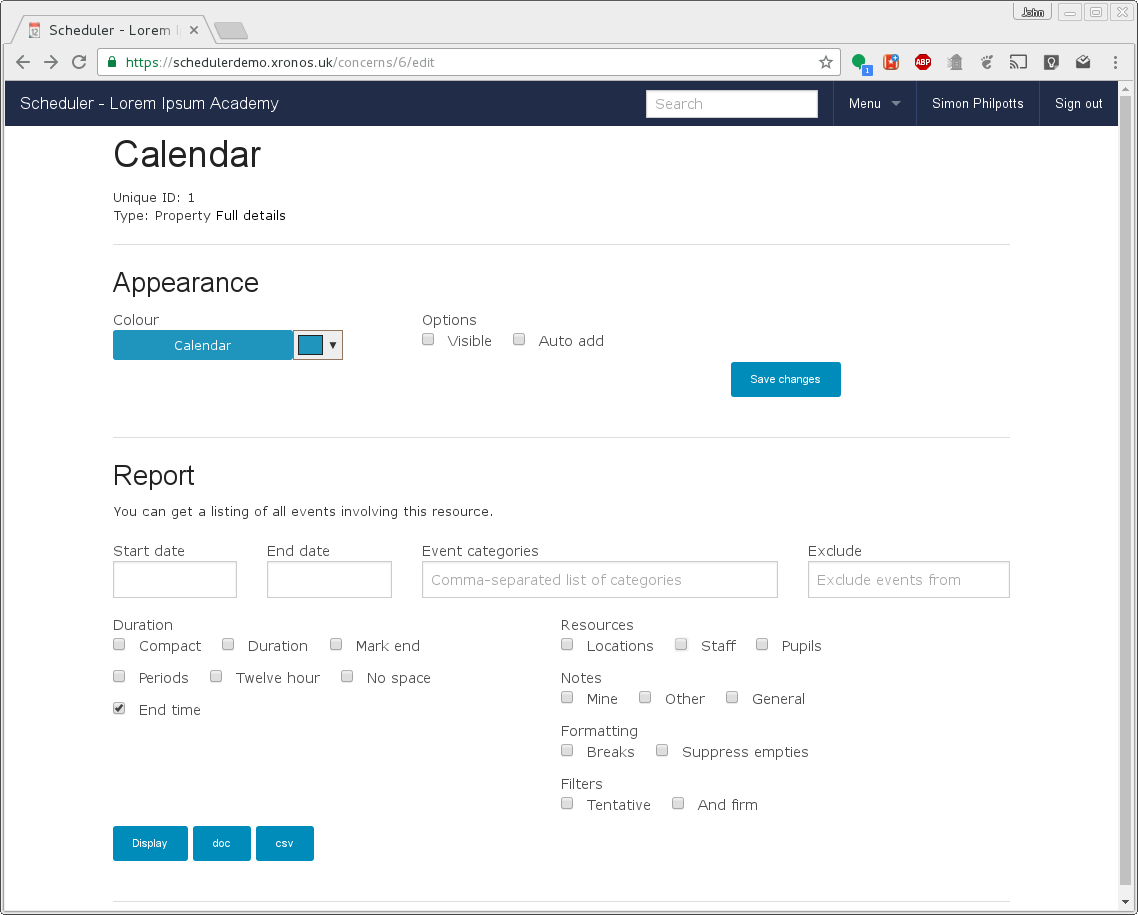
You’ll notice that on this same page you can also customize the appearance for this resource, but the bit that we’re interested in here is the report. This will generate for you a list of events for the selected resource. If you immediately go on and click “Generate” you’ll get something like this:
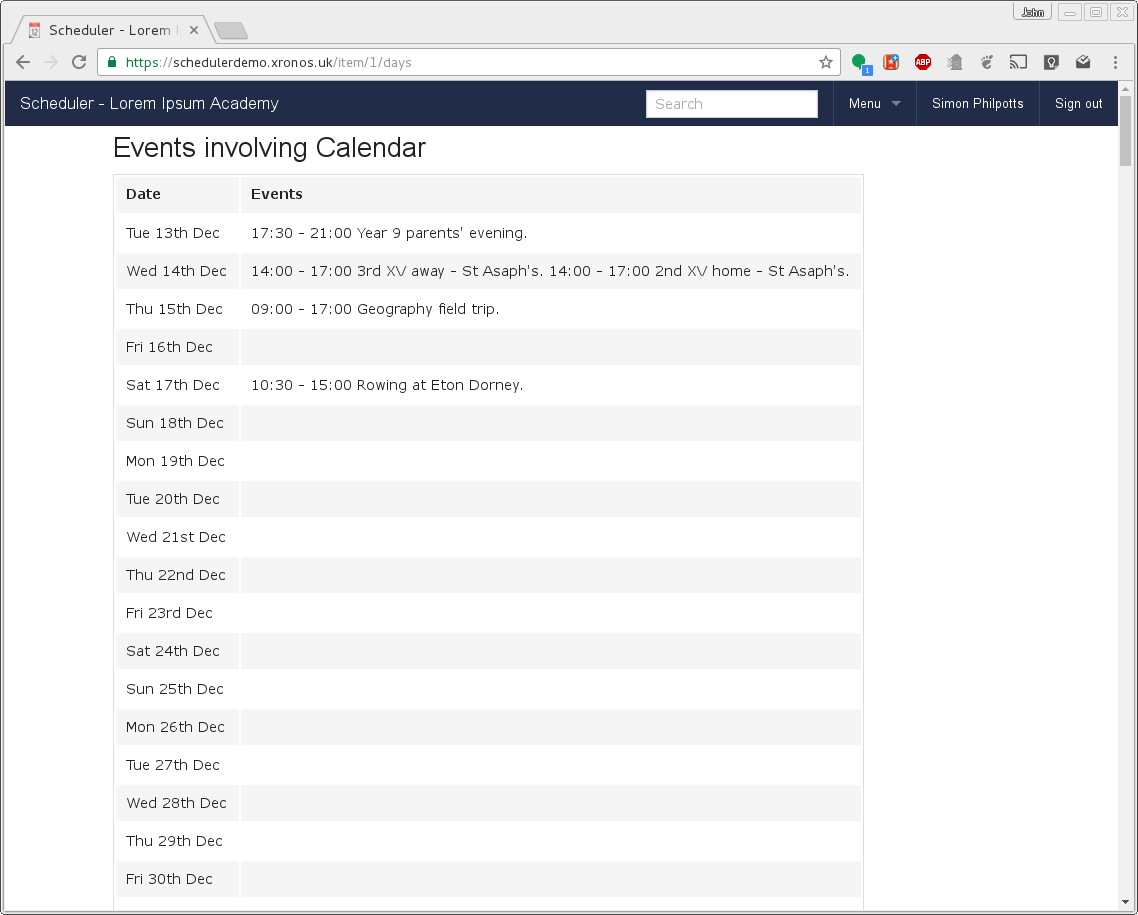
This is the simplest form of the report - it starts at today, and goes as far into the future as there are events. Using the form you can specify your own start and end dates, and restrict the events to a list of categories which you choose. (See Reference for a list of the categories.) You can even specify another event property and exclude events with that property from your listing. This can be handy if you want a listing of all events for a given resource which, for instance, aren’t in the public calendar.
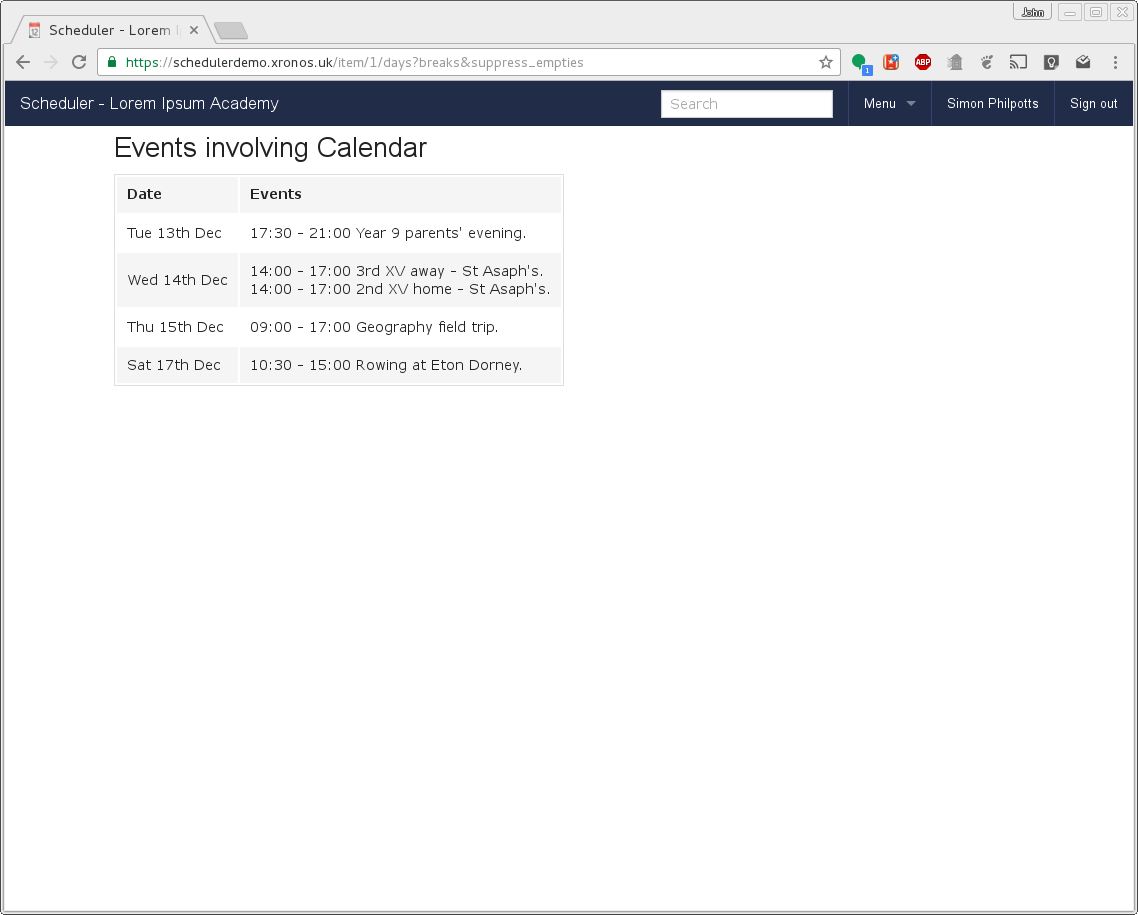
There are also quite a few flags available to tweak the output. It’s noticeable in the listing above that multiple events squeeze onto a single line, and there are days with no events at all. I can use the back button to return to the form, then select “Breaks” to add line breaks between events, and “Suppress empties” to remove empty days from the listing and it then looks like this:
For further explanation of what each of the tick boxes does, hover your mouse pointer over it and you will see some explanatory text.
After you’ve run a report, the system will remember the options which you chose, and will present them as defaults the next time you try to generate a report for the same resource.
As always, to get back to the normal calendar display, click on the “Scheduler” button at the top left of your screen.
Custom URL
Those of a technical bent will have noticed that when you use the form above to generate a report, it actually constructs a custom URL using all the options which you have chosen from the form.
The URL for the last report shown above is:
This can be useful if you want to save a direct link to a report for later use.
This section documents all the different options which may appear in such a URL, but you are strongly recommended to use the form to automate the construction.
The base URL for generating a report is:
To find out the relevant number for the item which you want, simply hover over one of the coloured boxes on the left hand side of the screen. As an example, the calendar’s unique number is 1, so if I wanted a report on calendar entries I would use:
which will generate a report on all the current entries in the calendar, looking like this: The events are sorted into their days and appear in chronological order, from today’s date until as far in the future as the events go. Should you want to download the report, add either “.csv” or “.doc” to the end of the URL to get either a CSV file (suitable for a spreadsheet) or a DOC file (suitable for a word processor).
You can then tweak the report using the following available switches:
- compact
This switch reduces an event which spans multiple days to a single entry on its first day. Thus, for instance, a sports trip lasting from 5th Dec to 10th Dec would by default be listed on all 6 of these days. If this option is specified then it will appear only on the 5th.
- duration
For use with the “compact” option above. This causes the end date to be included in the single starting entry. Thus for the same sports trip, the entry on the 5th would now read “Sports trip (to 10th Dec)”.
- mark_end
Again for use in conjunction with the “compact” option. This switch will cause the end day to get an entry as well. If it is added, the trip would also appear on the 10th Dec as “Sports trip - ends”
- locations
If specified, the (short) names of any relevant locations will be included with each event.
- staff
If specified, the initials of any staff involved will be listed with the event.
- pupils
If specified, the names of any pupils involved in the events will be listed.
- periods
If specified, the report will try to identify events which exactly line up with period times, and will then identify the event by period number, rather than by start and finish time. Only really useful for reports on stuff which fits the timetable.
- start_date=
List events starting on the given date rather than starting from today.
- end_date=
List events up to the indicated end date, rather than going on forever.
- twelve_hour
Show event times using the twelve hour clock (am/pm) instead of the default 24 hour clock.
- no_end_time
Don’t show the end time for events - just the start time.
- breaks
Put each event on a line of its own, rather than in a solid block.
- suppress_empties
If any date has no events at all, don’t produce an entry for that date. Useful if the events being reported on are spread sparsely through the calendar.
- tentative
By default, the report will contain only events to which the resource is firmly committed. If someone has for instance, requested a calendar entry but it hasn’t been approved yet, then the event will not be listed for the calendar. By adding the tentative flag, you can list tentative events instead.
- firm
And by also adding the firm flag, you can get both tentative and firm commitments.
- categories=
Provide a comma-separated list of categories to which to restrict the selection.
Note
If you’ve used the “.csv” or “.doc” extensions, then the switches go after the extension, like this: