Notes and Files
Overview
Any event within Scheduler can have notes and files attached to it by suitably privileged users. The author of a note can set its visibility so that it can be seen by staff, pupils or the general public, or any chosen combination of these.
Note
By default, staff can add notes to events and pupils can’t but the system adminstrator can change these permissions as required. They can be changed on a per-user basis, or by creating and editing User Profiles.
These notes can be used for a wide range of purposes. For example:
If a lesson is being covered the original teacher can leave a note specifying the cover work, which is then accessible to whoever ends up doing the cover. If necessary, worksheets can be attached as files.
For a pupil activity, the organiser might leave a note visible to all the pupils describing preparation work needed.
For a public event, a publicly visible note can be added with extra details of the event, a link to Google Maps for directions, and a downloadable programme.
A sample note can be seen on the Scheduler demonstration site. Just click on the rowing event on the Saturday to see it.
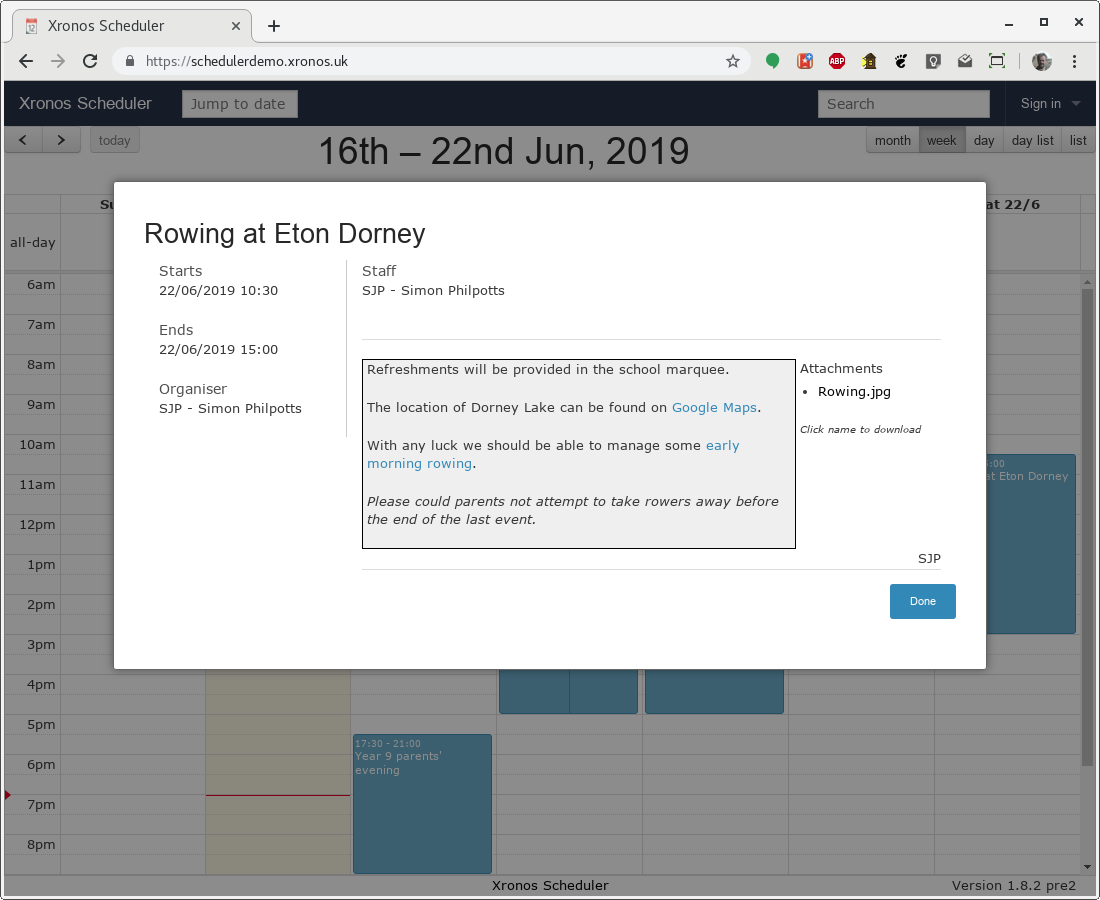
This note includes a link to Google Maps, and a downloadable file. The initials at the bottom right (SJP) indicate that this note was added by Simon Philpotts.
Markdown
For a simple note, the user can type just text and not worry about the formatting. However, if more is required then all the facilities of Markdown are at your disposal. You can create headings, add formatting, embed links and much more.
Creating a note
Let’s take a look at how SJP might have created that note. Before he added the note, his detailed view of the event (gained by clicking on it) would have looked like this:
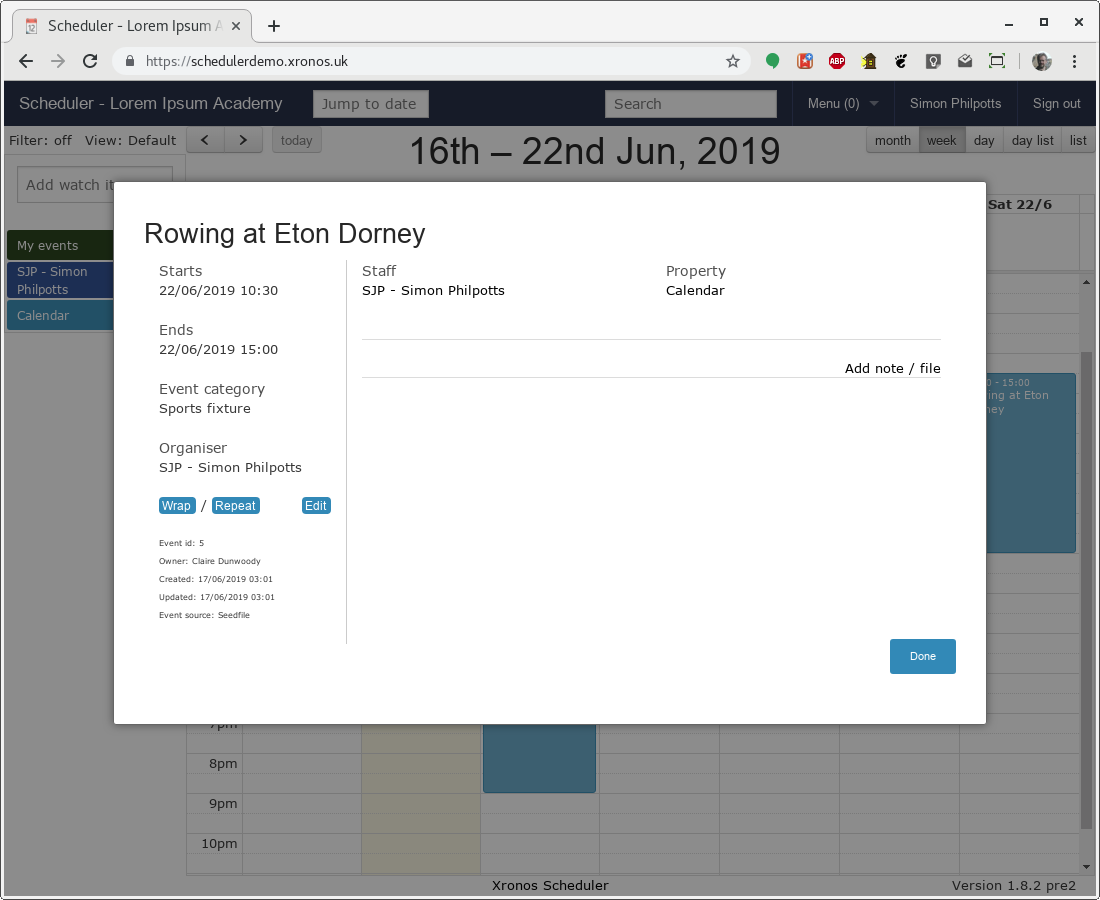
Note the “Add note / file” link towards the right of the dialogue box. Clicking on that produces this view:
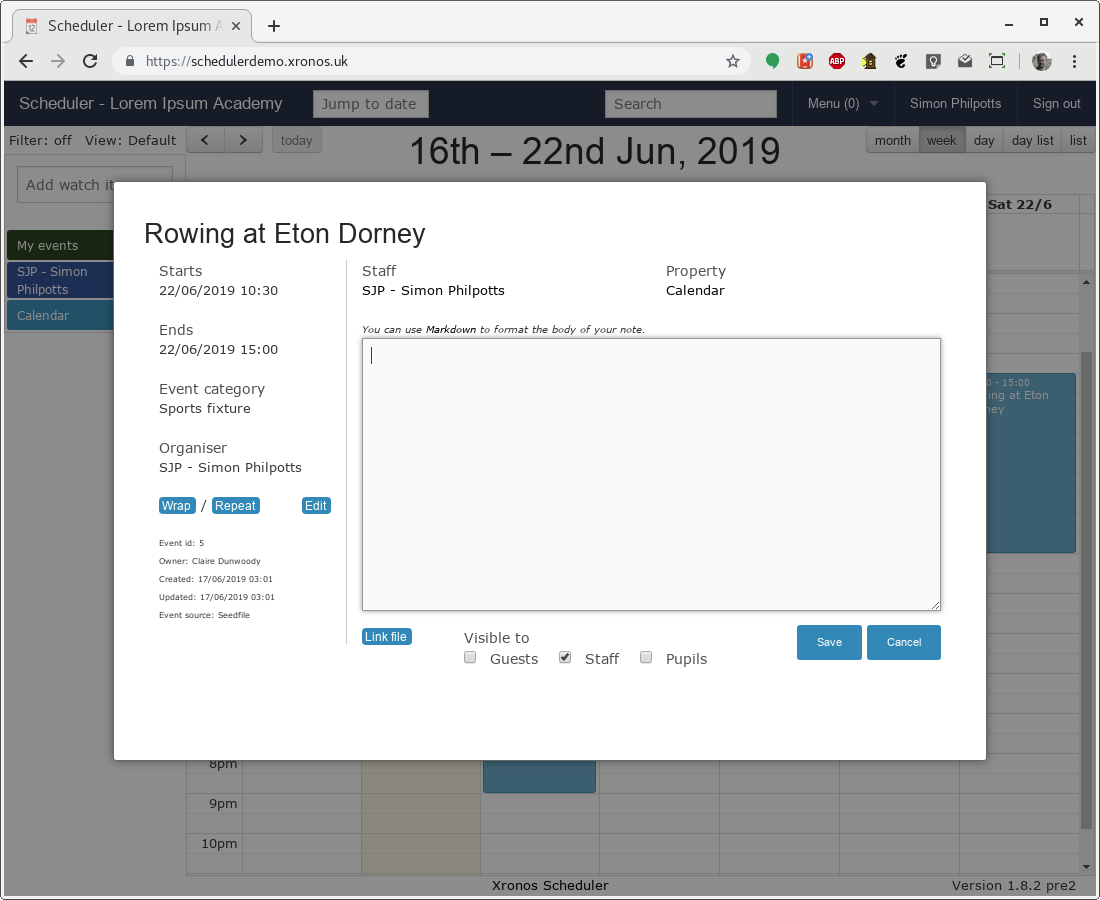
The basic text can be entered very easily. In the next screen, SJP has got as far as wanting to embed the link to Google Maps.
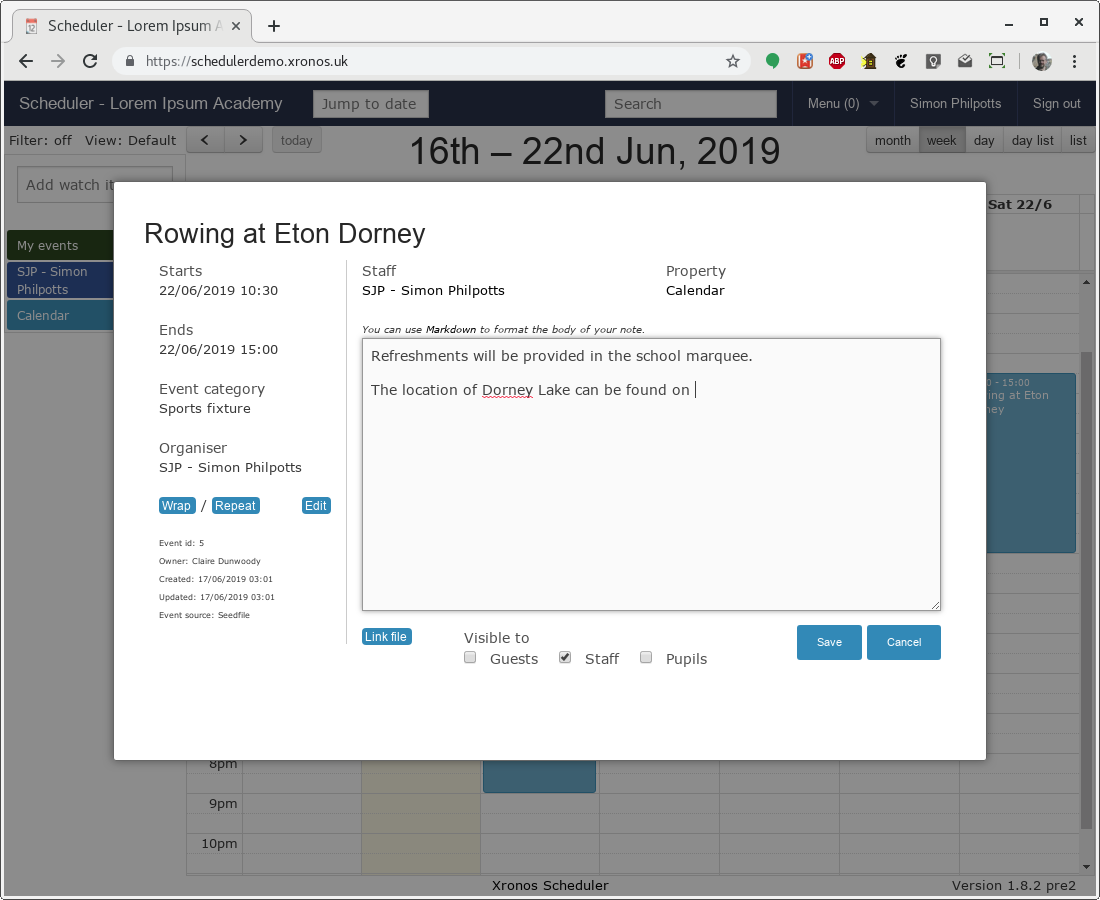
Note that the cursor is positioned where he wants the link to go. He then clicks on the “Link file” button (bottom left) to open the link helper dialogue:
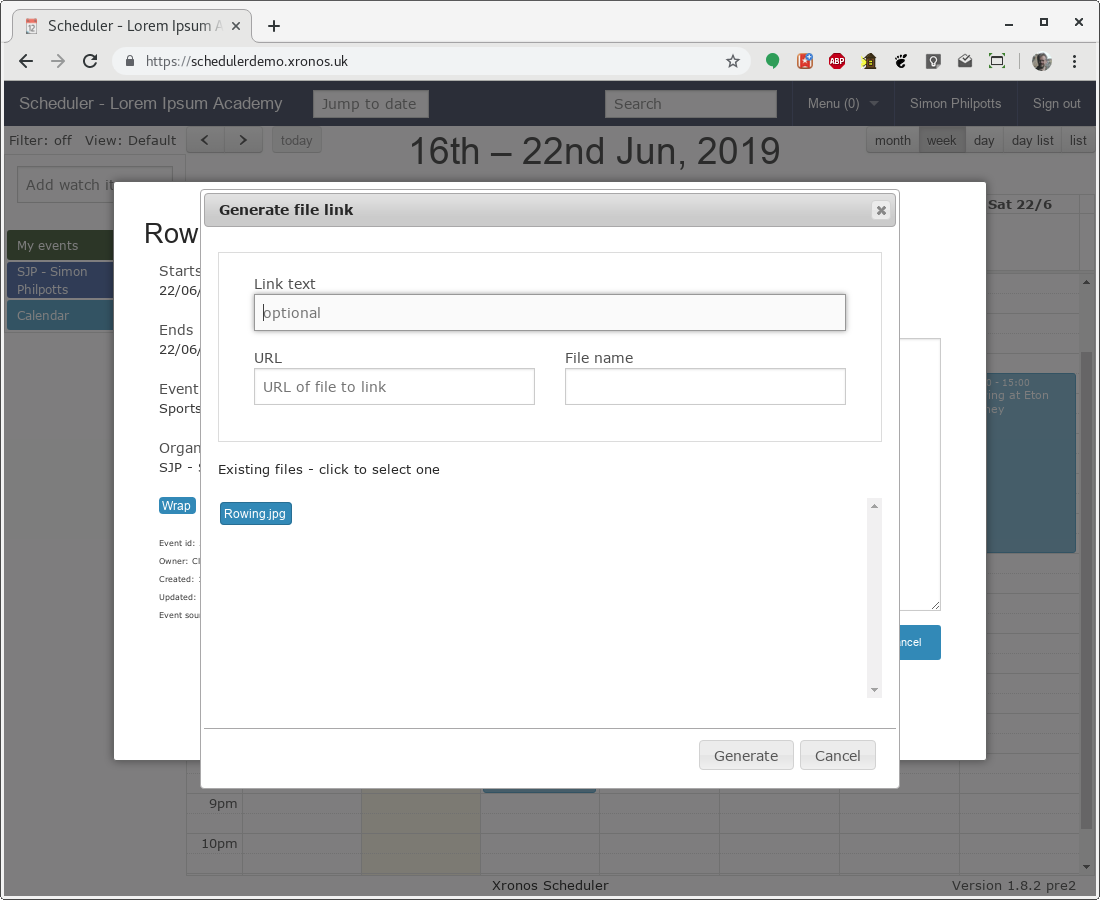
Here we have three fields:
The first field is for the text of the link to be embedded. In our case we want to put just “Google Maps”.
The second field is for the required URL.
The third one is for a file name. It’s not needed in this case, but when using an actual file, it will be used as the text of the link if nothing is entered in the first field.
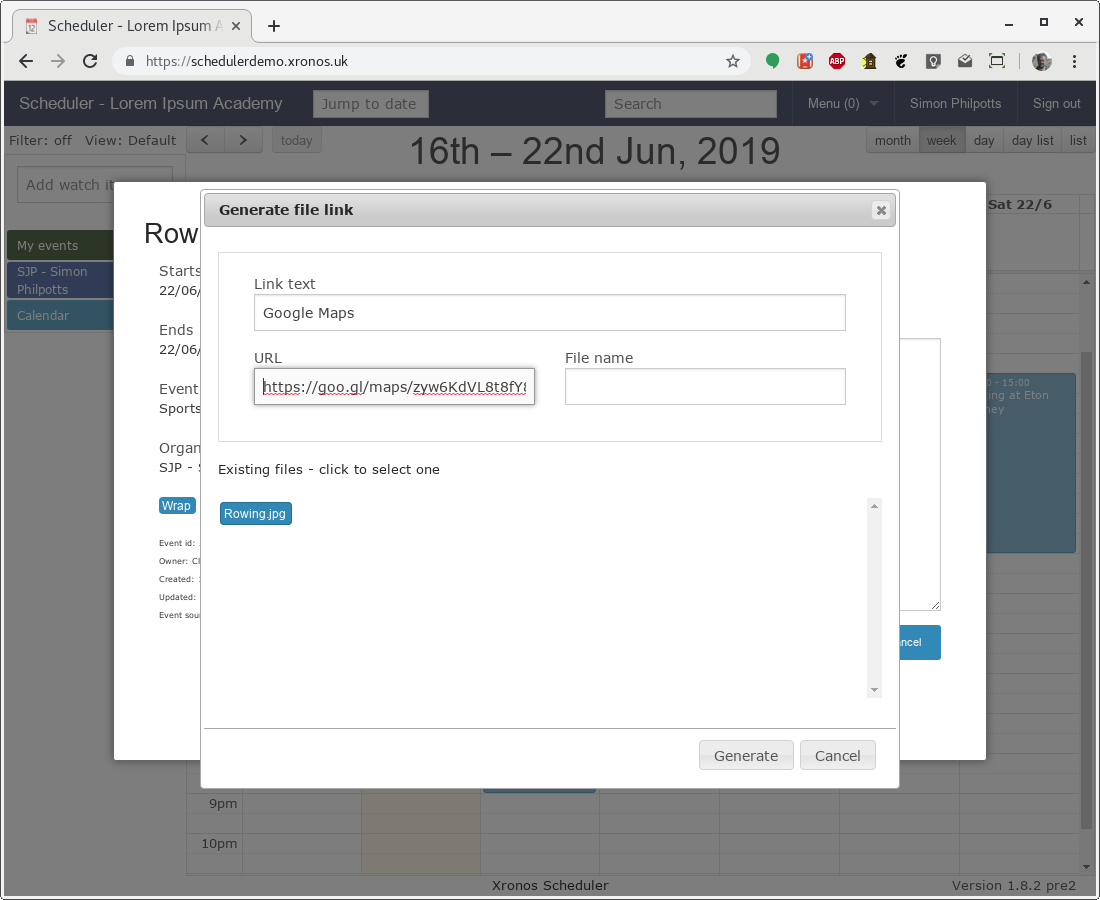
Filling in the fields as above and then clicking “Generate” will produce this in the note being created.
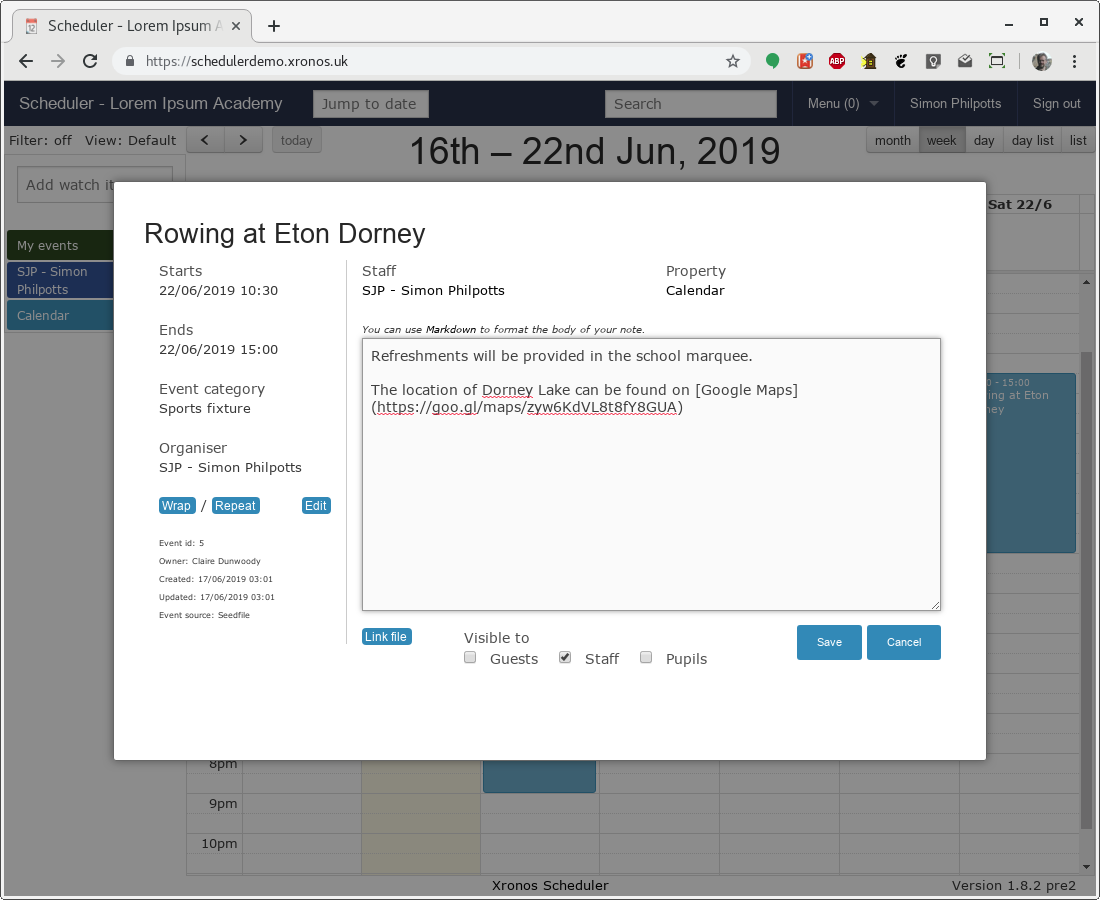
The helper has simply formatted the data given into a Markdown link.
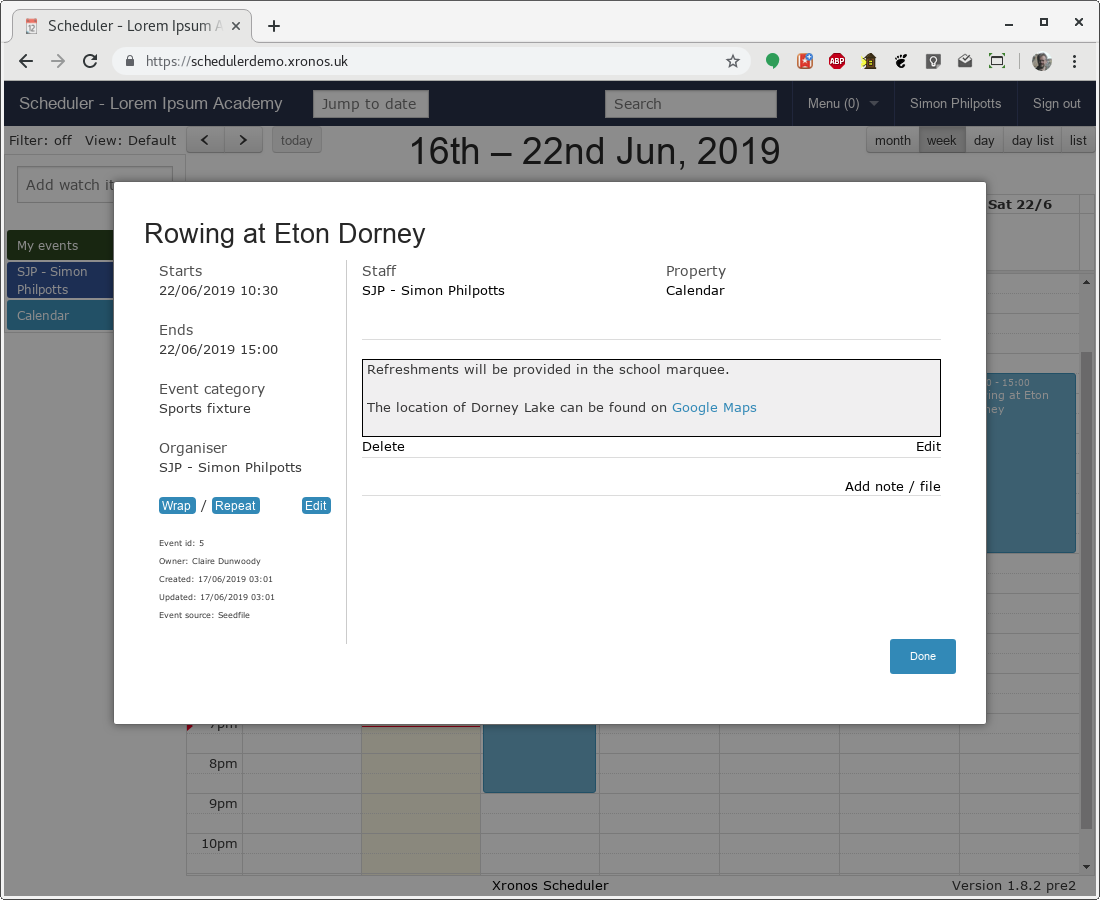
The note is intended to be read by the general public, so click the “Guests” box under “Visible to”, and then click “Save” to save the work to date. The note now looks like this:
Note
You don’t need to use the helper - it’s easy enough to type a Markdown link manually - but it can make the job just a little easier, particularly if you want to embed a link to a file held on Scheduler itself. Read on.
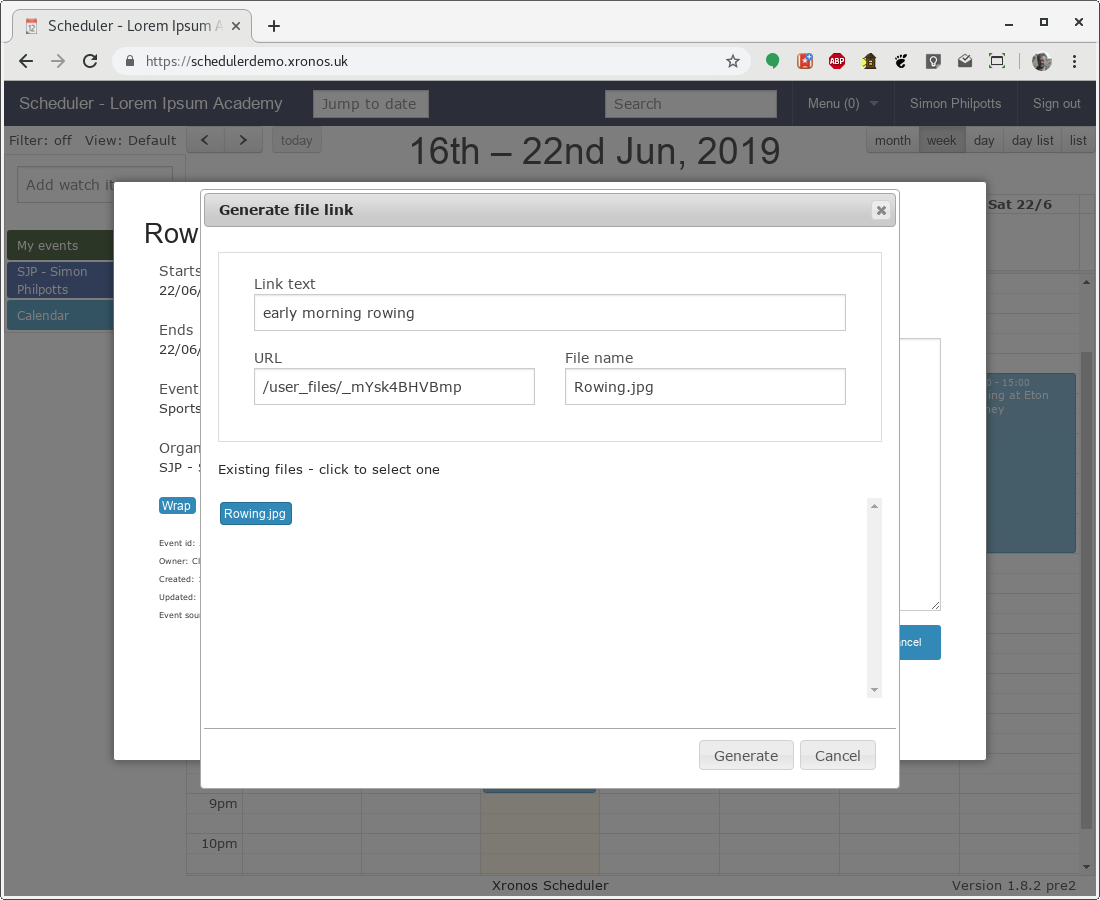
Next we want to embed a link to a picture file which has already been uploaded to Scheduler. We type the next bit of text, then again invoke the “Link file” dialogue.
The text field has been filled with “early morning rowing”, and then the other two have been filled by clicking on the icon in the file list below the fields.
And then clicking on “Generate” we get back to this.
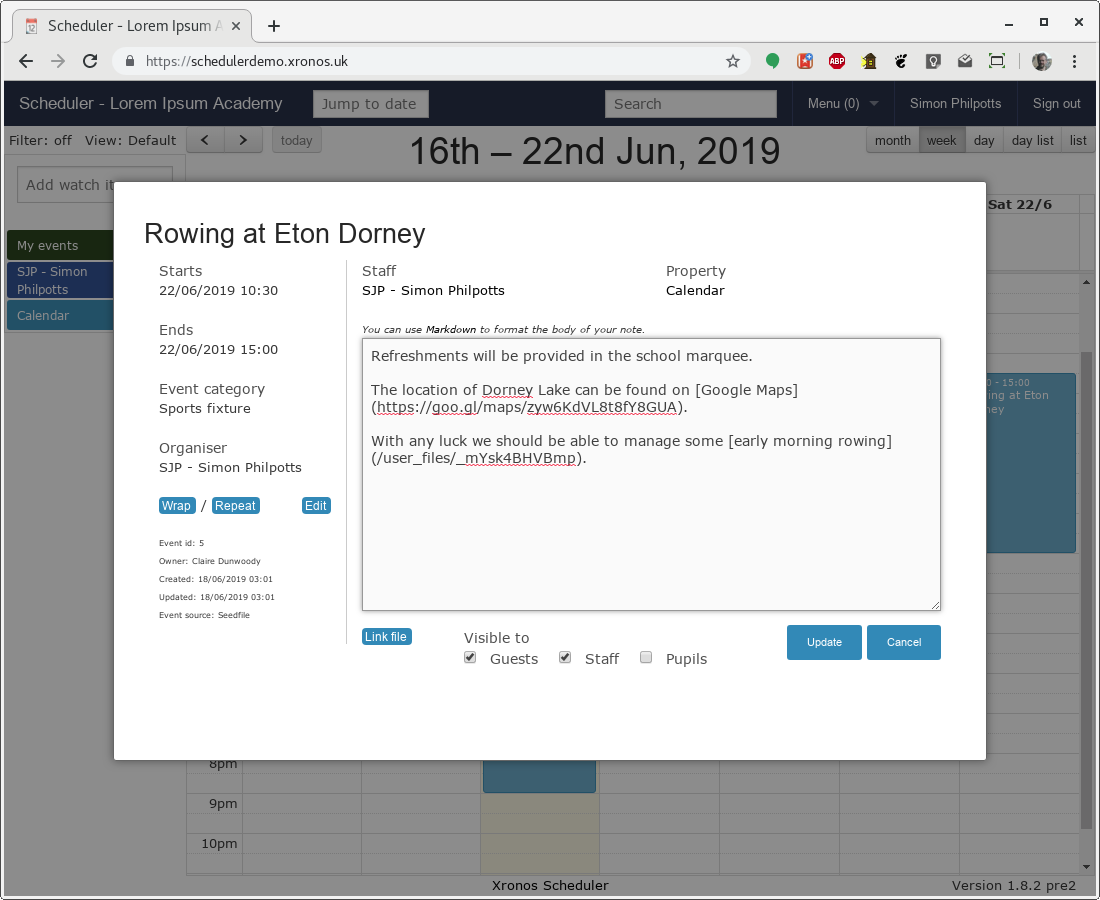
Note that this time the embedded link points to a file hosted on Scheduler itself.
Finally we can add the last line of text, and because we want it in italics we surround it with underscore (_) characters.
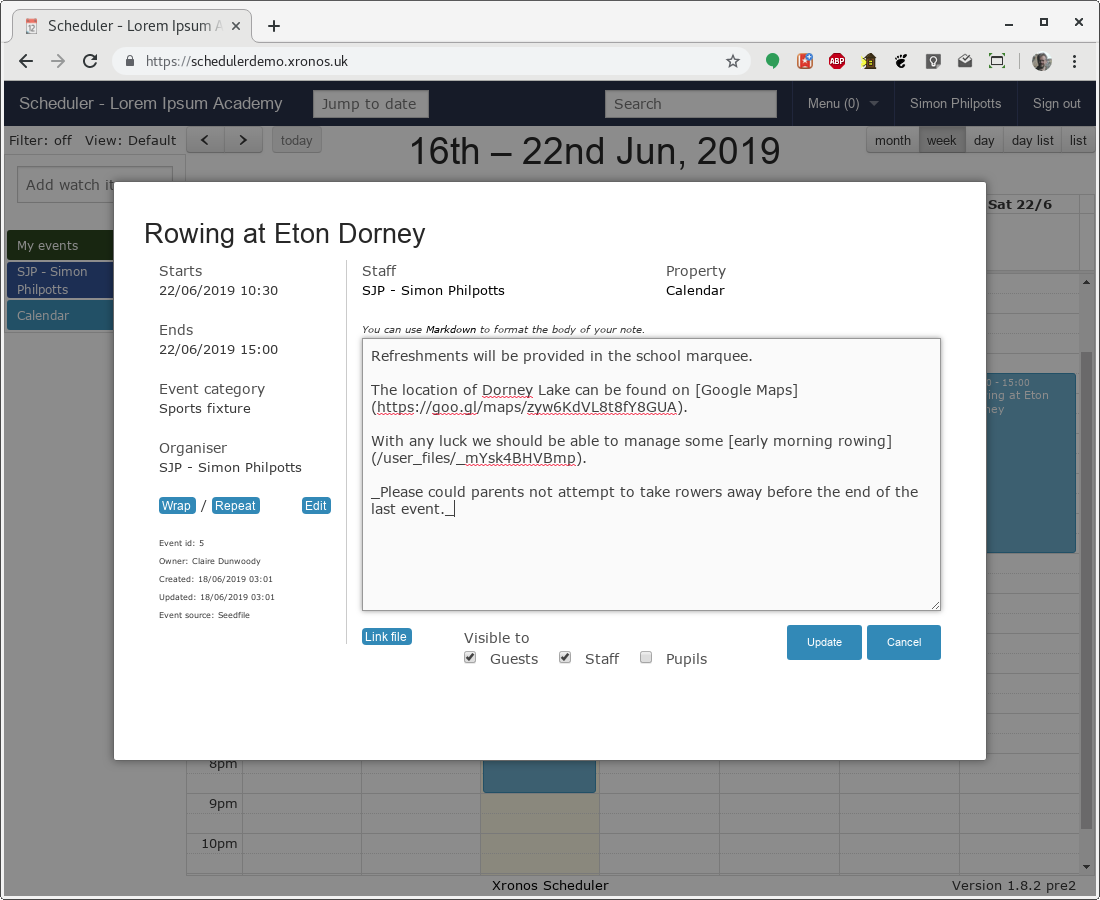
And then once “Update” has been clicked the final note looks like this.
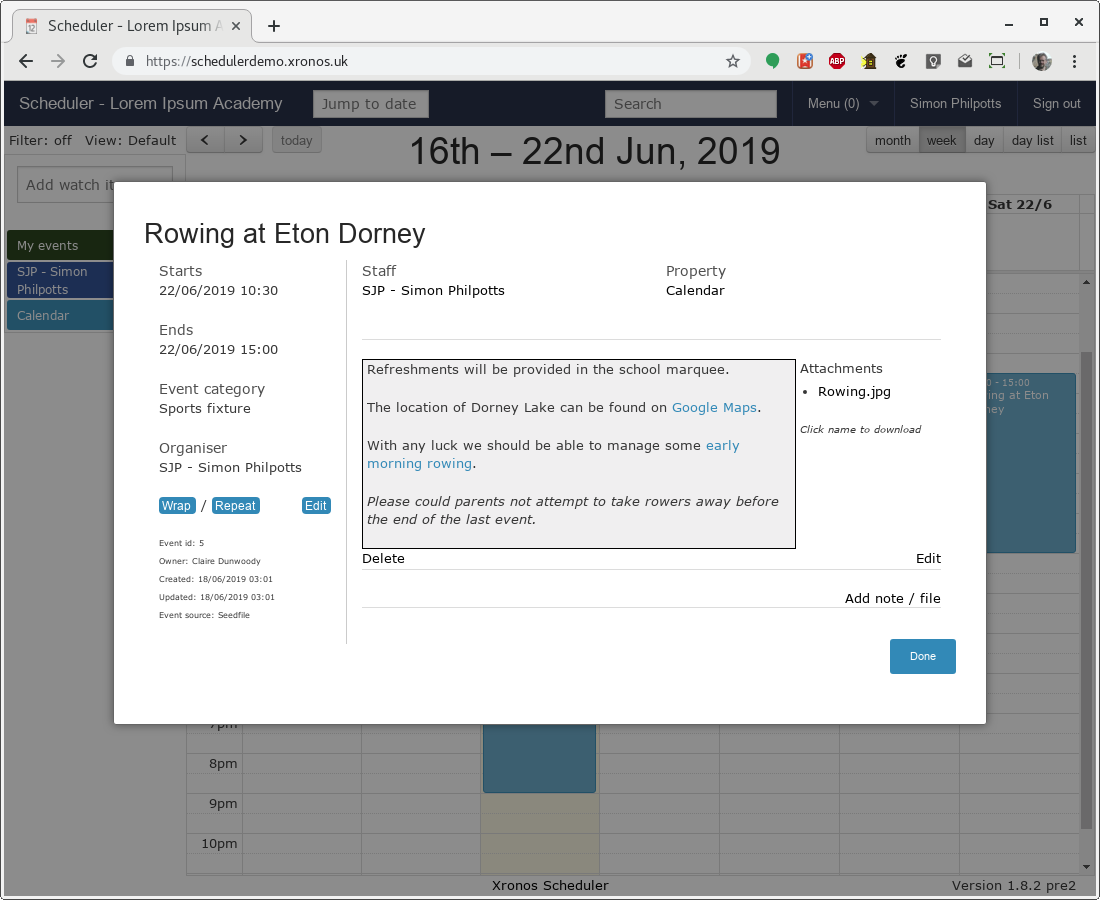
Because that second link points to a file actually hosted on Scheduler, a separate link has been created on the right hand side. Clicking either within the text of the note, or on the link on the right hand side will cause the file to be downloaded.
Uploading files
Assuming your system administrator has given you permission to upload files to Scheduler, you can upload them from the main menu.
Use Menu => Files to get to your list of currently hosted files.
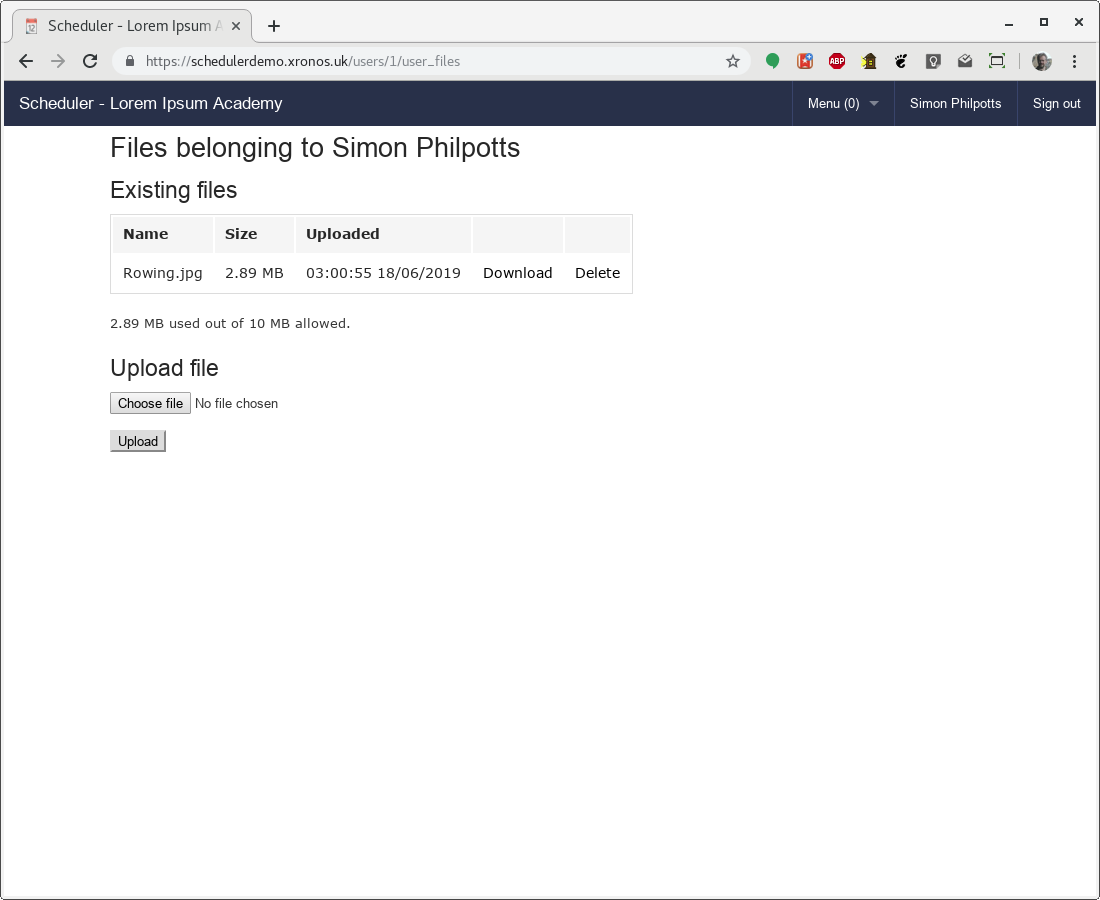
Note the list of existing files, plus a note of how much of the user’s available space is already in use.
To upload a file, click on “Choose file”, select the file you want from the resulting dialogue, then click on “Upload”.
Note
The appearance of the file selection dialogue will depend on what browser and operating system you are using. Typically it will be the normal file selection dialogue for your system.