Entering events
You enter events into Scheduler in much the same way as you would for any calendaring program, but with one big difference - they are structured. Each event carries information about the resources - people, places and services - involved in it.
Warning
The most common source of confusion for a new user is entering an event without any resources and then wondering why no-one else can see it. Such an event is visible only to the person who put it in - and then only if “My events” is ticked.
Scheduler is interested in the resources which each event uses. An event with no resources might as well not be there.
Creating
To create a new event in the system, simply click on the relevant date and time, or click and drag to set both a start and an end time. All-day events can be entered by clicking in the all-day section at the top of each day. A dialogue box will appear as shown below.
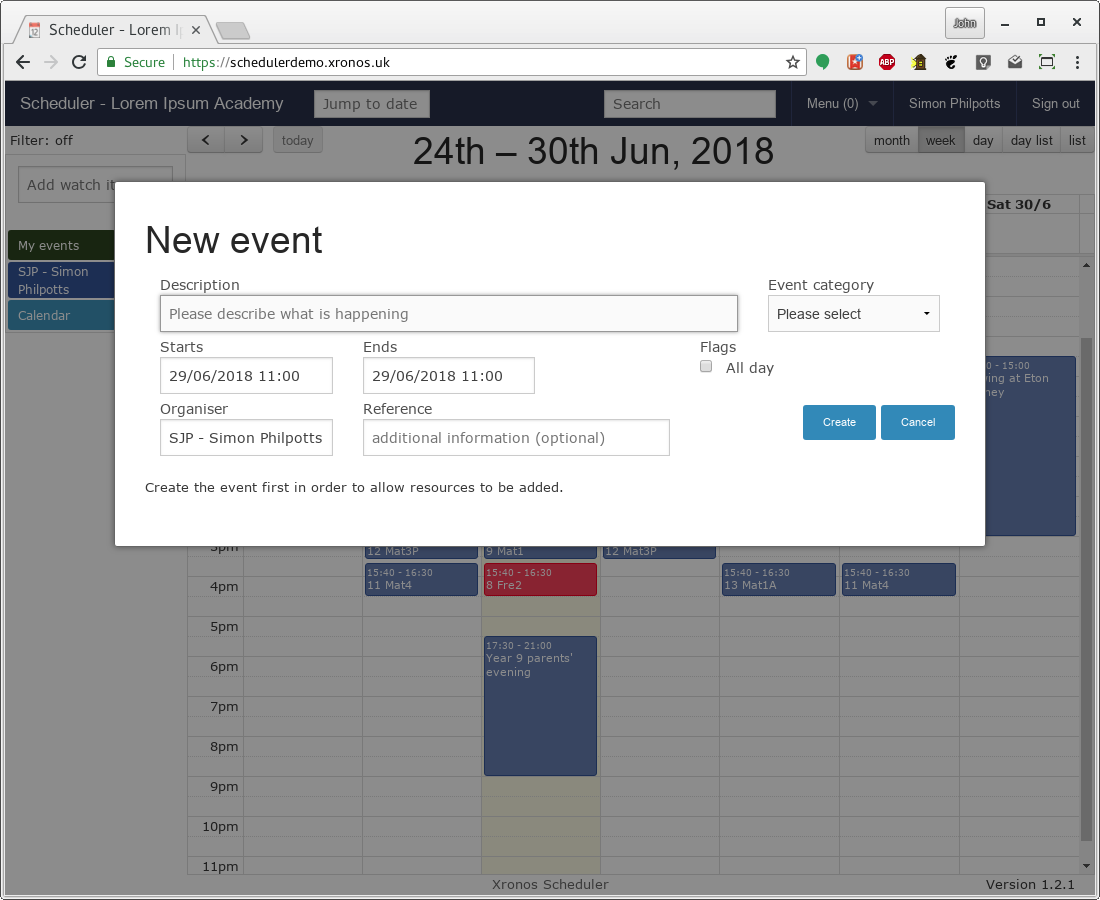
The first box is simply for you to put in some sort of description of your event. E.g. “Planning meeting for trip to Greece”.
Warning
Again, a common mistake is to try to put unnecessary information in this box. Don’t put “Planning meeting for trip to Greece - room 6H”, or “Progress meeting - Lord Copper, Jane Eyre and Harriet Vane”.
Instead put “Planning meeting for trip to Greece”, and “Progress meeting” and then add the venues and/or attendees as resources in the next step. To get the full benefit of Scheduler you need to give it accurate structured information.
The next box lets you put your event into one of a number of broad categories. What exactly is available in your system will depend on how your system administrator has configured it, but these are what are on the demonstration system.
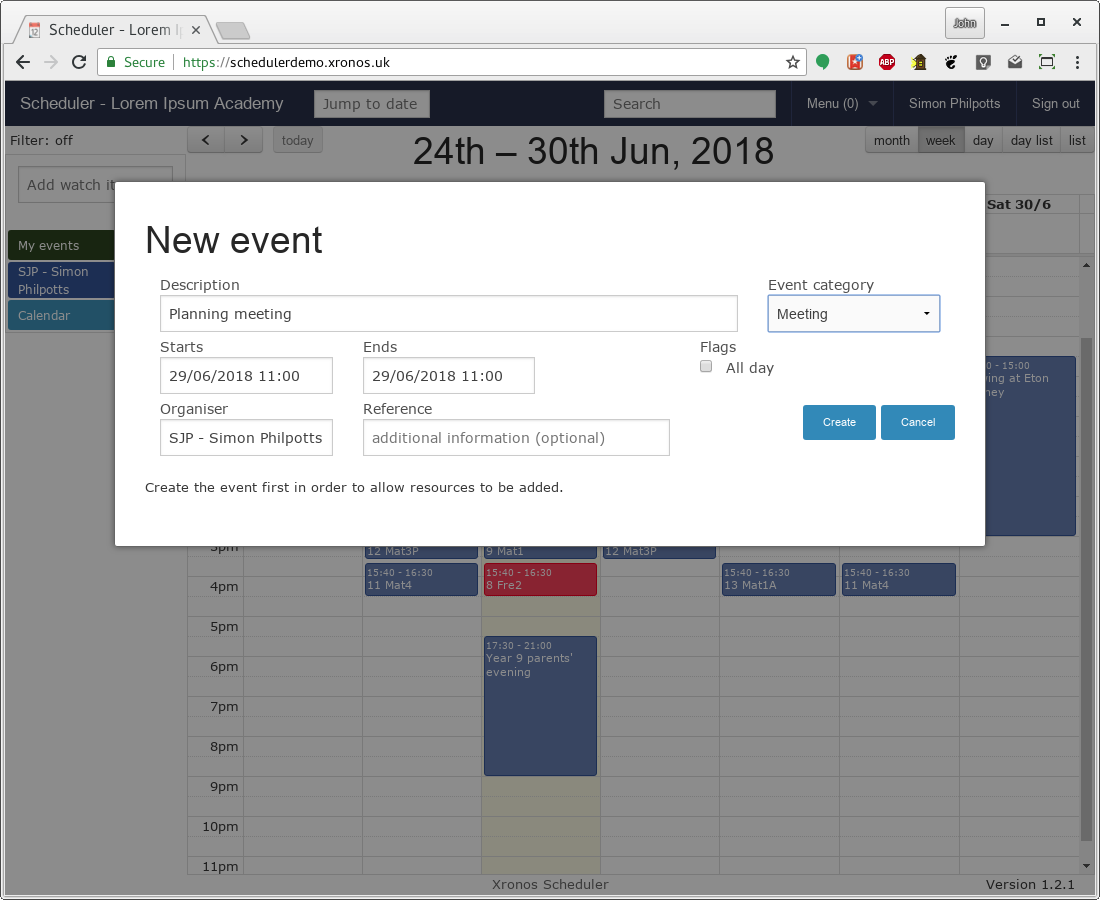
Because I just clicked on the calendar to create this event, the start and end times are the same. You can change them either here in the dialogue, or by dragging the event on screen later.
The Organiser field provides documentary information about who is responsible for the event. Sometimes the actual data entry is done by a different person, and it can be useful to know who the right contact is. Finally, the Reference field allows extra text to be entered if needed.
Adding resources
Once you click on the Create button, the dialogue changes slightly - a new field appears at the bottom. The event now exists, and resources can be assigned to it.
Simon Philpotts has been added to the event automatically. This is a user-selectable setting which to start with is switched on - every time you create a new event you are auto-added as one of its resources. To switch if off, click on your name in the coloured block in the left hand column, and then un-tick the “Auto add” box.
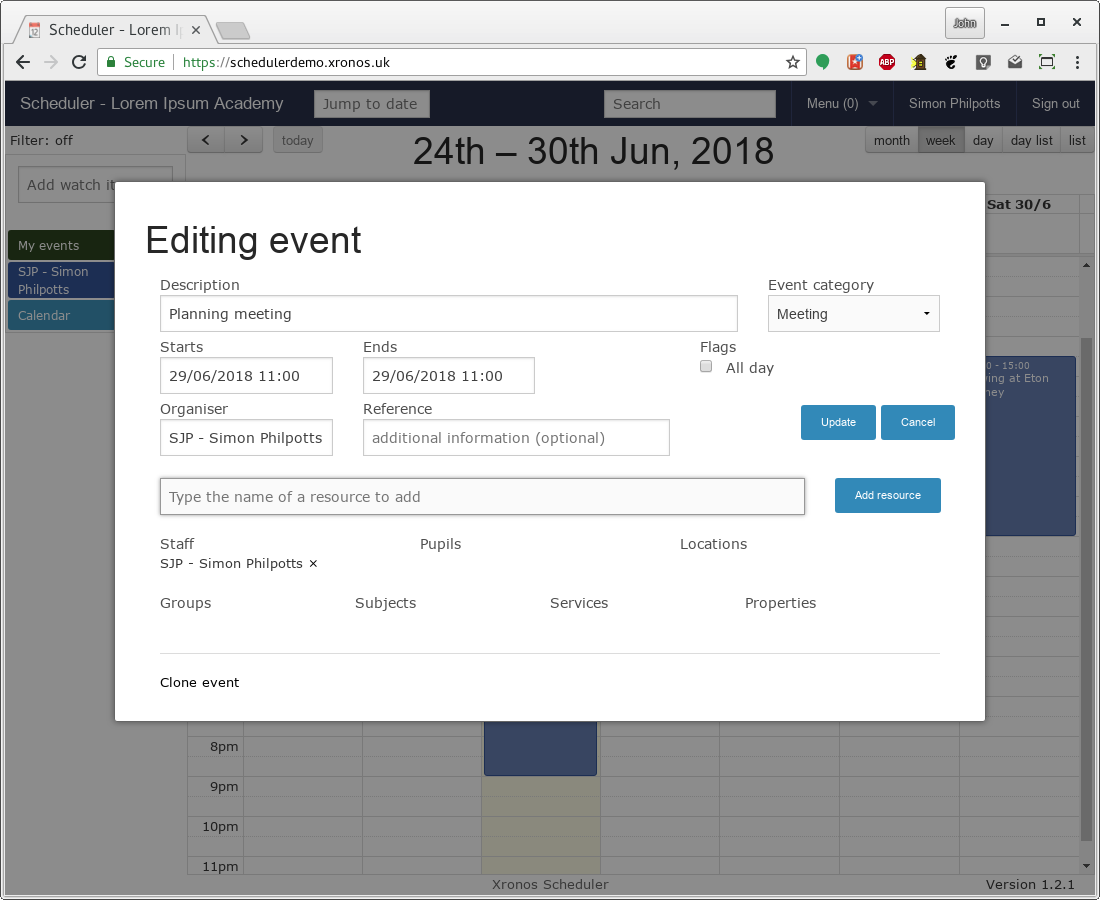
There is only a single field for adding resources. You can type there the name of any resource - staff member, pupil, room, location, service, property or group - and the system will assist you by auto-completing it. As you add resources, they are sorted into their various types and listed as being involved with the event.
Note
Try to include all the resources which your event will require. List the staff who will be there. If you want a group of pupils, you can either use a pre-existing group or create one of your own and add that. If you’re using a particular room, add that in. If you need a particular service like cleaning or catering, list those too. The whole idea is to share as much information as possible.
Warning
Don’t add people to the event just because you think they might be interested in it. The resources which you add to an event are those which are actively involved in the event. If you want to publicize your event, think about adding it to one of your school’s public calendars.
Obviously there are some kinds of resources which need a degree of control. You can’t have just anybody putting events into the school’s public calendar. Note what has happened here when Simon Philpotts attempted to add “Calendar” as a property to his event.
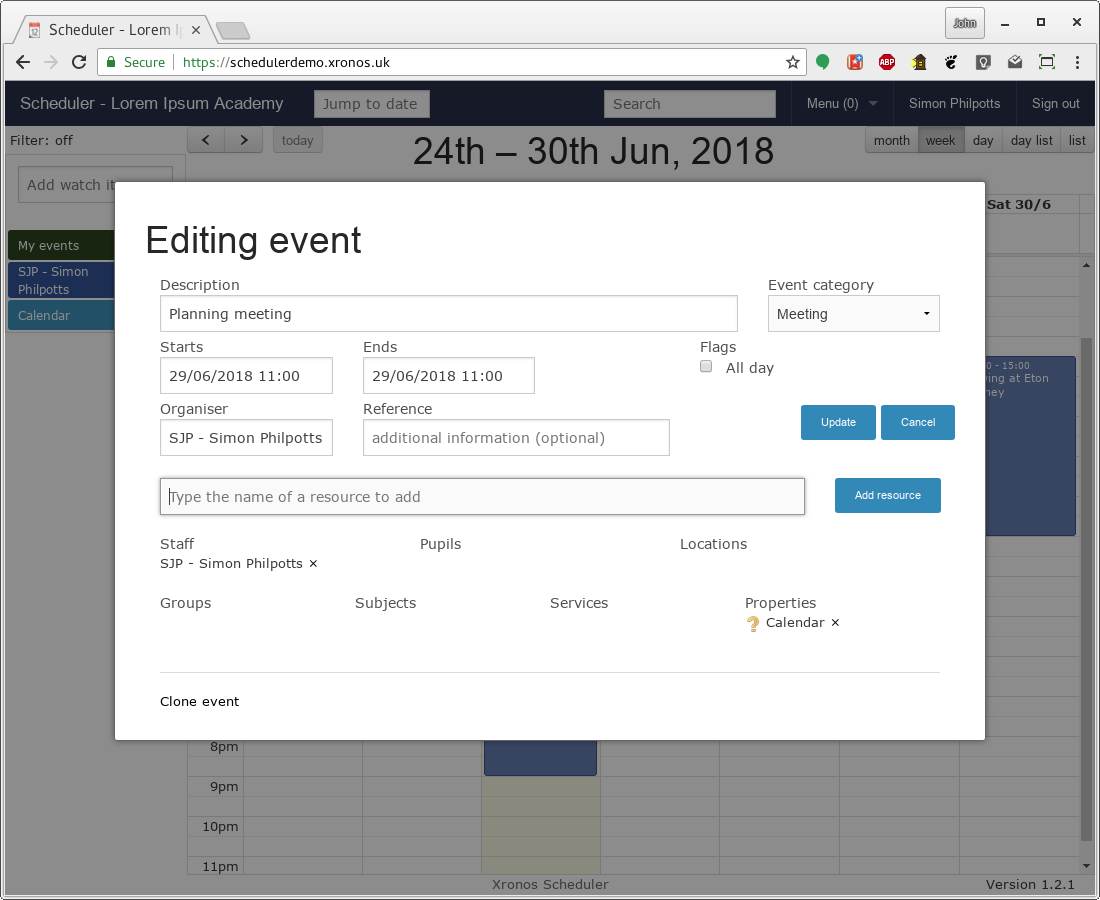
It has appeared, but it has an orange question mark in front of it. This indicates that approval is needed before the event will actually appear in the school calendar. The relevant people will have been notified, and once the event has been approved it will then appear. For now, only some users will be able to see it in the context of the Calendar.
Note
Who exactly can see un-approved events like this is under the control of the system administrator. Typically it might be staff, but not pupils or the general public. For those who can see the event, it will appear greyed out to indicate that it is still tentative.
See also Specifying Requirements below.
To finish off editing the event, click on the Update button and you will be taken to a dialogue showing full details of the event.
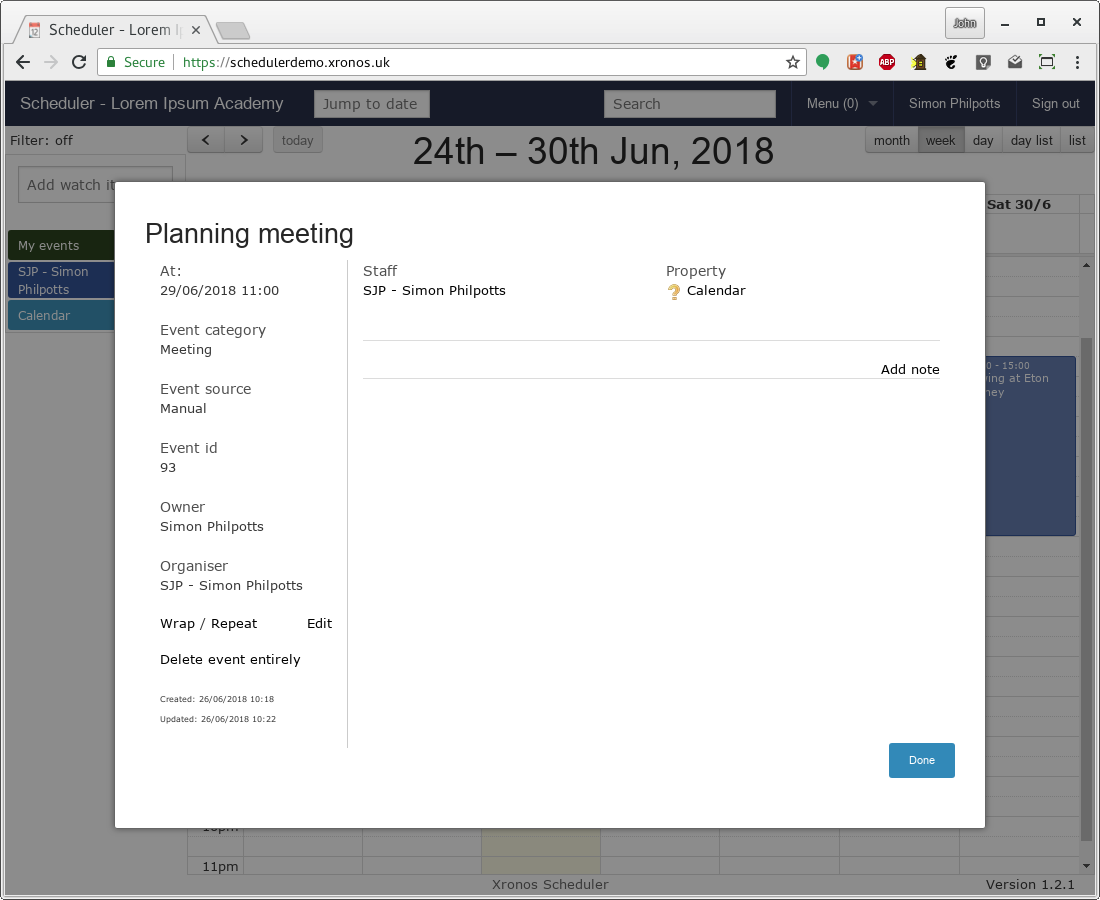
And then if you click the “Done” button the dialogue closes and you’re back to the main calendar display.
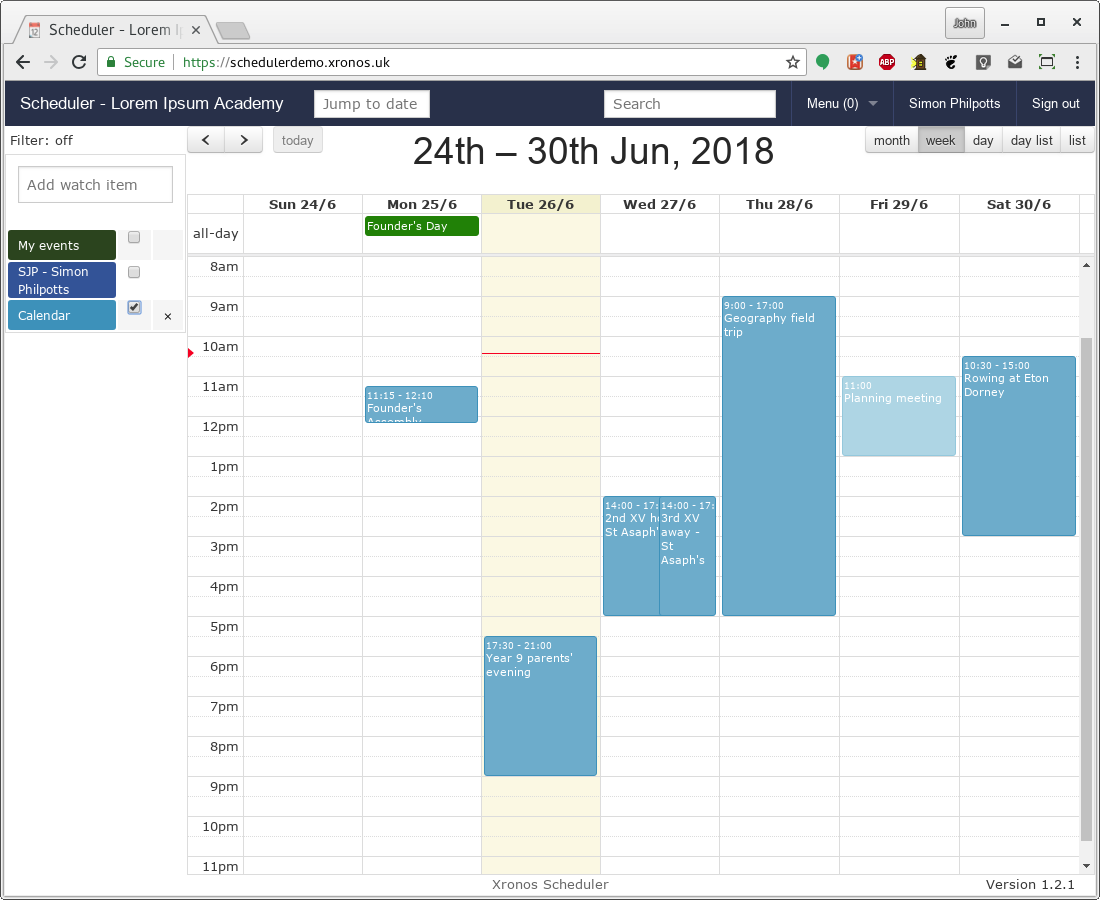
Notice that it’s there, but greyed out to indicate that it’s incomplete.
Editing
You can edit any event which you have created, plus your system administrator may give you permission to edit others. To edit an existing event, simply click on it and you’ll get shown additional information about the event. Provided you have the appropriate permissions there will also be an “Edit” link on the left hand side.
Adjusting
Remember that this event originally had no explicit end time? Now the bottom edge of the box can be dragged up and down to set a duration.
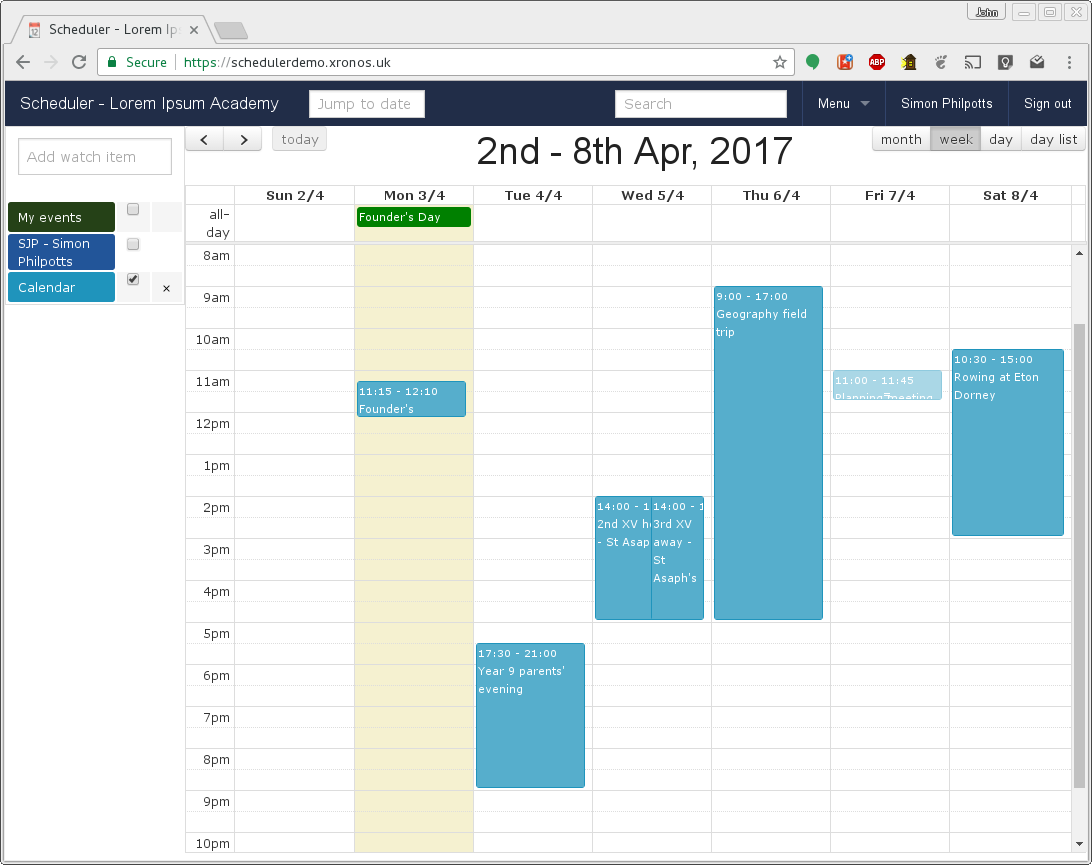
You can also drag the whole box to a different time, or a different day. To make it an all-day event, drag it up into the “all-day” section at the top of the day’s column.
Note
If you want to move an event from one day to another whilst retaining the same timing it can be helpful to do it from the “Month” view of the schedule. That way you can see more days, and now matter how you drag, the times of the event won’t change.
If you want to set up an event for a specific resource, you can short-cut the process by dragging the required resource from the left-hand column into the calendar at the required time. The same dialogue box will display, but then the indicated resource will be added to the event as soon as it is created.
Specifying requirements
The request above to place an event in the school’s Calendar is a simple yes/no request. The person responsible for deciding the contents of the public school calendar will decide whether or not this is a suitable event to go in it. Other requests though may need some ancillary information, and Scheduler provides facilities to gather this information too.
Perhaps, for instance, an event requires the services of the catering department. Adding “Catering” as a resource to the event produces an amber entry as before:
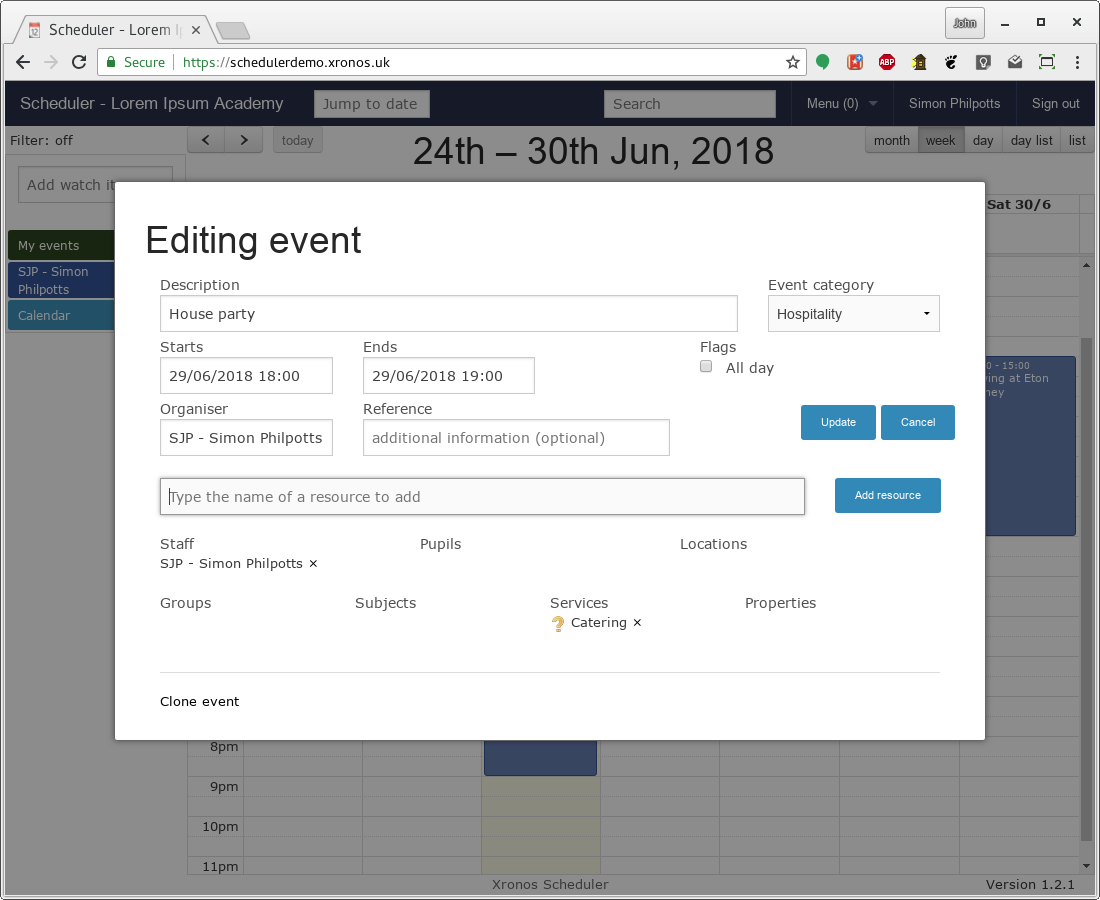
But in this instance, the catering department have configured Scheduler to gather more information from the requester. When the user finishes editing the event (clicks on “Update), the following screen is displayed.
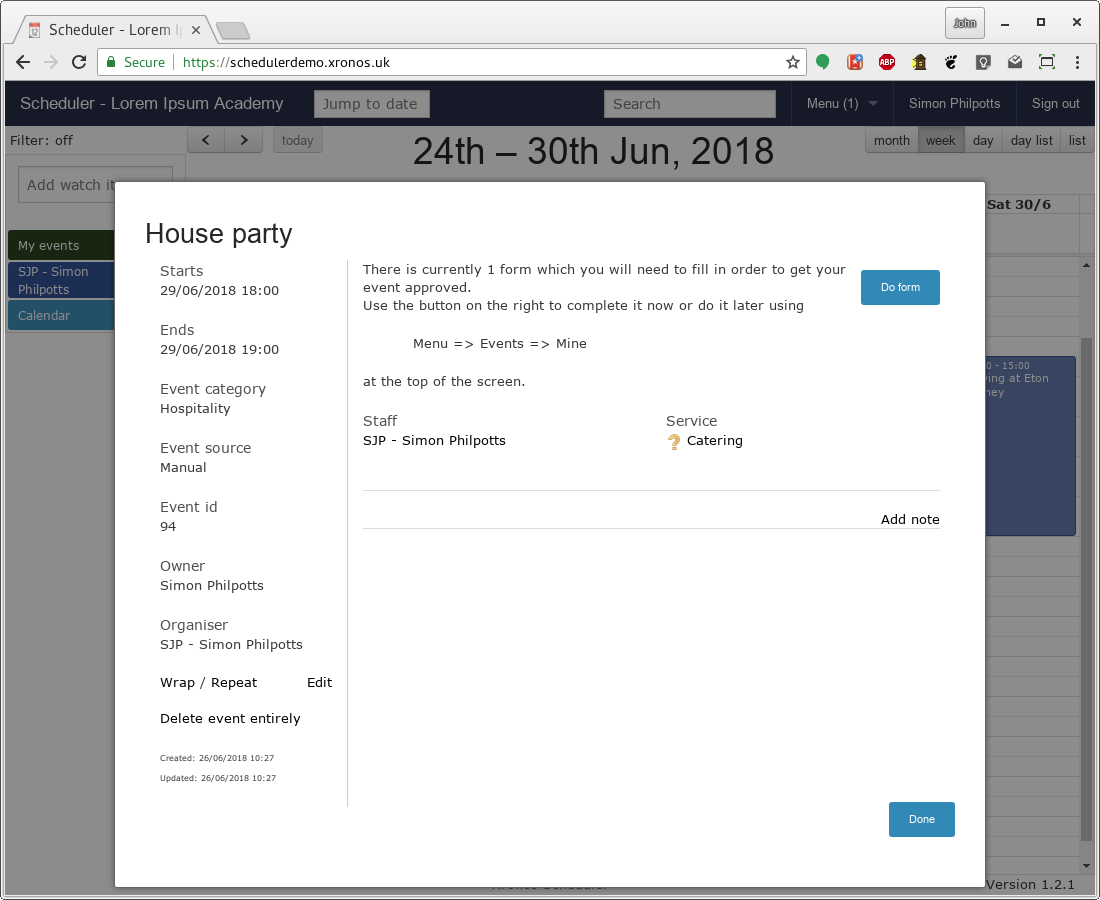
There is a form which the user needs to fill in to specify the exact catering requirements. You can either go to the form immediately from here using the “Do form” button, or you can do it later on from the menu in the main screen.
Note also that a “(1)” has appeared next to the main menu button in the top bar - this is to tell Simon Philpotts that there is one item (the form) awaiting his attention. Whenever you see this in the menu you can find the item by following the numbers down through the pop-down menu.
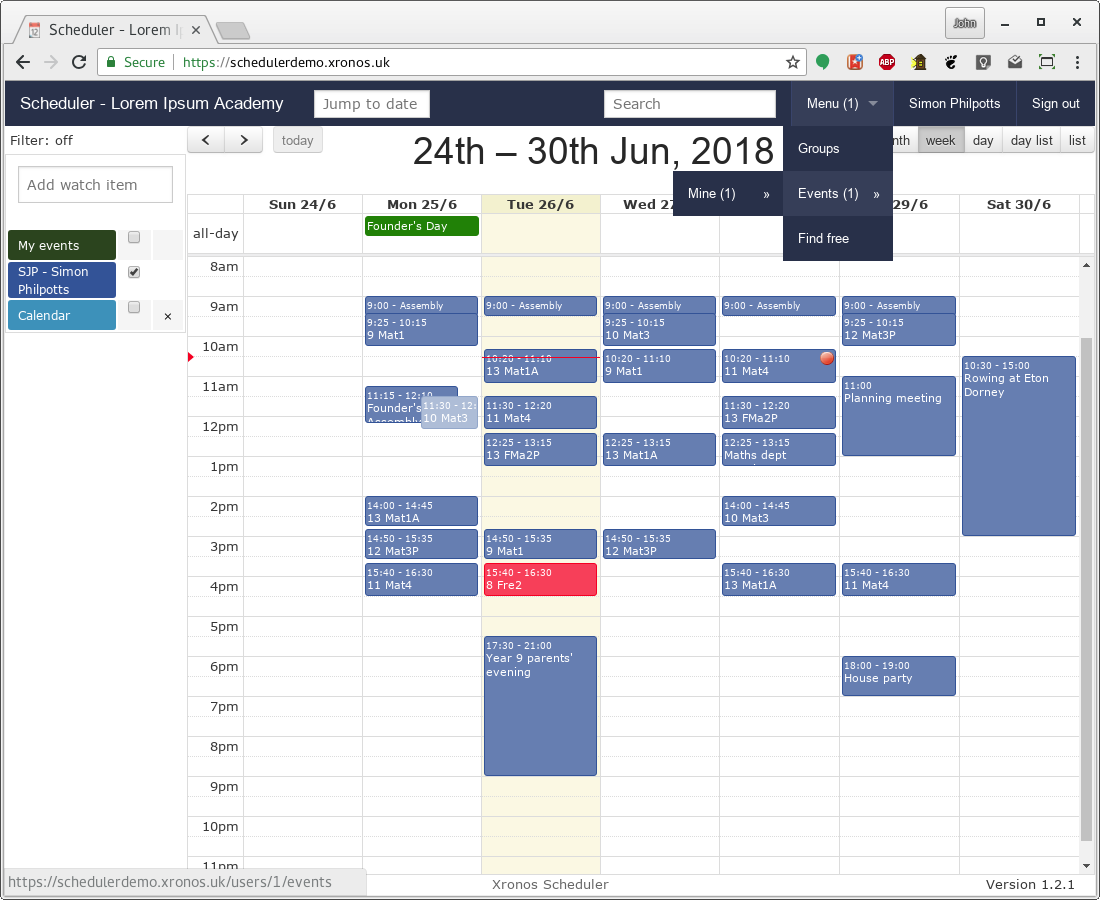
Here we can see that the item is under Menu => Events => Mine, and clicking on that menu item brings up the following screen.
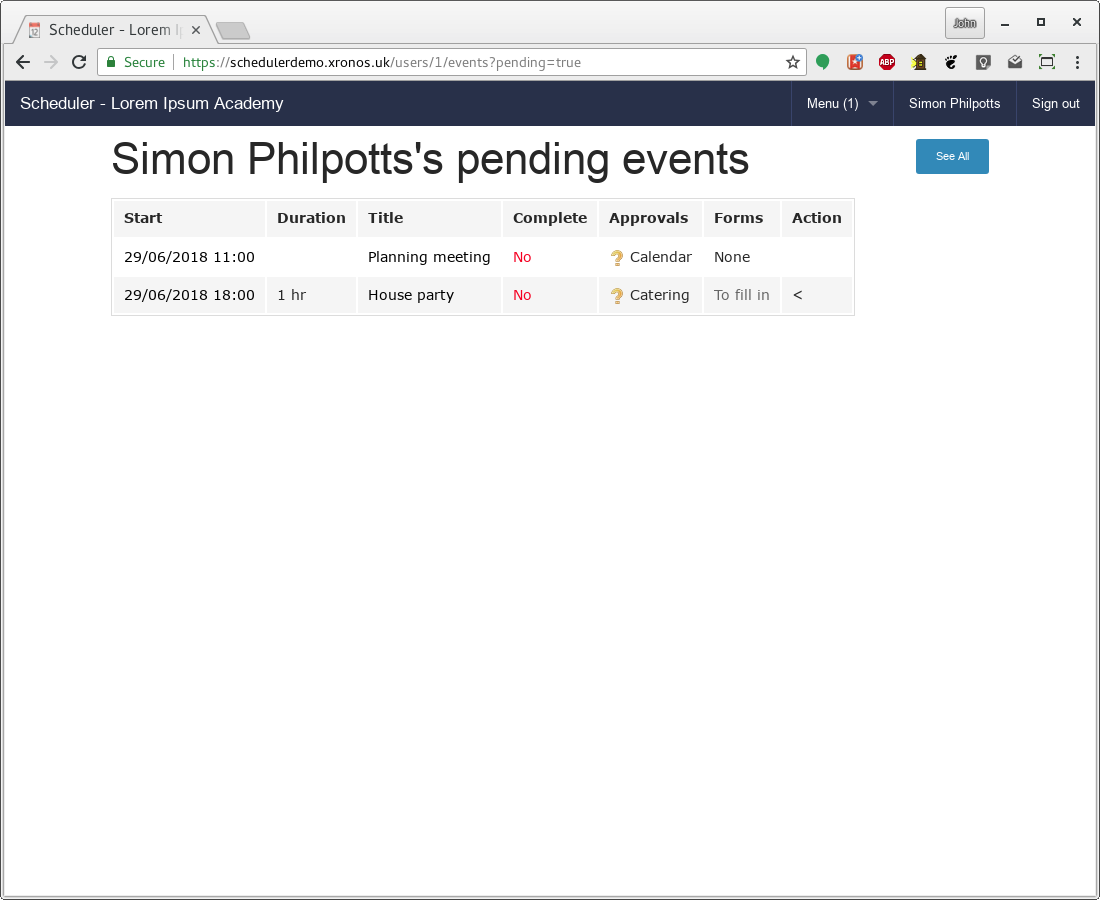
There are two events listed - the two which we’ve just entered. However, the number displayed was only 1 - this is because only one of these events is awaiting input from Simon Philpotts.
Note the little arrow in the “Action” column. This will appear against any event which requires action from the user. The forms column says there is a form to fill in, and clicking on the “To fill in” link will bring up the relevant form.
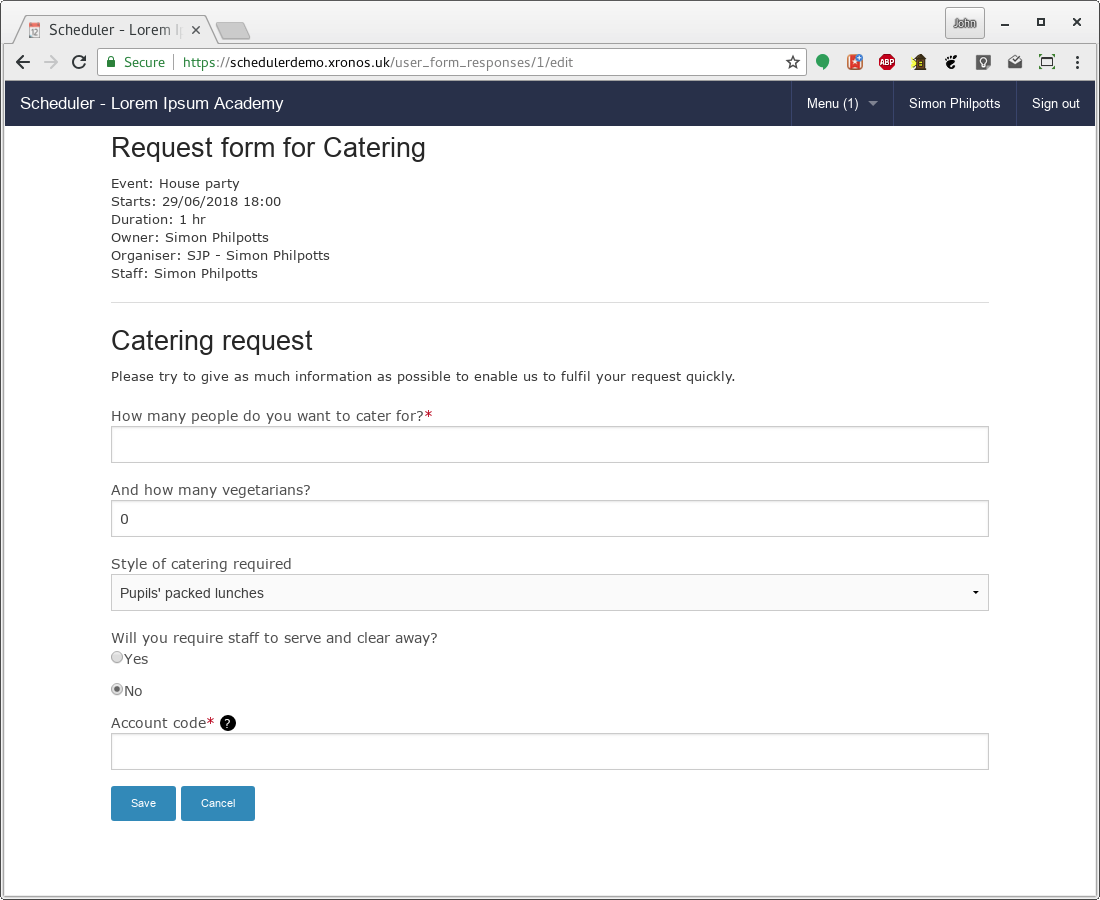
The exact design of each form is under the control of your system administrator and/or the controller of the resource - in this case the catering department. There are a wide range of possible field types and this example shows just a few.
Note that two fields have asterisks against them, indicating that they are compulsory fields. One is a pop down list to choose from, and one gives a yes/no choice.
Once you have filled in the form and saved it, you are returned to the event listing screen.
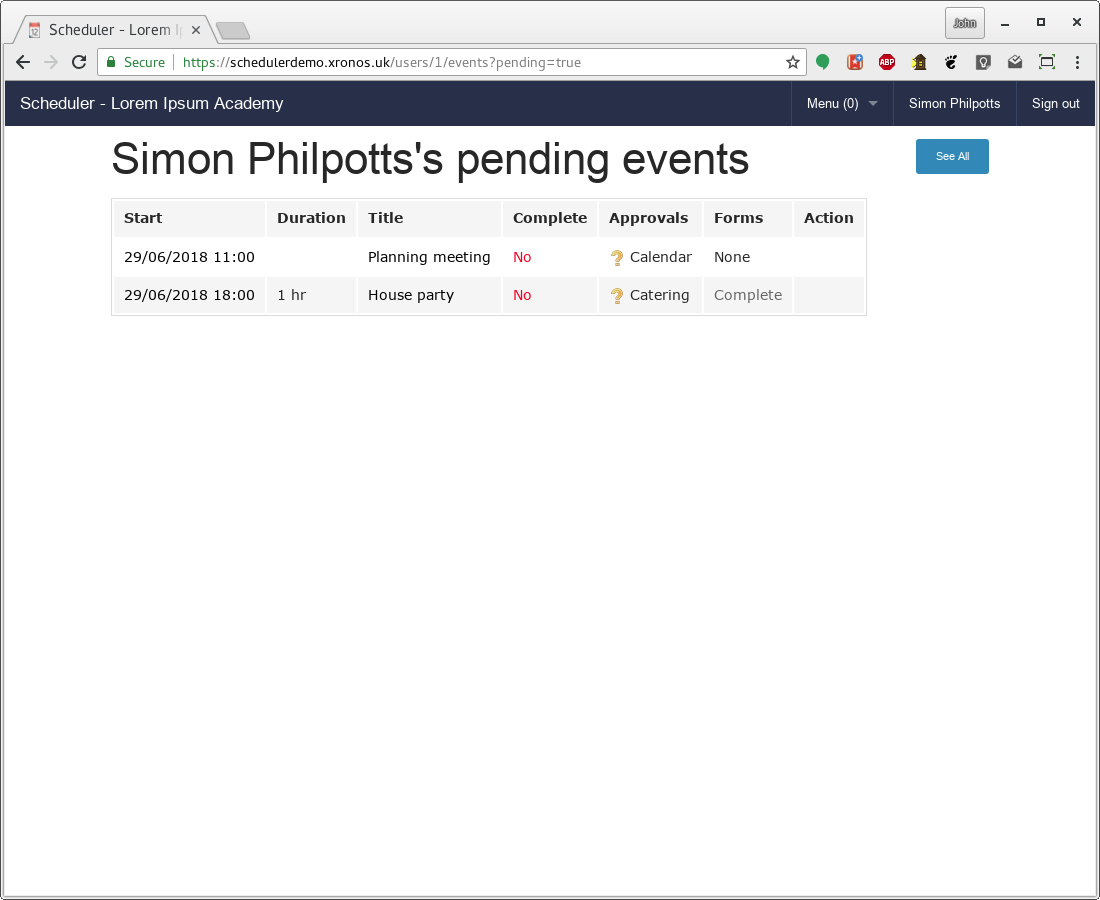
The form is now shown as being complete, and your count of outstanding actions has gone down to (0). The form and event have now been passed to the catering department for approval, and the requester will be notified when they have dealt with it.
There are three possible responses which you might get to a request like this:
Approved
Rejected
Noted / held
The first one is self-explanatory. The second one should come back with a reason, (e.g. “Sorry - we’re already fully-booked for that night.”) whilst the third one is generally an indication that more information is needed. For instance, you might have entered “80 to 120” as the number of people for whom you need catering. The catering department thus knows about your request - a good thing - but they need you to firm up the numbers in advance of the actual event. They thus pass it back to you with a “Noted” status, and it’s up to you to fill the rest in when you can.
Once a request has been approved, you can no longer change the contents of the corresponding form.
More than forms
It’s possible that the extra information needed is too sensitive to be stored in a relatively public system like Scheduler, or too complicated or it’s just necessary to display a message when a resource is requested, without requesting any input.
As an example, here’s what happens when the resource “Medical” is requested for an event in the demonstration system.
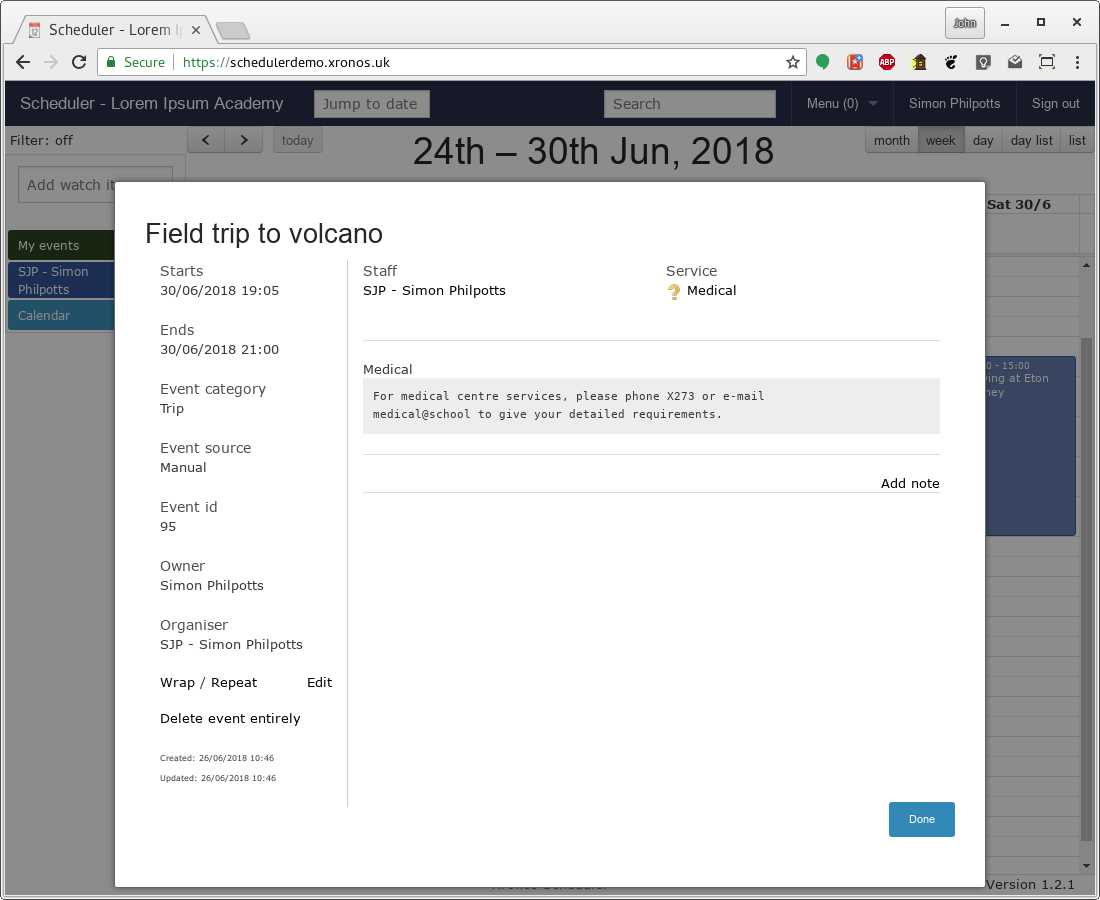
A note has been added automatically to the event for the requester to see, but there’s no way to edit it. It exists purely to prompt the requester to take some particular action. Typically the request will not be confirmed until the action has been done.
All of these prompts and fields can be customised by the users responsible for each individual resource, so it’s quite feasible to tweak the prompts as experience is gained in the use of the system.
You can try all this out for yourself by logging in to the Scheduler demonstration site and creating your own events. Don’t worry about making a mess - the whole database is reset each night.