Exam invigilation
Overview
Some School Management Information Systems are better than others at handling the entry and maintenance of exam invigilation slots. If your MIS has the facility to handle these then Scheduler will import and display them, but if not then you can do it directly with Scheduler.
Scheduler will assist you with setting up the framework of slots, scheduling when the actual exams are, and selecting the most suitable staff to use for each individual slot, taking into account suspended lessons and how many slots each staff member has already done.
Scheduler aims to help with the process of converting a general statement about when and where exams will be into a set of individual invigilation slots.
Note
Scheduler uses the following terms:
Exam Cycle - a set of exams like “3rd year summer 2019 exams”, or “January re-sits 2016”.
Exam Session - a continuous period of time when exams are in progress. Typically an Exam Cycle will have several (possibly many) Exam Sessions. Each Exam Session has a start and end time, and covers not just the actual duration of the exam(s), but also the setup and clear up times. An example might be “Wed 8th June, 08:45 - 12:30”.
Exam/Invigilation Slot - a period of time within an Exam Session which is allocated to one or more individuals to invigilate. The duration of your Slots will typically be driven by your school’s normal timetable.
In setting up an Exam Cycle in Scheduler it is assumed that someone has already decided when the exams will happen and what rooms they will use. We enter that information into Scheduler, and then along with what it already knows about your school day it can generate all the necessary Exam Slots. Given a list of the staff who may do invigilation, it will also assist you with allocating individual staff to each Slot.
Note
All the screen shots below are taken from the Scheduler demonstration system. You can work through all the stages yourself by logging in as CED from the pull-down login menu. Claire Dunwoody (CED) is designated as the exams officer on this system. You will see some differences in staff names because most of the staff are randomly generated each night, but the general flow remains the same.
It is assumed that you already know the basics of how to create events within Scheduler - if not then see the Scheduler User Guide.
General setup - done only once
The next three items need be done only once, then the same data will persist across all your Exam Cycles with only minimum changes.
Who can invigilate?
Assuming your normal teaching staff do invigilation (rather than extra people hired in specially) your first step is to set up a Scheduler Group listing those who are eligible to invigilate.
Scheduler’s normal facilities for combining and building on groups mean that you can base this group on an existing group - e.g. Teaching Staff - adding or removing people as needed.

In the above screen, a group has been created called “Invigilators (SJP)” and it has been specified as including all staff, except Peter Wodehouse who doesn’t do invigilation.
By basing the group on another group like this, you can make sure it updates dynamically as staff arrive or leave.
You are strongly advised not to use an existing system group directly in the exam cycle to provide your invigilators - you will almost certainly find later that you want to add or remove someone.
By creating your own group based on a system group as shown here, you gain much more flexibility.
Shape of the day
Your school will have its own idea of how long an invigilation slot should last and when they will be. Quite likely this will reflect your school’s normal timetable. You enter this information as an Exam Template. From the menu icon in the top bar, choose Menu => Invigilation => Template, and then click on the “New Rota template” button. Enter a name for it (e.g. “Internal examinations”) and click on “Create”.
You will then see a screen like this:
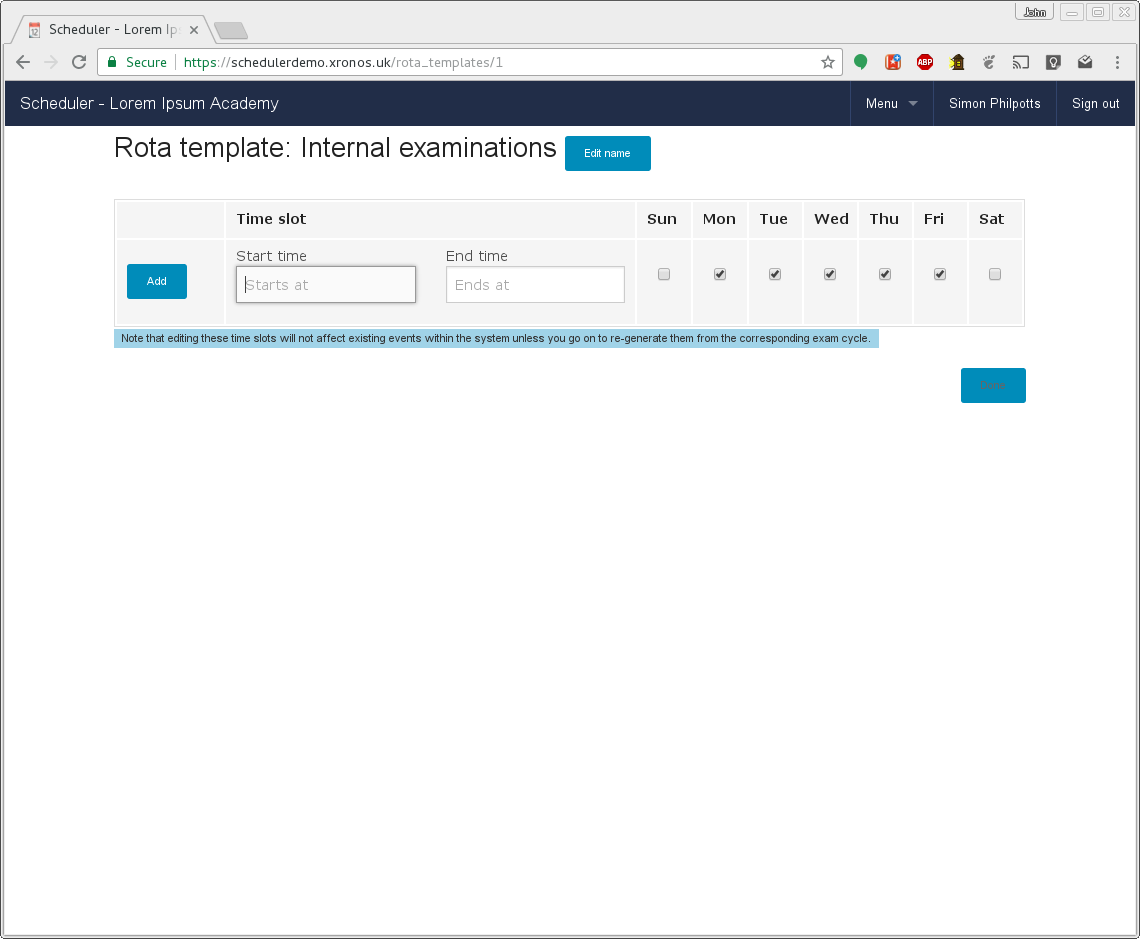
Enter start times and end times for each of your sessions, clicking Add after each one. Note that you can set up different time slots for different days of the week if you want to.

In the above screen, we don’t have any slots on Wednesday afternoons.
You can add or remove the slots until you have the correct configuration, then click on “Done”.
You may want to set up more than one template to reflect the different ways in which you organise different exam sessions. For instance, you might have different period times in your lower school from those in your upper school, in which case you’d probably want two different rota templates - one for each.
How many invigilators per room
Each Location record within Scheduler contains a field specifying the default number of invigilators for that room. This value defaults to 1, which is appropriate for normal classrooms.
It is probable however that your school has some bigger venues too which are used for public examinations and the like. By editing the Location records for these rooms you can change their defaults.
For instance, you might use your Sports Hall for public exams, and you might want to set the default number of invigilators there to 5 if it’s a big one.
You can always tweak this number later at the point of allocating the invigilators. If you happen to know there’s only a small number of candidates at a particular time, you can allocate two invigilators and then set the number for that particular slot in that room to two.
Setting up an Exam Cycle
Having done the general setup steps above, you are then ready to enter details of a particular Exam Cycle.
The timings of the Exam Sessions will be entered as normal events into Scheduler, with the required rooms attached to each Session. Scheduler needs some way of knowing that these particular events are the ones which define your sessions, and so each should also involve a particular Element of your choosing - referred to as a Selector Element.
The simplest way of doing this is to create a new Property within the system. It could be called “Year 11 exams”, or anything else which you choose. You can create a new one for each Exam Cycle, or re-use the same one for all of them.
Note
The only time when you absolutely need to have two separate Selector Elements is when you have two simultaneous Exam Sessions and you want to keep them distinct. Otherwise you could just have a single one called “Exam session”.
Suspend the lessons
If the Exam Cycle is replacing lessons for one or more year groups then the lessons for those year groups should be suspended on the relevant days. This frees up the staff who would be teaching those lessons to be first choice for invigilating the exams.
Information on how to suspend lessons will be found in the Scheduler Admin Guide.
Suspensions take effect at the next data import from your MIS, so make sure you put the suspensions in place at least a day before you want to start allocating staff to invigilation slots.
Entering the Exam Sessions
Exam Sessions are entered as normal Scheduler events. You can use any of the usual techniques of clicking and dragging, and having entered one you can clone or repeat it to enter others.
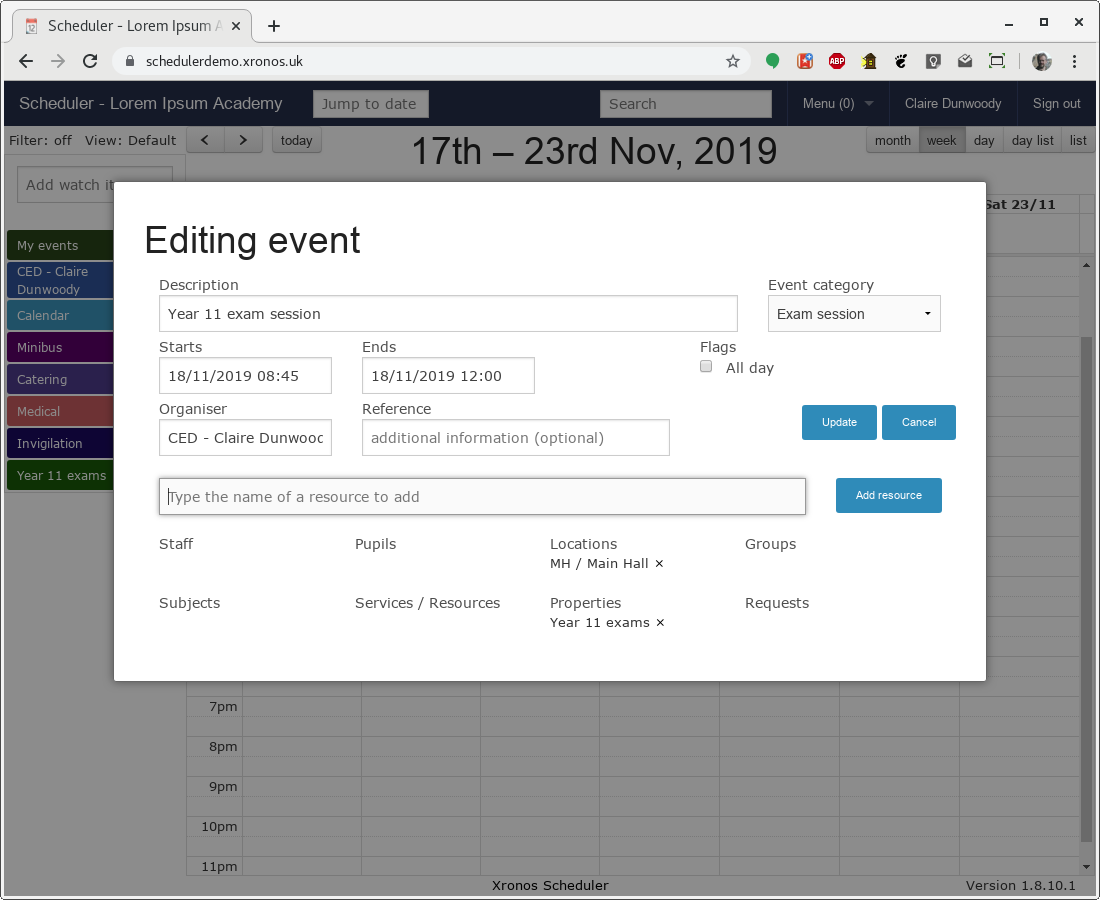
The following event represents an Exam Session from 08:45 (to allow setup time) to 12:00 on Mon 18th November. The room in use is the Main Hall and it has the “Year 11 exams” property attached so that the system knows it is to be considered as part of our Exam Cycle.
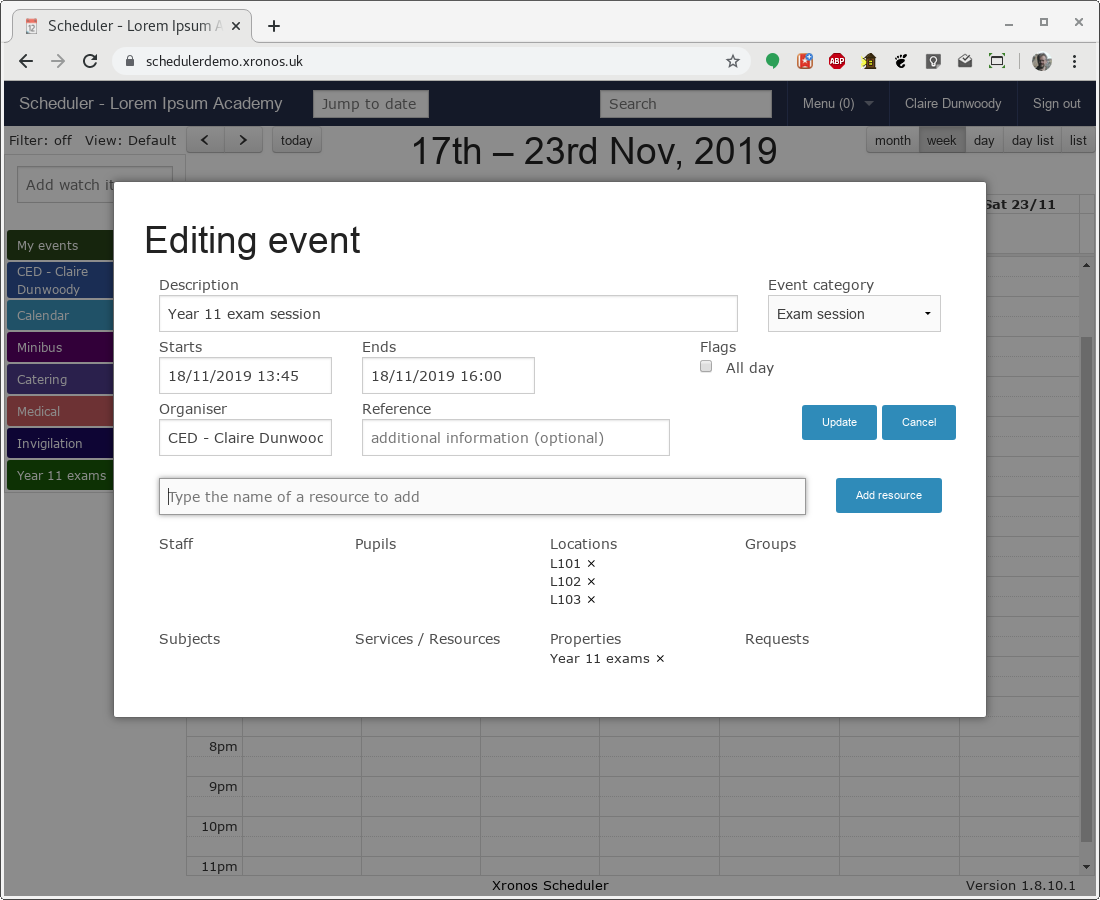
and then this second one is the corresponding Exam Session in the afternoon. Note that instead of using the Main Hall, this one is using three ordinary classrooms.
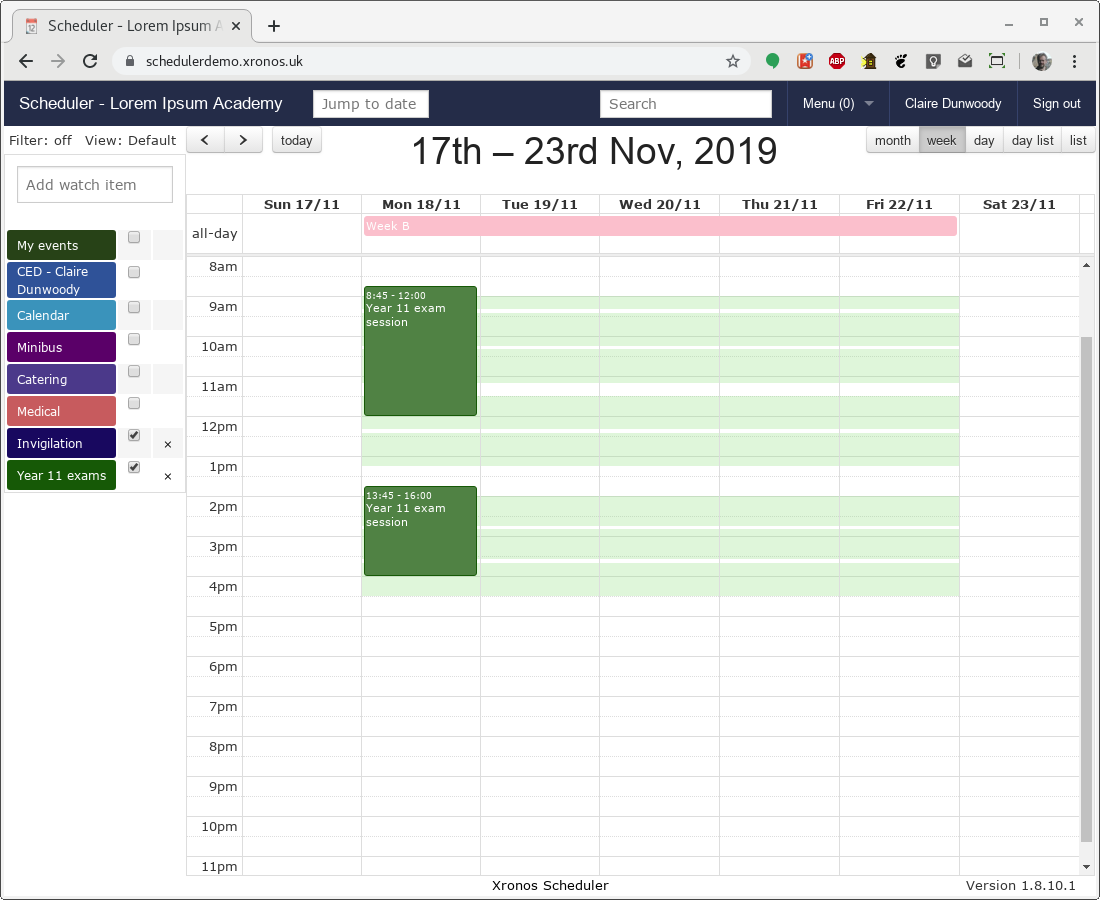
and the two together look like this:
Create an Exam Cycle
With all the building blocks now in place, you can create an Exam Cycle record which pulls them all together.
Choose Menu => Invigilation => Cycles, and then click on the “New Exam Cycle” button.
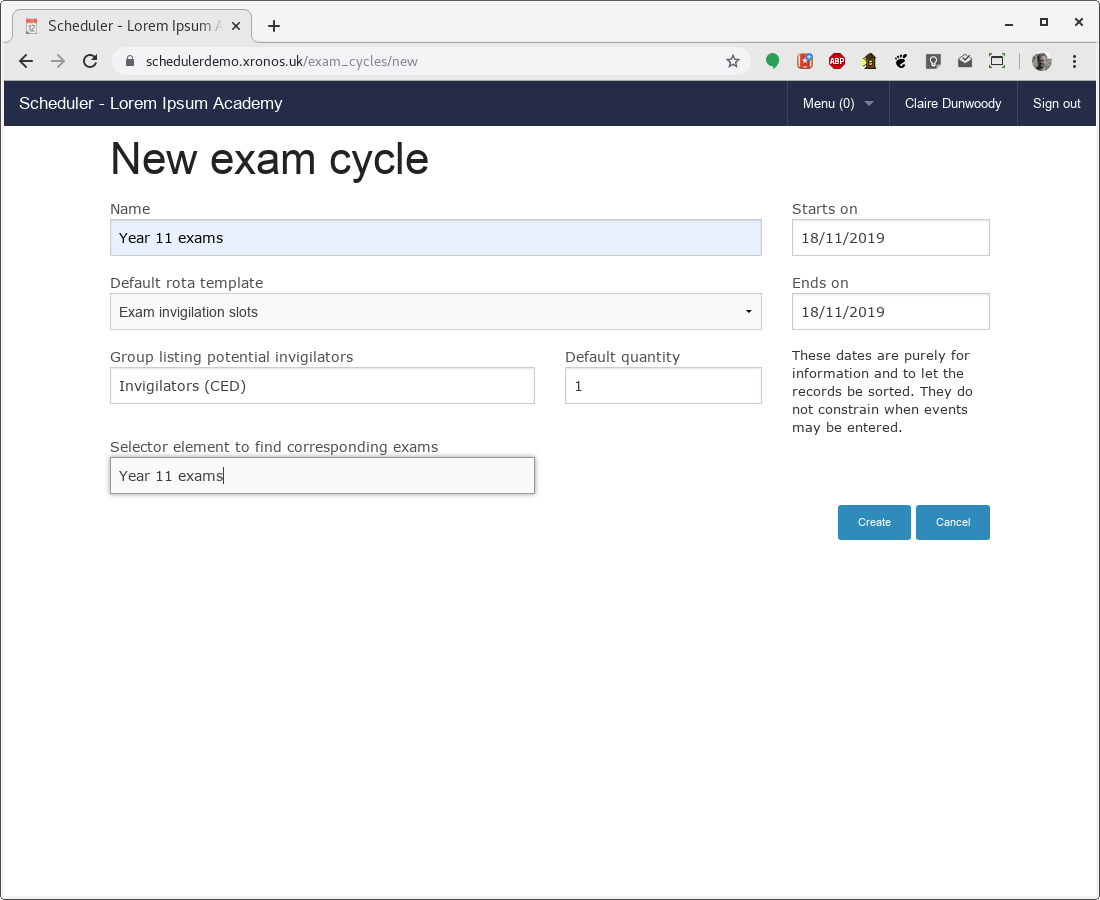
In the above screen shot, all the necessary fields have been filled in. The first field is a simple name for the cycle, then below it the template to be used. On the right we have the duration of the cycle (just 1 day for this demonstration) then the name of the group to be used to provide invigilators, and the default number to expect for each room, and finally the Selector Element which let’s Scheduler find the corresponding Exam Sessions which were entered a moment ago.
Clicking the “Create” button will the cause the exam cycle to be created.
Build the invigilation slots
The system now has all the information which it needs in order to calculate your invigilation slots. Back in the listing of Exam Cycles click on the right-hand “Edit” link against your newly created Exam Cycle and you will see a screen like this.
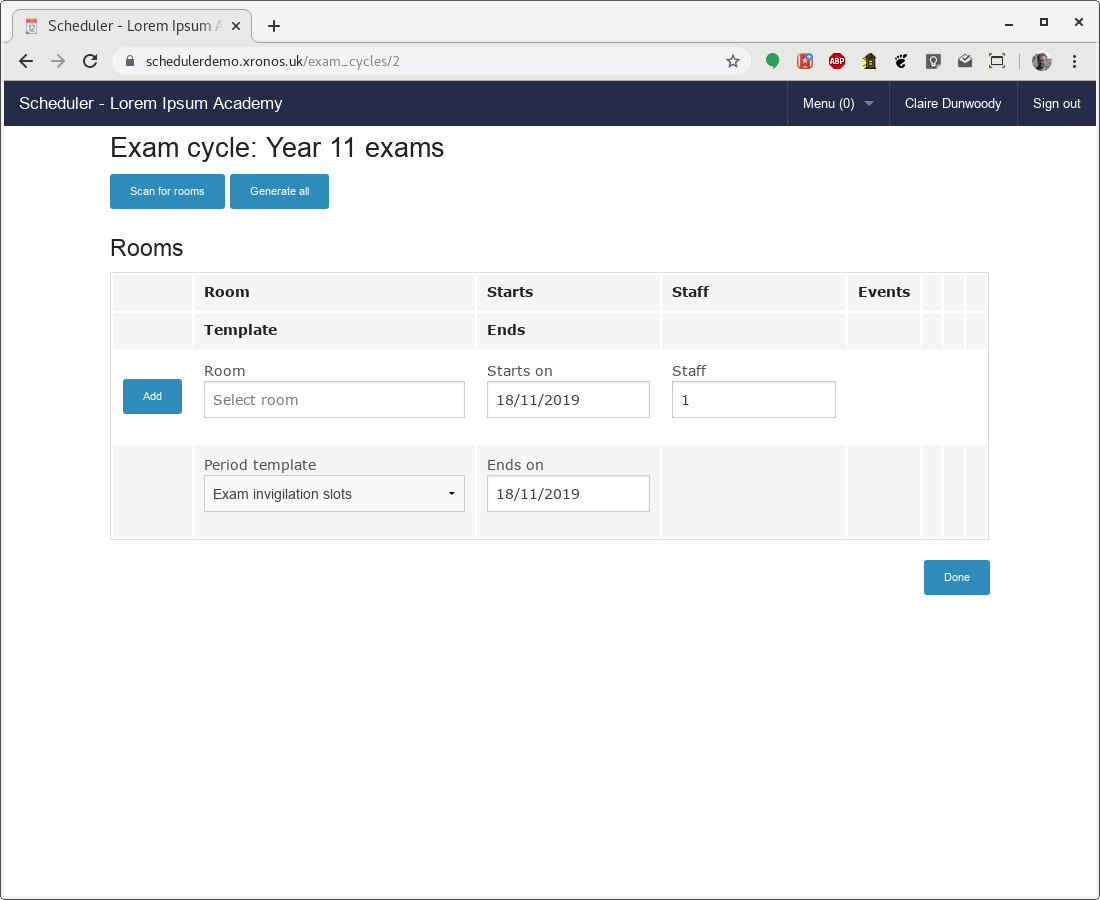
Here you could create individual records for each of the rooms to be used, but note the two buttons at the top, just under the title. They can do almost all the work for you.
Click the “Scan for Rooms” button and your display will change to this.
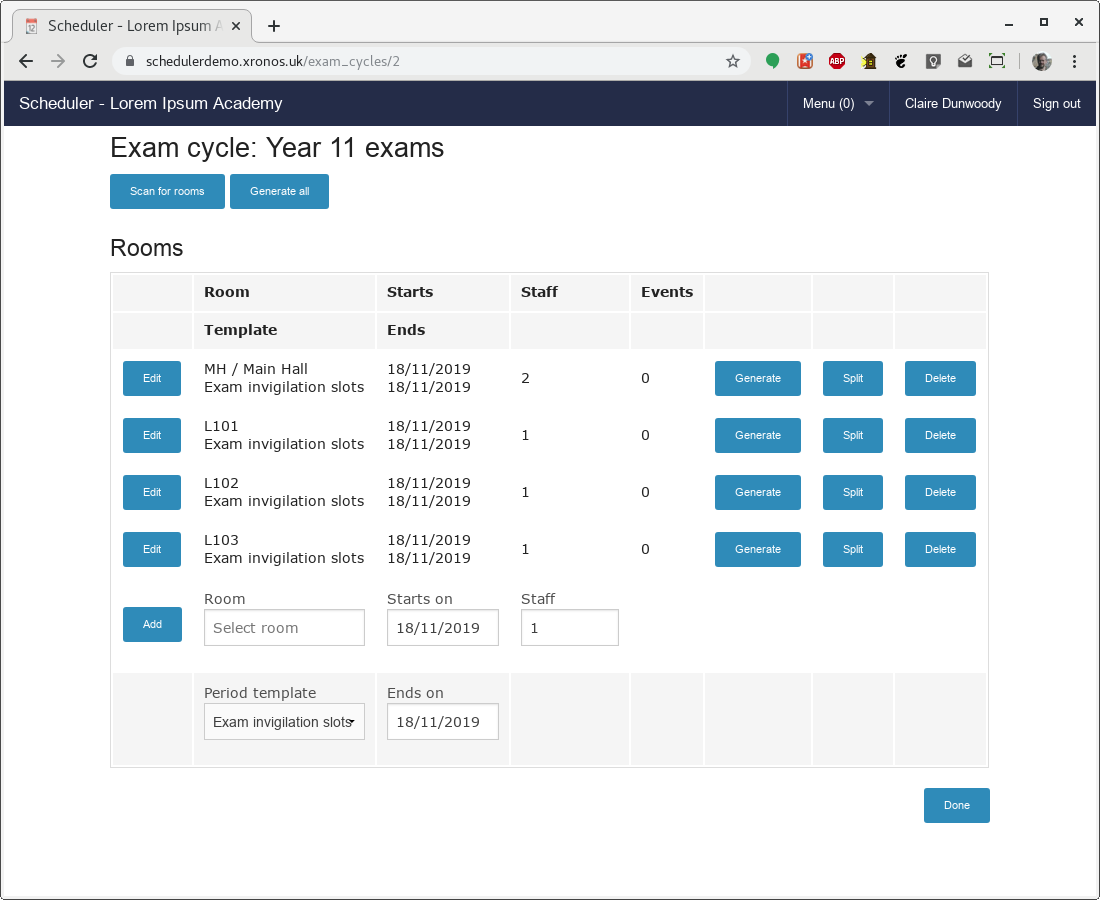
Scheduler has used the Selector Element to find all relevant events (the Exam Sessions) within the dates of the Exam Cycle, picked out all the rooms used by those events, and assembled them in a single list. These are the rooms which will require invigilators.
Then click the “Generate all” button and the display changes to this.
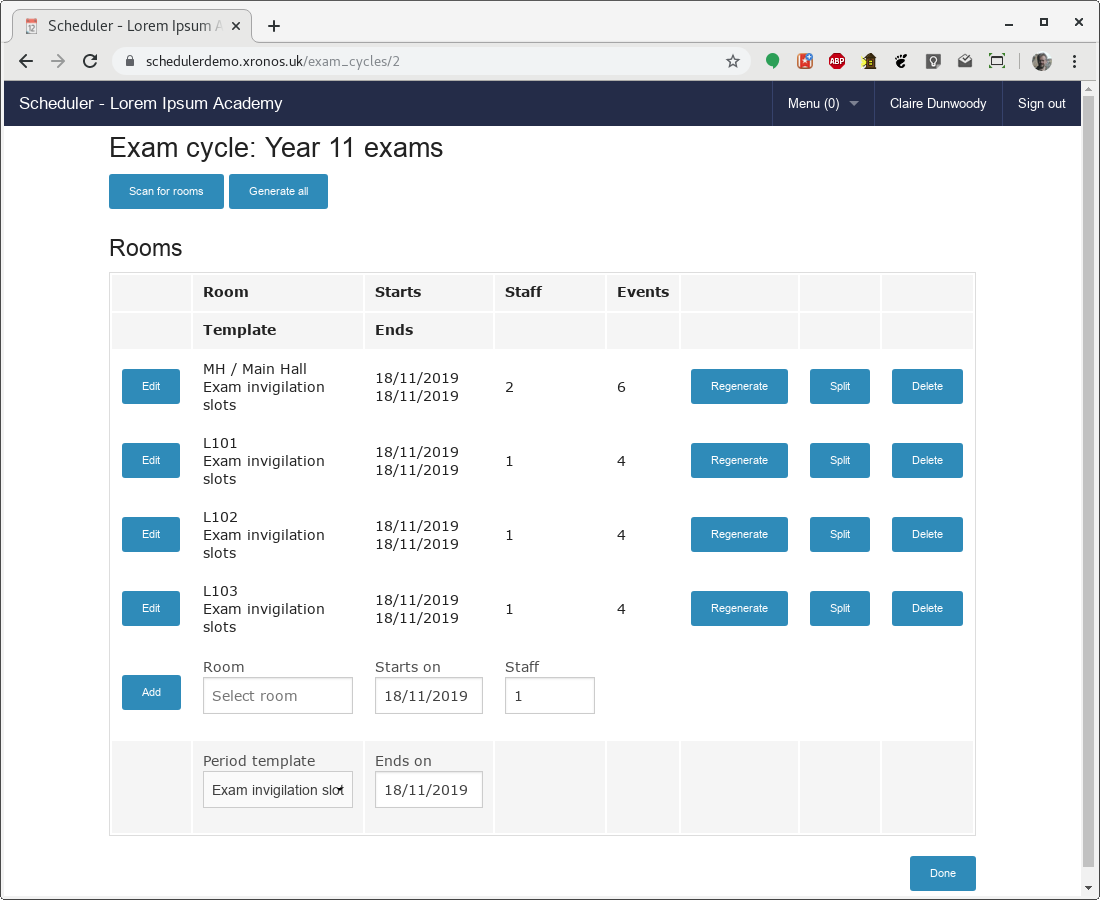
For each of the rooms previously identified, Scheduler has looked at when it is needed (from the Exam Session records) and at your defined invigilation times (from the Invigilation Template) and thus created all the Invigilation Slots which are needed.
You can see them more graphically by switching back to the usual schedule display and looking at the “Invigilation” item.
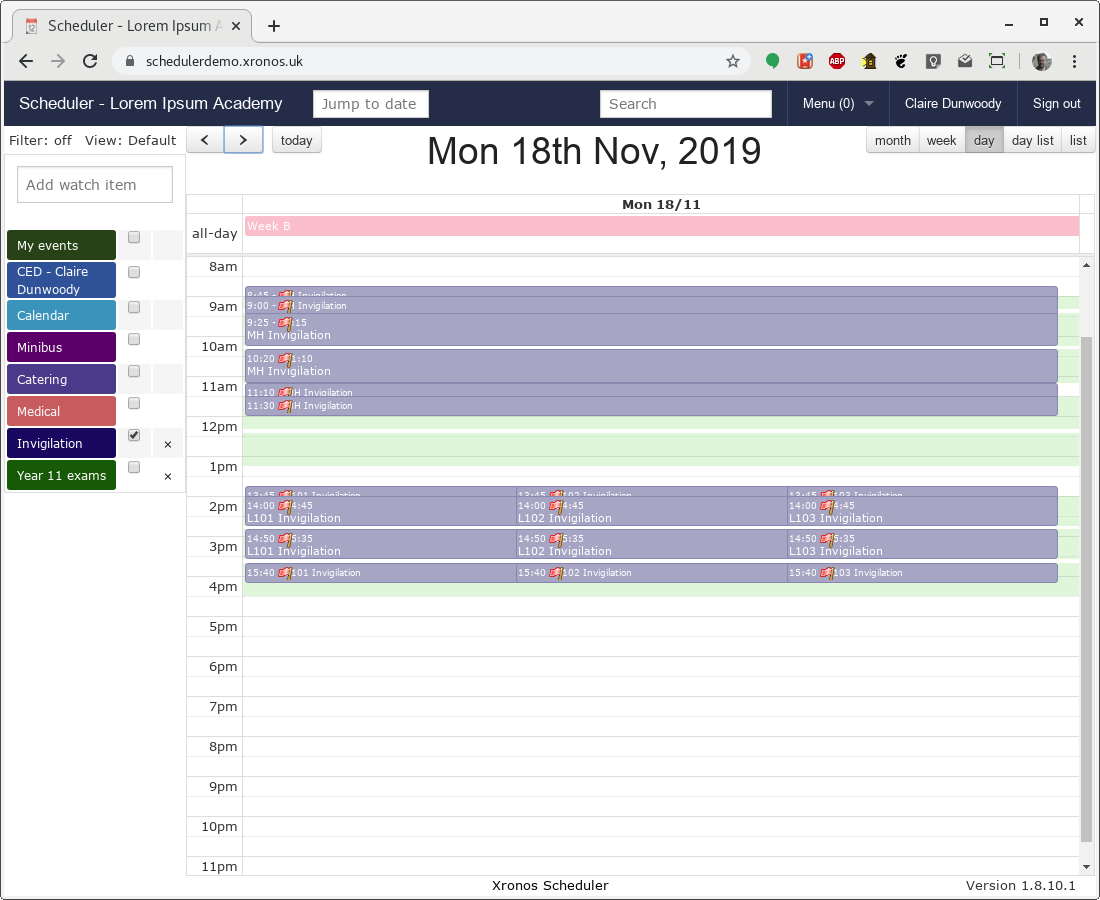
Here the display has been switched to a day view for clarity. There are 6 sequential slots in the Main Hall in the morning, then parallel slots in each of the 3 classrooms in the afternoon. Each has a red flag to indicate that the necessary staff have not yet been allocated. These flags are visible only to nominated exams officers - they don’t appear to normal users.
Staff allocation
By clicking on one of these events, you can start allocating invigilators.
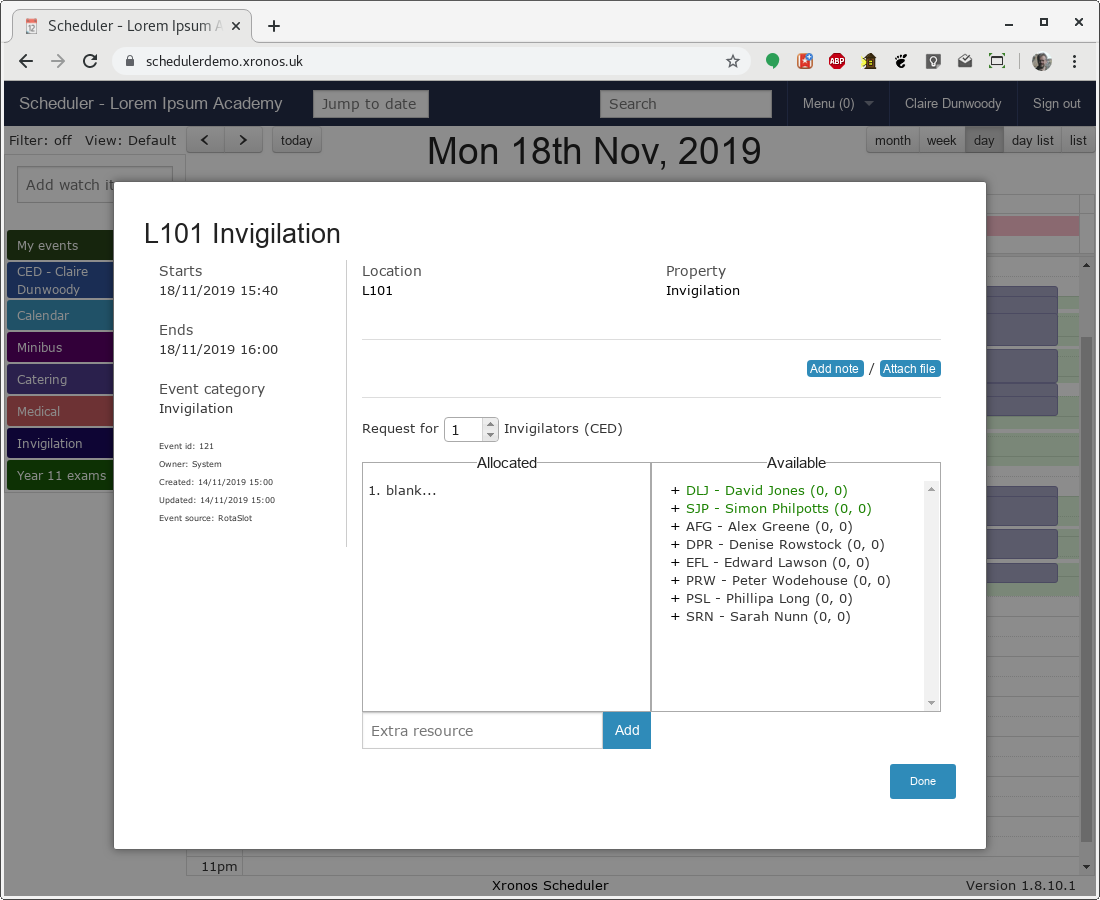
This slot wants 1 invigilator and none has so far been allocated. The box on the right lists free staff (those not currently teaching) and they have been sorted in order of suitability.
The names in green are staff members who would otherwise have been teaching at the time, and thus are first choice to do the invigilation. The rest of the staff listed are those who are free, and the numbers after their names show how many invigilations they have already been scheduled for - the first number is for the current day, and the second for the current week. Currently no-one has any invigilations so they’re all 0.
To choose someone, simply click on the + next to the name and they will move over into the “Allocated” box.
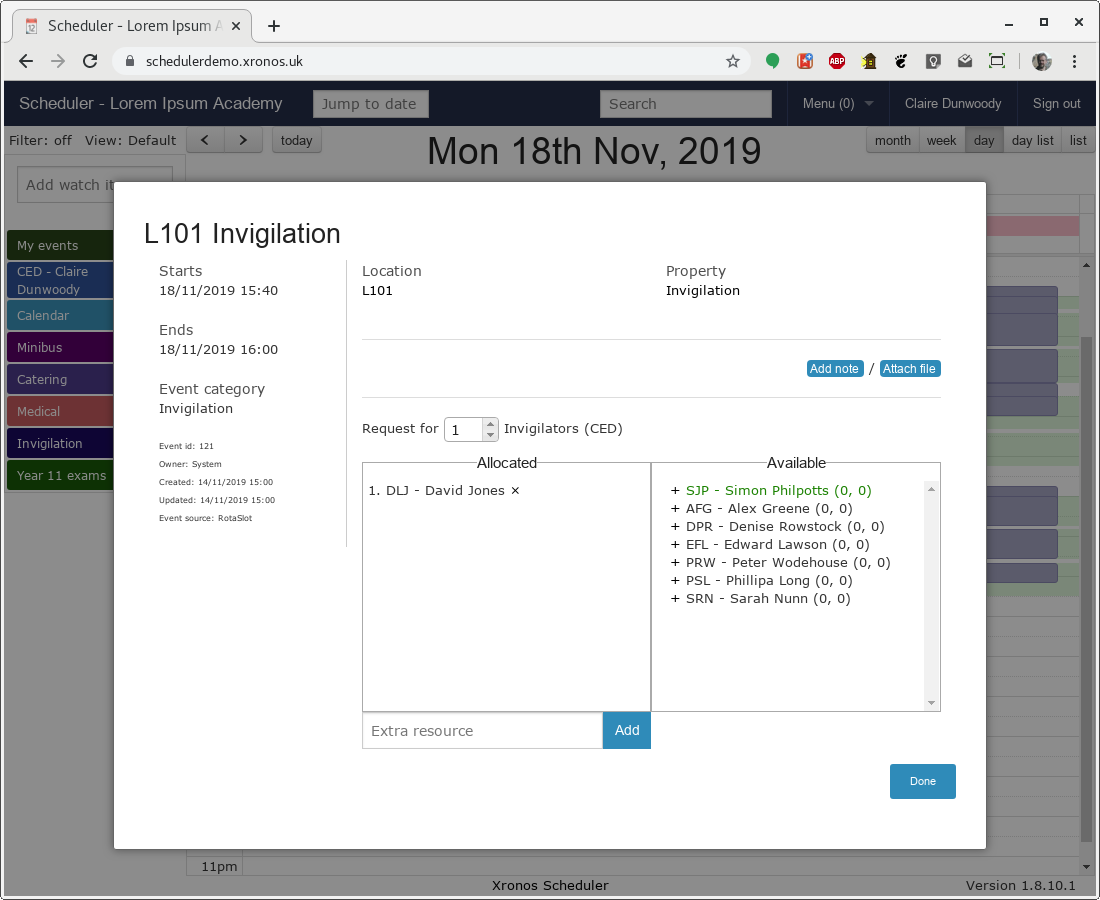
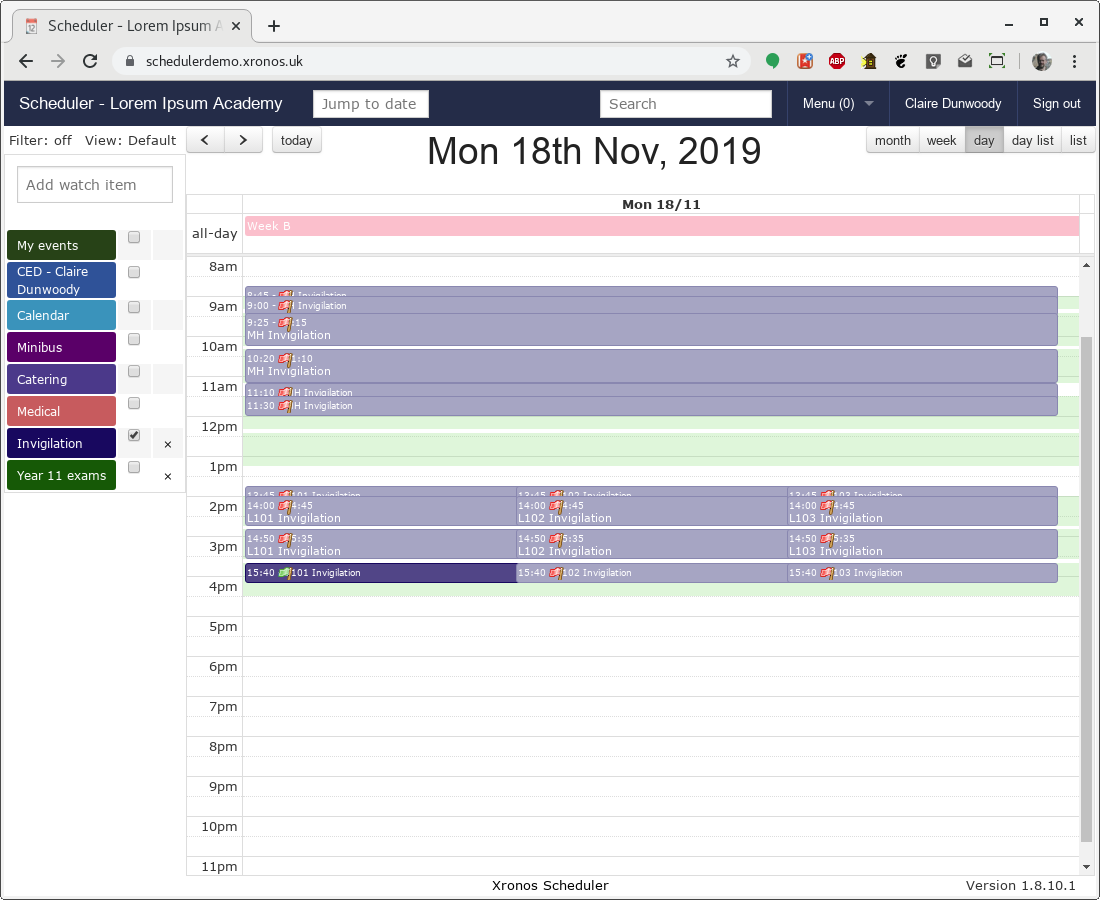
Click on “Done” and the dialogue will close. You then see that the flag on that particular slot has changed to green indicating it is complete.
Once a few slots have been filled, the staff listing gets more interesting.
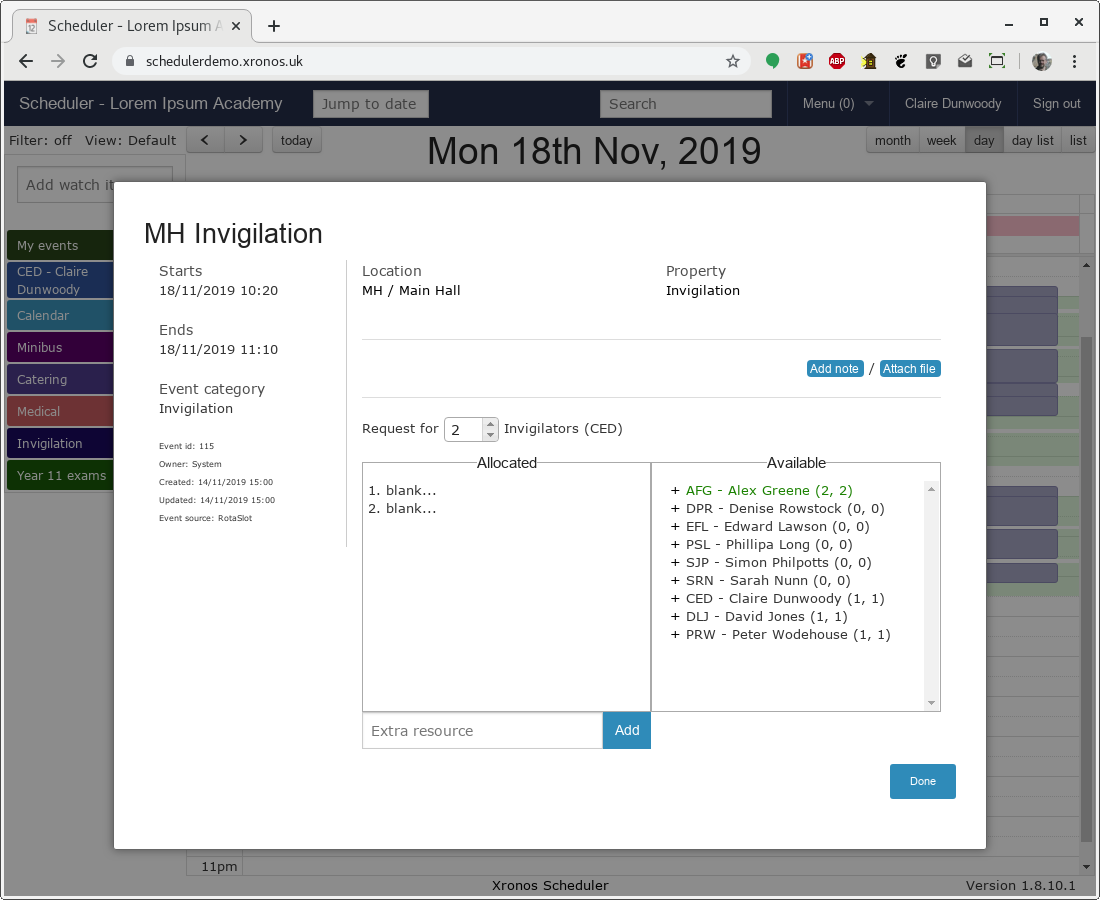
In this listing, we can see that Alex Greene might be the first choice because he would otherwise have been teaching year 11, but he’s already been given 2 invigilation slots today. Denise Rowstock has done none, so she might be preferable. (This demonstration school has an unfeasibly small number of staff, which is why they are getting so many slots each.)
Note
It can happen that you want to allocate someone to an invigilation slot even though the relevant individual isn’t actually free at the time. For example, it might be a requirement to have the head of maths present at the start of a maths exam.
The “Extra resource” box at the bottom of the list of allocated staff allows you to override the system’s advice and add any member of staff as an invigilator for the current slot.
The final decision is as always best done by someone who knows the school, but the program can help a lot in providing sorted lists.
Hint
If you are going to allocate specific people to certain invigilation slots (.e.g the head of maths to start a maths exam) then do these allocations first, before you do the general just-need-four-people-who-are-free ones. That way they can be taken into account when calculating the loading for the later allocations.
Notification
Once the invigilation slots have been allocated they will appear immediately on the schedules of the individual members of staff.
They can also be printed out using the usual event reporting facilites, and individual e-mail notifications can be sent.
To send out e-mails, choose Menu => Invigilation => E-mails and you’ll get a form like this.
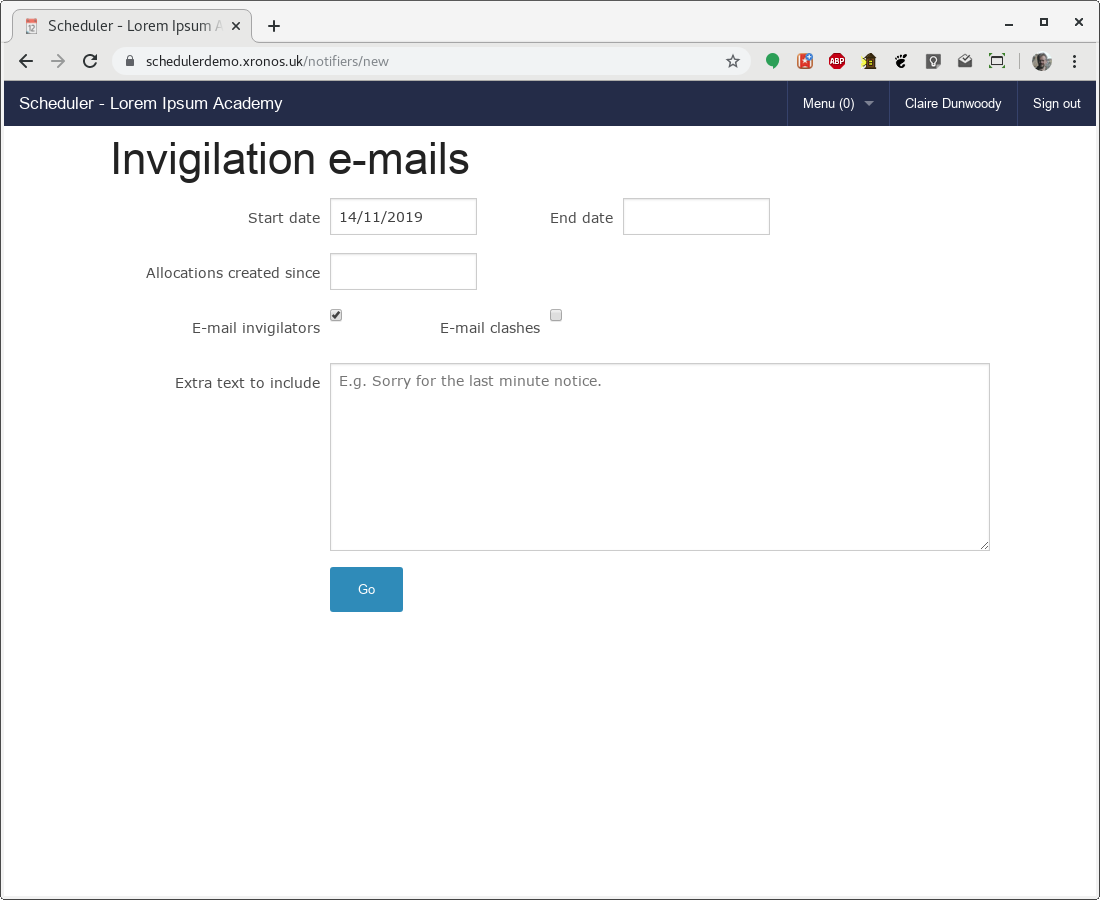
The start and end date indicate the period for which you want to send out notifications, and the next field allows you to send out notifications only for invigilation slots added after a specified date - useful if you’ve been amending the allocations and want to notify just the amendments.
Finally, you can add a bit of free-format text if there’s any extra message you want to put in.
Click on the “Go” button and you should see a screen much like this:
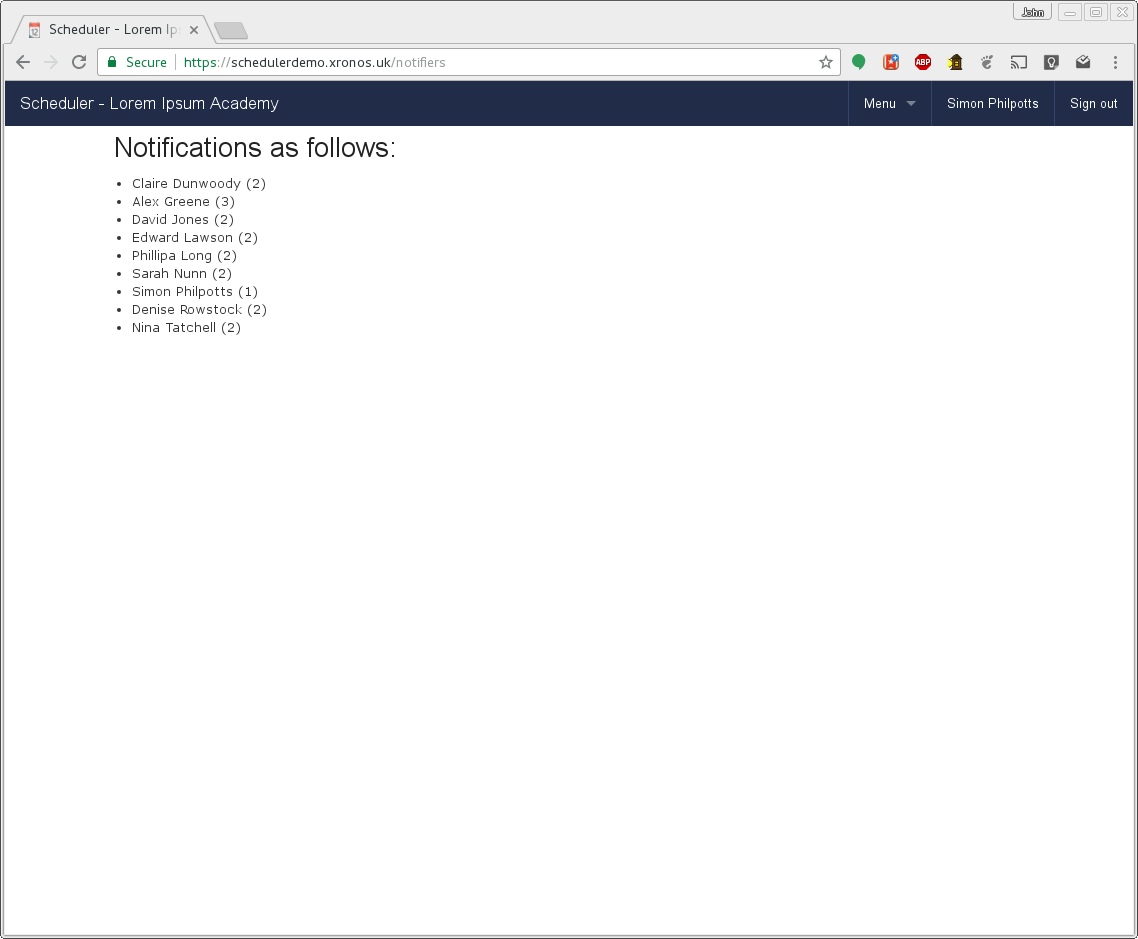
Your users will have been sent individual e-mails asking them to cover their particular invigilation slots.
Clashes
You can also check for clashes affecting your invigilation allocations. These can arise for two reasons:
You’ve overridden the system’s list of free staff to cover a slot
Fresh events have been entered into the system after the staff were chosen.
To check for clashes, use Menu => Invigilation => Clashes and after a short delay you’ll get a list any potential clashes on your screen.