Ad Hoc Lessons
Purpose
Scheduler uses the term “Ad Hoc Lessons” to refer to lessons where pupils are taken out of their normal timetabled lesson for some kind of extra tuition. Typically this will be an instrumental music lesson, learning support or something similar.
It is generally desirable to rotate these kinds of lessons so pupils don’t miss the same subject more often than is necessary. If, for instance, an instrumental music lesson makes a pupil miss a maths lesson one week, then the same pupil should not miss another maths lesson the following week.
The person responsible for scheduling these Ad Hoc lessons therefore needs access to all the pupils’ individual timetables, plus a record of what lessons they have already missed. Scheduler aims to assist with this by providing all the relevant information in one place.
Once a suitable schedule for the term (or half term, or whatever period you choose) has been devised it can be published automatically to both pupils and relevant teachers.
Pre-configuration
Initial configuration of an Ad Hoc category will be done by your system administrator who will also appoint one or more controllers for the category. This guide assumes you have been appointed as a controller of an Ad Hoc category for the scheduling of peripatetic music lessons.
You can change most things about the category but a couple of them will require intervention by your system administrator because they are global items within the system.
The overall day shape - what hours there are in the morning and afternoon - is set by your administrator. You can then define more specific availabilities for each of your music teachers.
The list of subjects potentially available - e.g. Viola, Violin, Mandolin - is again set by the system administrator.
If you are the system administrator and want to set up an Ad Hoc category, then see the Scheduler Admin Guide
Once the system administrator has created the Ad Hoc category, you will find you can access it through Menu => Ad Hoc t/ts => Music Lessons.
You can work through all of the following on the Scheduler Demo System by logging in as Simon Philpotts (SJP).
Overview
In order to use the Ad Hoc lessons facility, you will need to think about a number of things to set up. Most of this needs to be done only once - the first time you use it - and then can be carried forward into subsequent uses.
Cycles - a cycle is a period of time in which you schedule lessons. It will be whatever unit you usually use - typically a term or half a term.
Subjects - the subjects being taught in your Ad Hoc lessons.
Staff - the people doing the teaching. These will generally have been imported automatically from your MIS.
Pupils - pupils are entered linked to a subject and a member of staff, creating a requirement for a lesson.
Allocations - for each cycle you can create one or more allocations. These are attempts to schedule the required lessons satisfactorily. You can have more than one because you might want to try different allocations until you find one you like.
Implementation - once you are happy with an allocation, you can implement it. This has the effect of publishing the lessons you have scheduled and injecting them into the schedules of both staff and pupils. If you later decide to implement a different allocation, all the lessons created by the first one will be removed and the new ones will be put in their place.
Note
If you have implemented an Allocation and later decide you want to remove all the lessons again, simply create a new blank Allocation for the same Cycle and implement that one. Doing that will delete all the lessons from the first Allocation (from the published schedule - not from the Allocation itself) and not create any replacement ones.
Cycles
A cycle is whatever period of time you want to do your scheduling over, typically a half term or a whole term.
The first cycle which you set up is the most laborious because you need to enter all the subjects, staff and pupils for it. For subsequent cycles you can choose to copy over information from a previous one.
Thus, having set up a cycle for the first half of a term, you would probably want to copy over everything - subjects, staff and pupils - into the cycle for the second half of term, making any required changes manually afterwards.
On the other hand, at the start of a new academic year, you would probably copy over just subjects and staff, and enter all the new pupils afresh.
Assuming your system administrator has set you up as a controller for your Ad Hoc category, you should find you have an extra menu item like this:
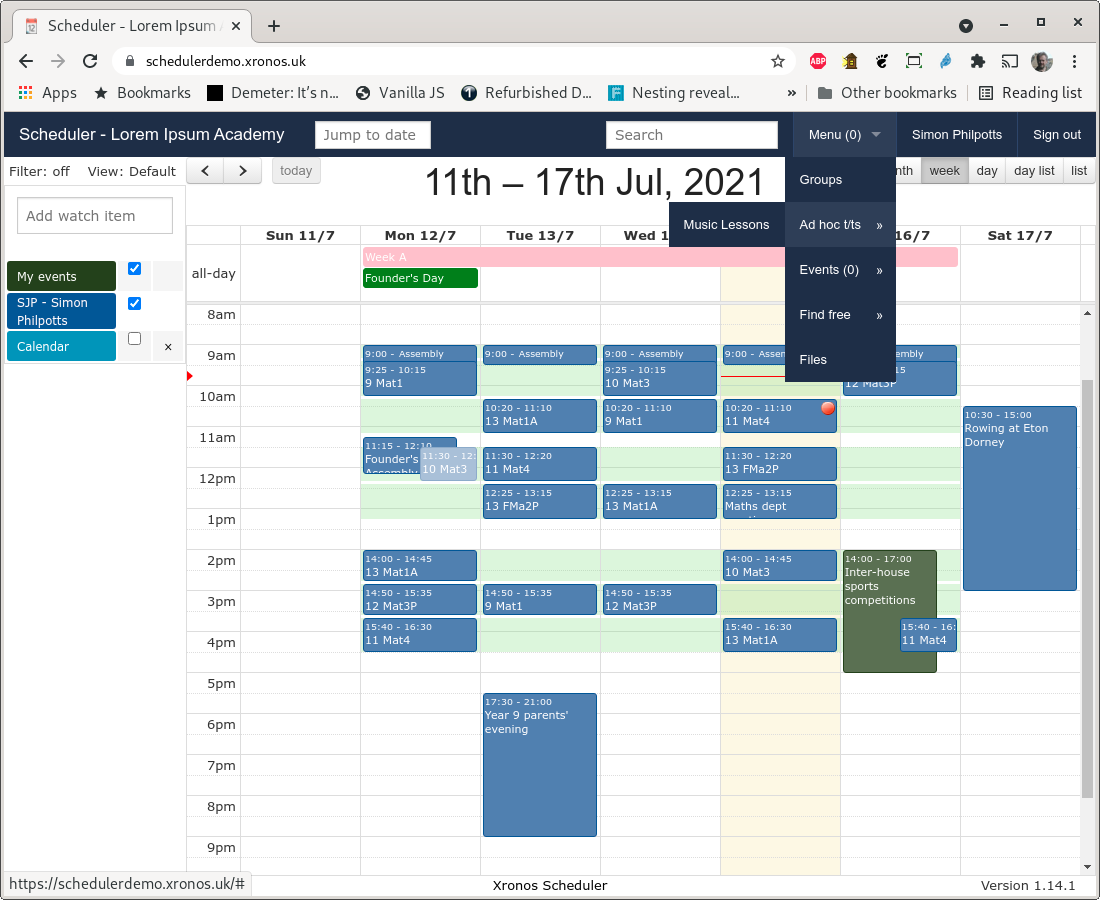
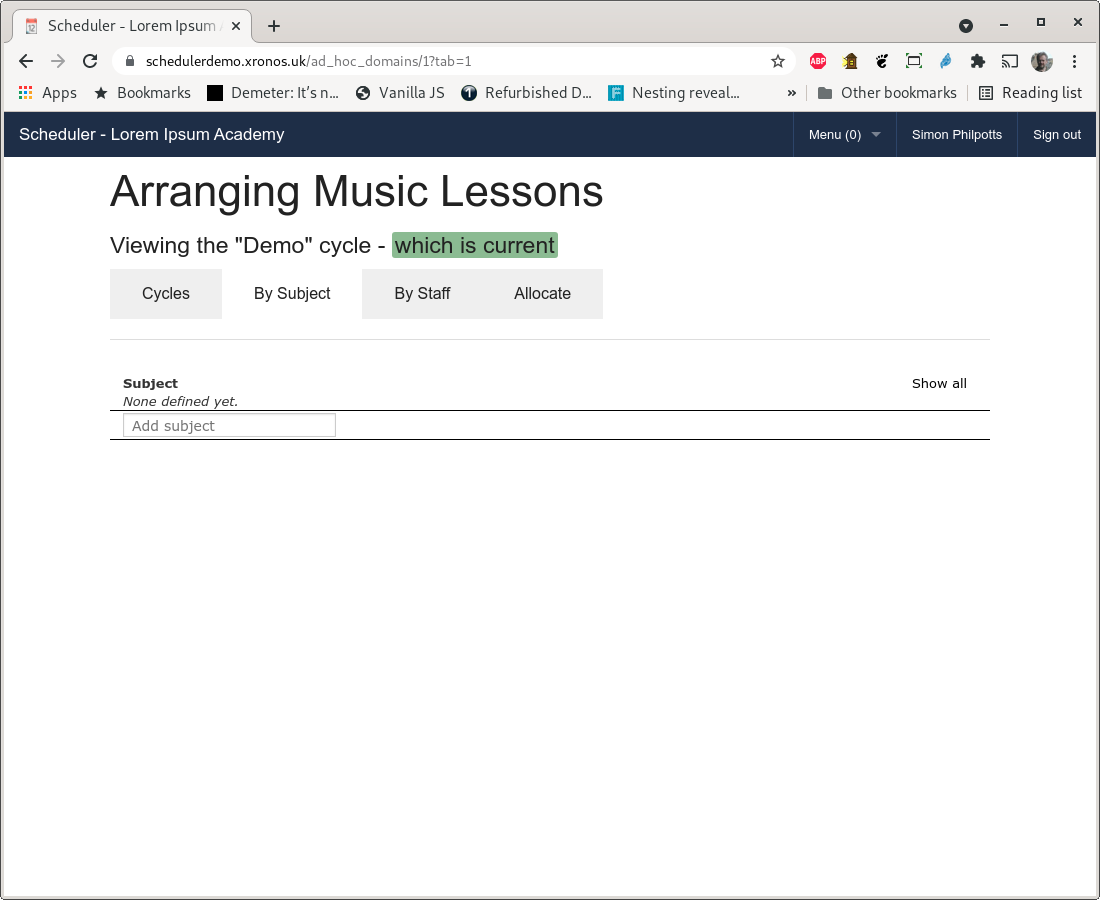
Click on the “Music Lessons” menu item and you will see a screen like this.
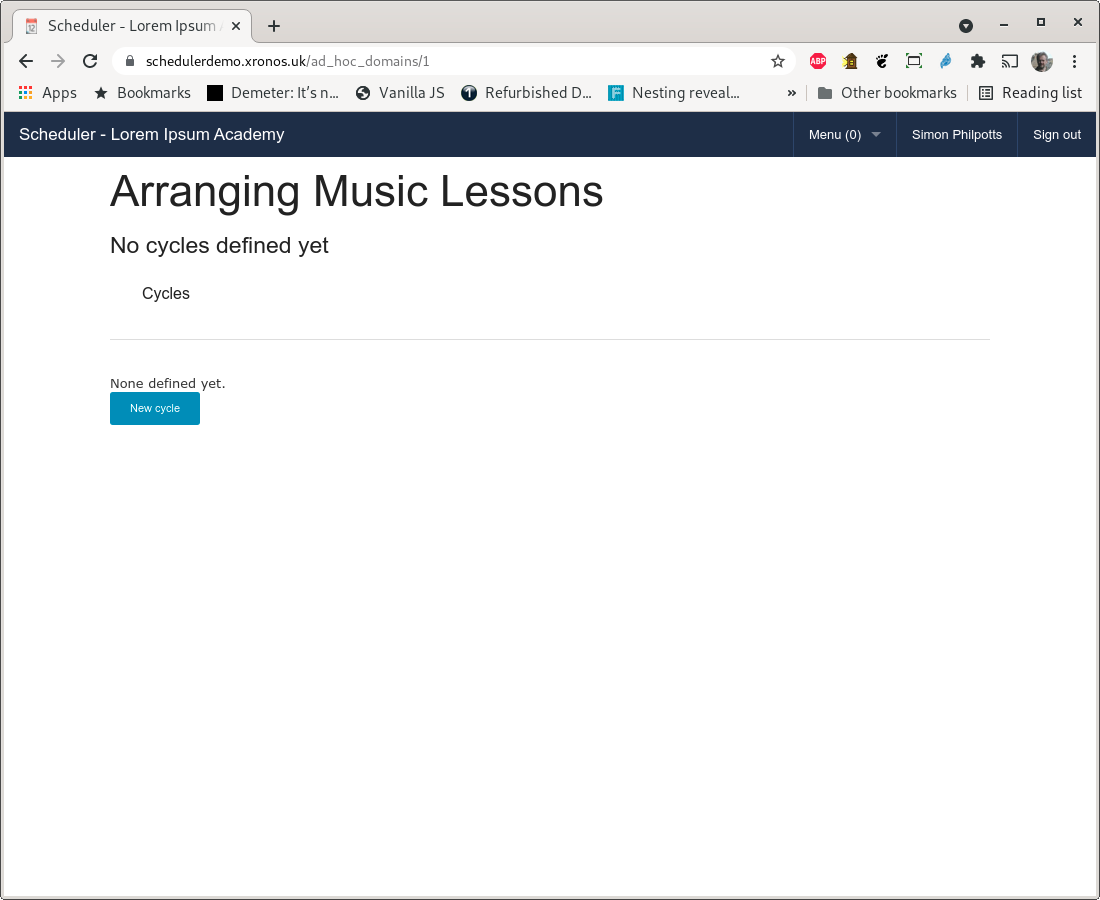
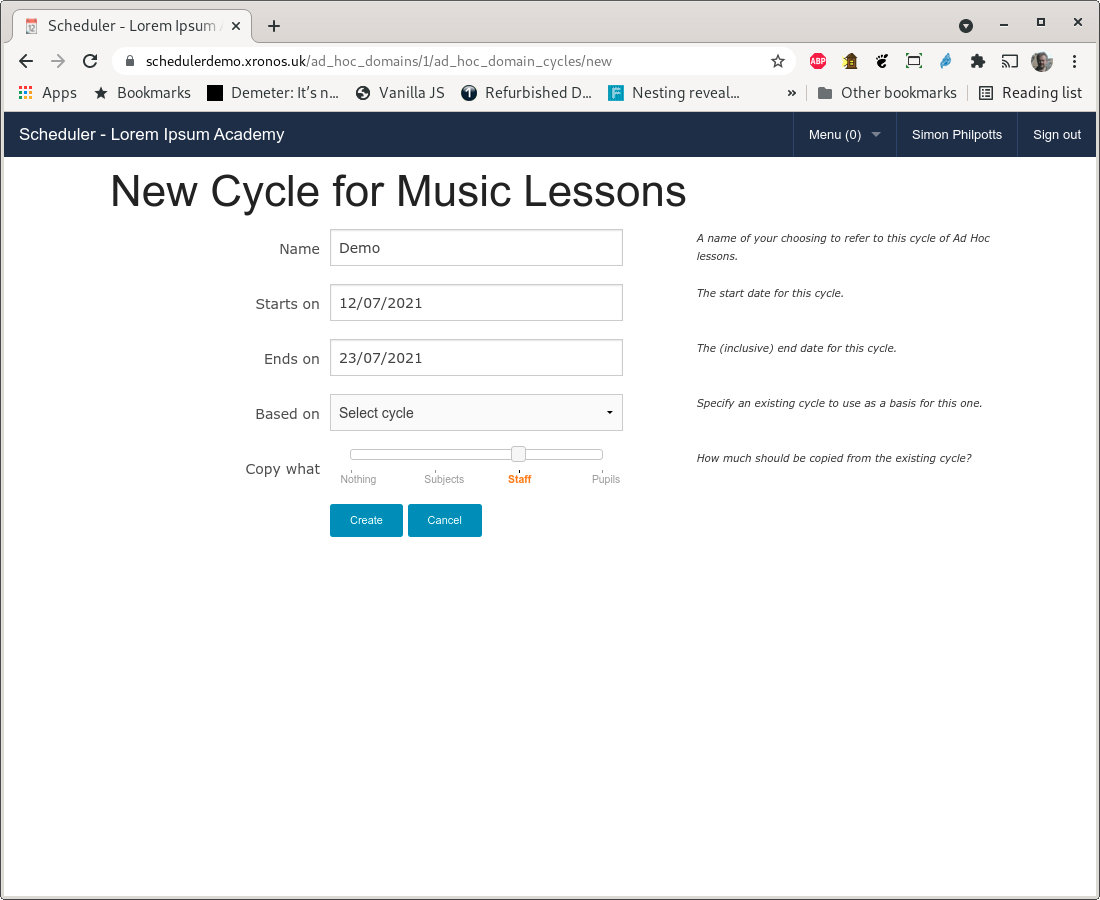
Currently there are no Cycles defined so click on the “New cycle” button and fill in the fields.
Note
If you are working through this example on the Scheduler Demo System then as dates use the start date of your current week and the end date of the following week. The data in the demonstration system are regenerated every night and roll through the year, always appearing in whatever is the current week.
We can’t select anything in the “Based on” field because this is our first Cycle. If we were doing the second half of a term then this is where we would select a Cycle on which to base our new Cycle, and specify how much of the previous one was to be carried over.
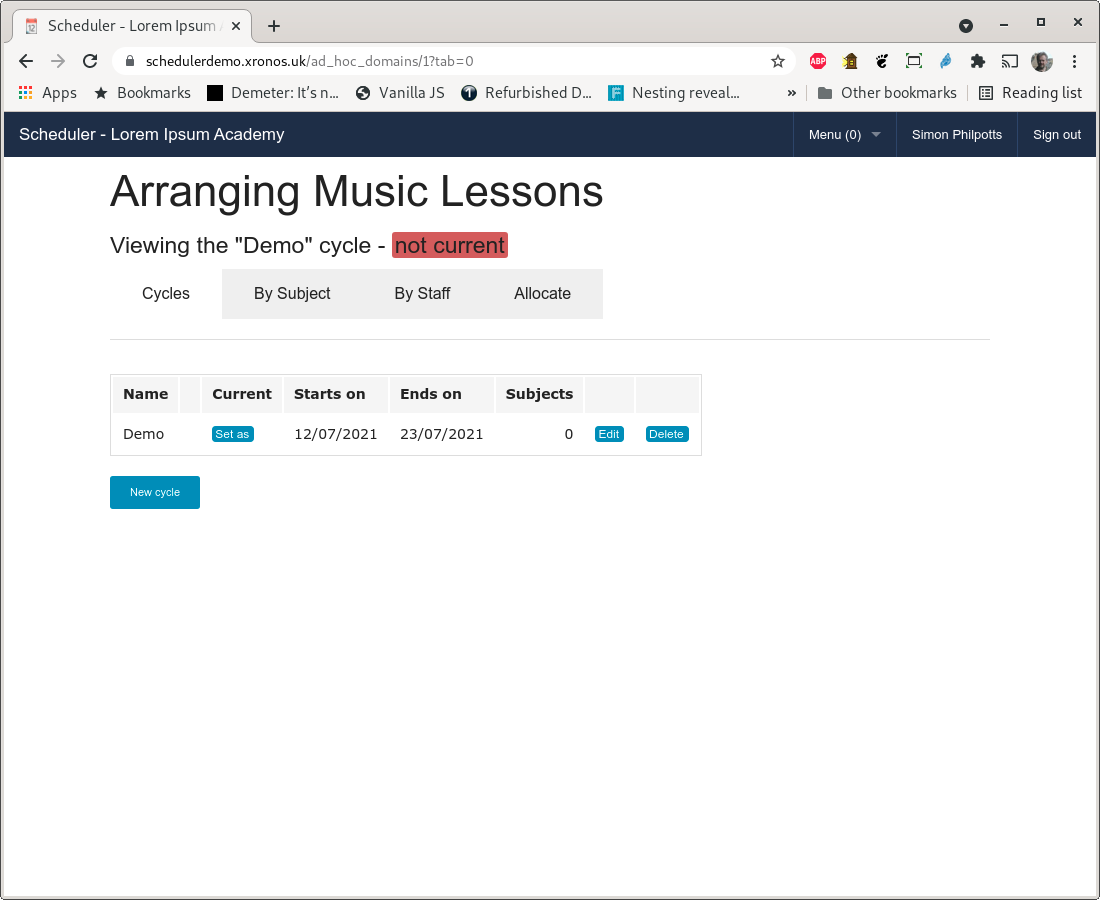
Note that the above cycle is currently flagged as “Not current”. Because you can have many cycles in existence at once, Scheduler has the concept of a “current” one, which simply means the one which it will assume you want by default. Click on the “Set as” button next to the name of the cycle to make it the current one.
The cycle is now flagged as current and our view has been moved on to the second tab of the page, headed “By Subject”. You can always go back to the first tab - Cycles - to choose to work with a different cycle.
Subjects
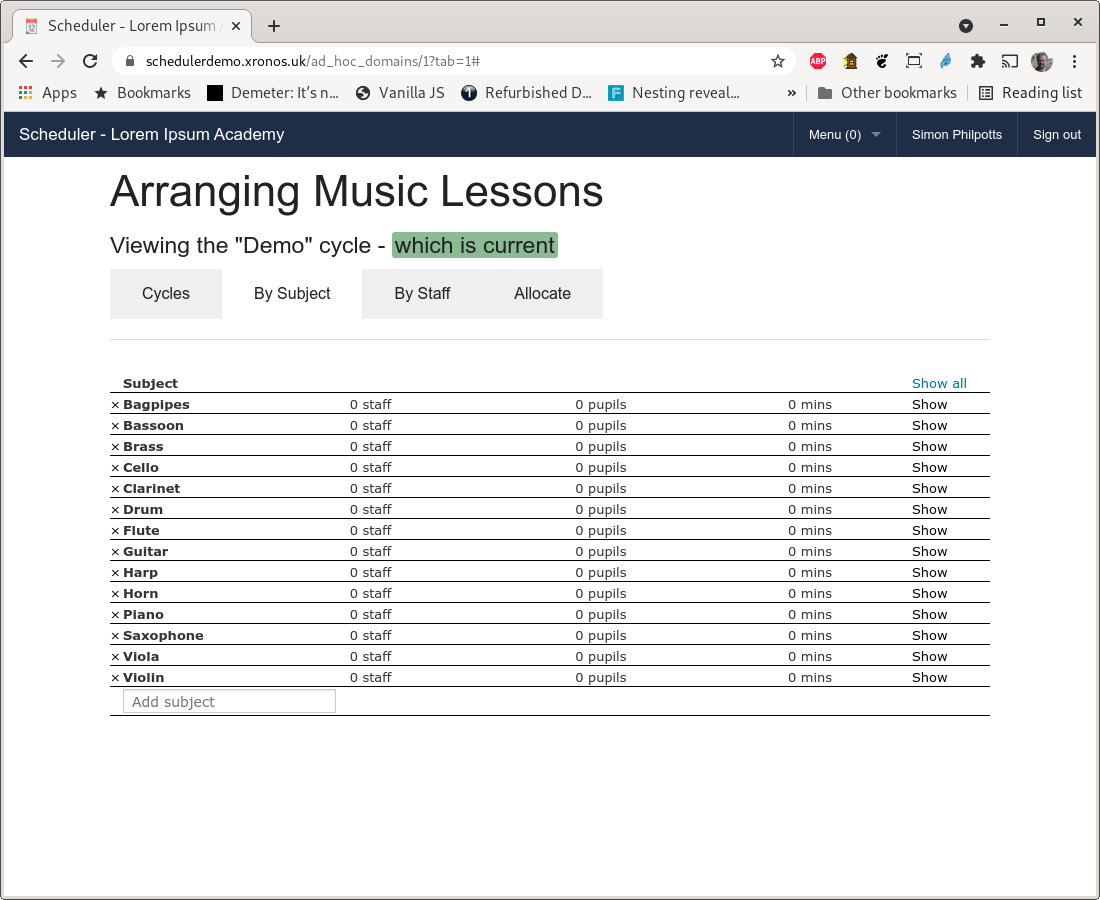
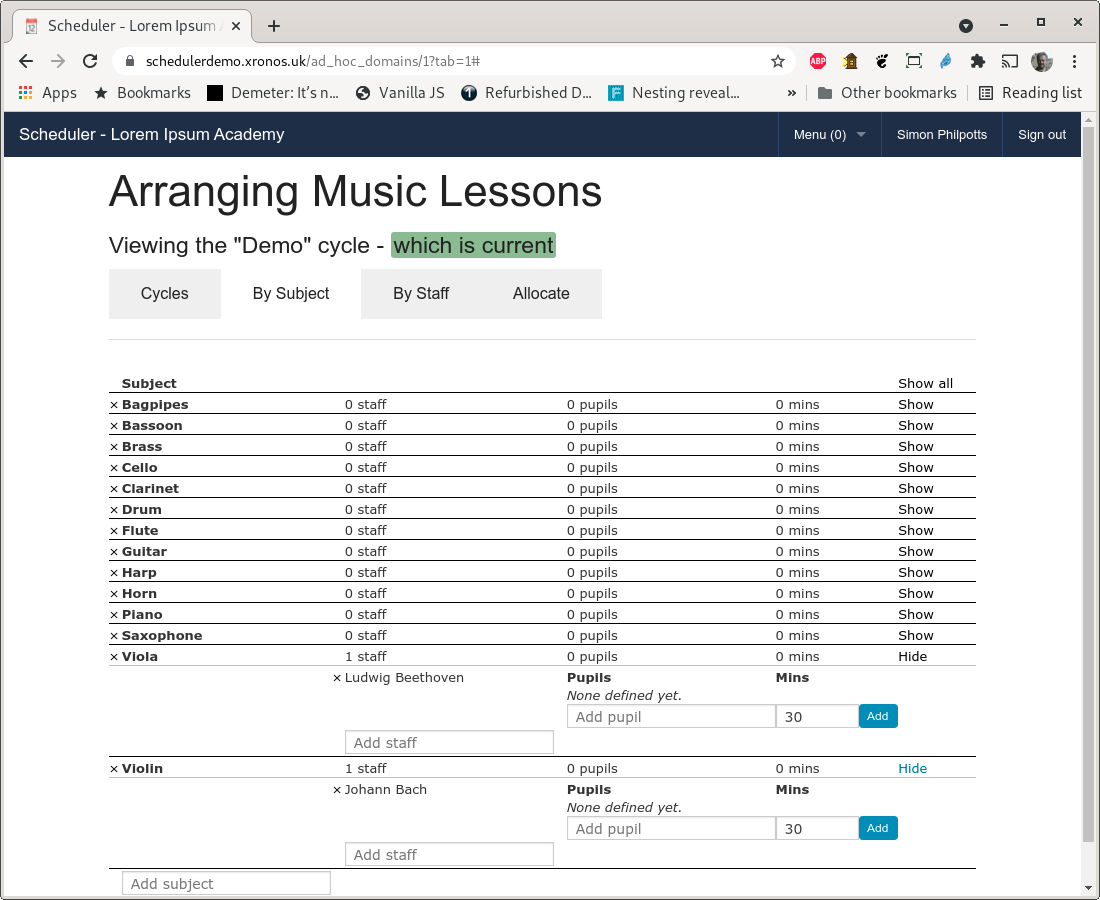
Next we enter in the subjects which are due to be taught in this cycle. The necessary global subject records must already exist in the Scheduler system, but we’re now linking them to staff and pupils. Simply type the name of a subject in the “Add subject” field and press Enter. Continuing doing this until all your subjects are listed.
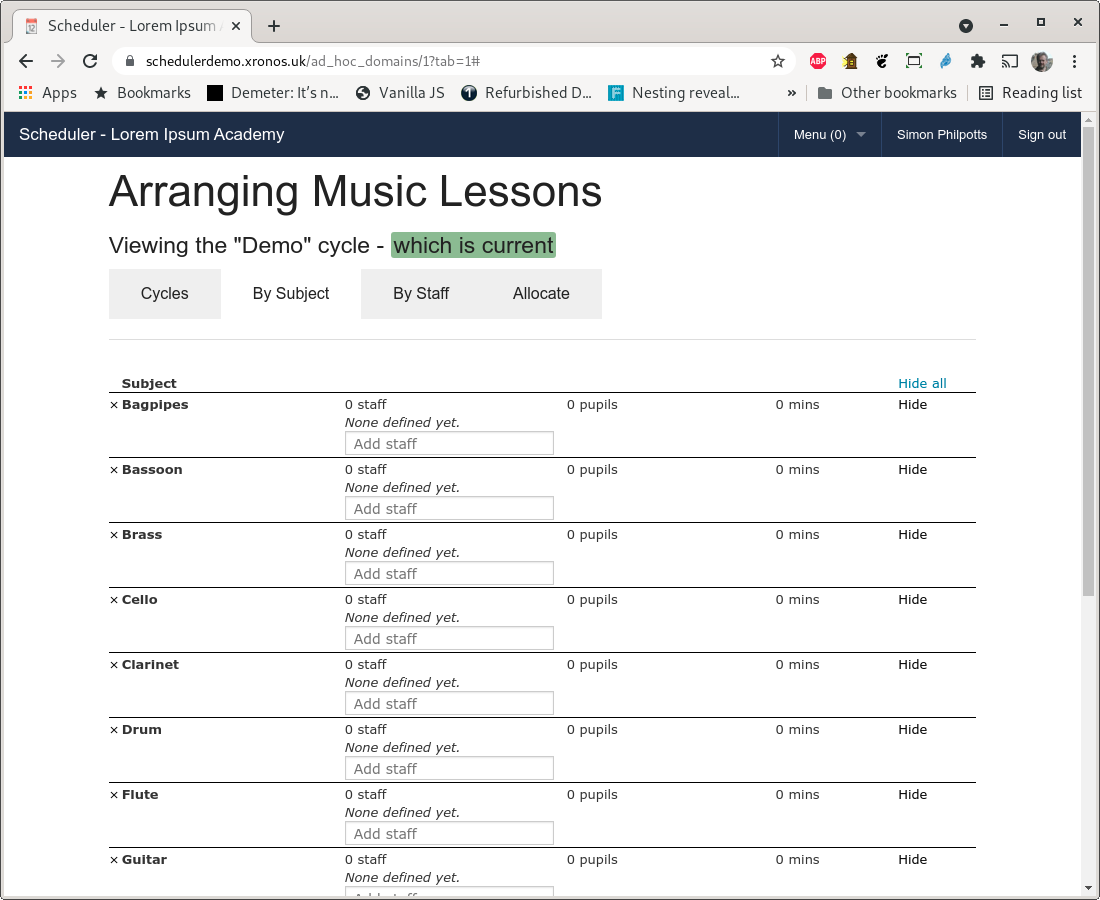
The list can get a bit long for the screen so buttons are provided to fold the display. Click on “Hide all” to reduce it.
Staff
Click on the next tab - “By Staff” to start entering staff information.
Note
It’s entirely up to you whether you enter subjects and then staff, or staff and then subjects. You can also then link them together by entering a staff member name under a subject heading, or by entering a subject name under a staff member’s heading. Whatever is easier for you - it all ends up in the same place. You can switch backwards and forwards between the two tabs and you will find all the information entered on one is visible on the other.
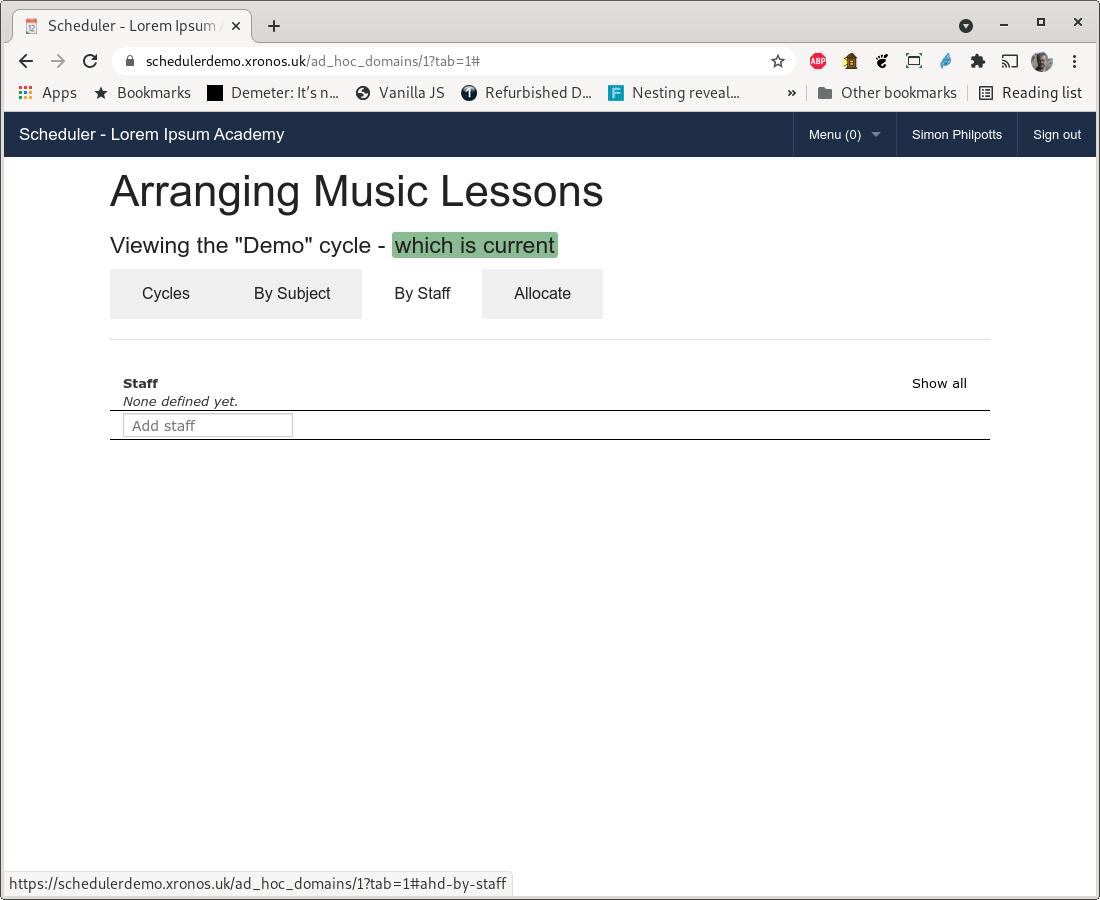
Enter the names of staff who are going to teach your Ad Hoc lessons in exactly the same way as you did for subjects.
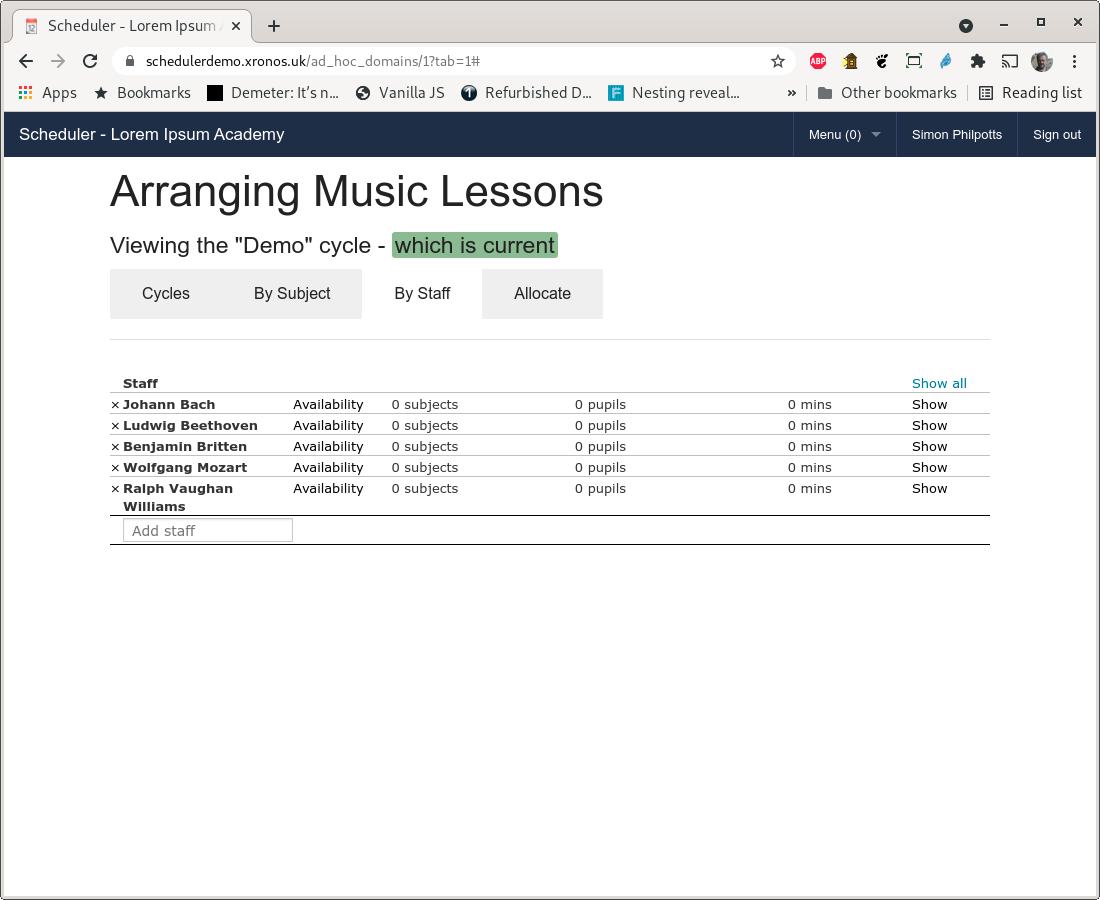
For the purpose of this example, we will have just J.S. Bach teaching Violin and Ludwig van Beethoven teaching Viola.

Although I have entered the subjects under the staff headings, if we flip back to the “By Subject” tab we find exactly the same information there.
Availability
Each staff member will typically have certain defined periods of time when they are available to teach. This information can be entered from the “By Staff” tab by clicking on the “Availability” link next to the staff member’s name.
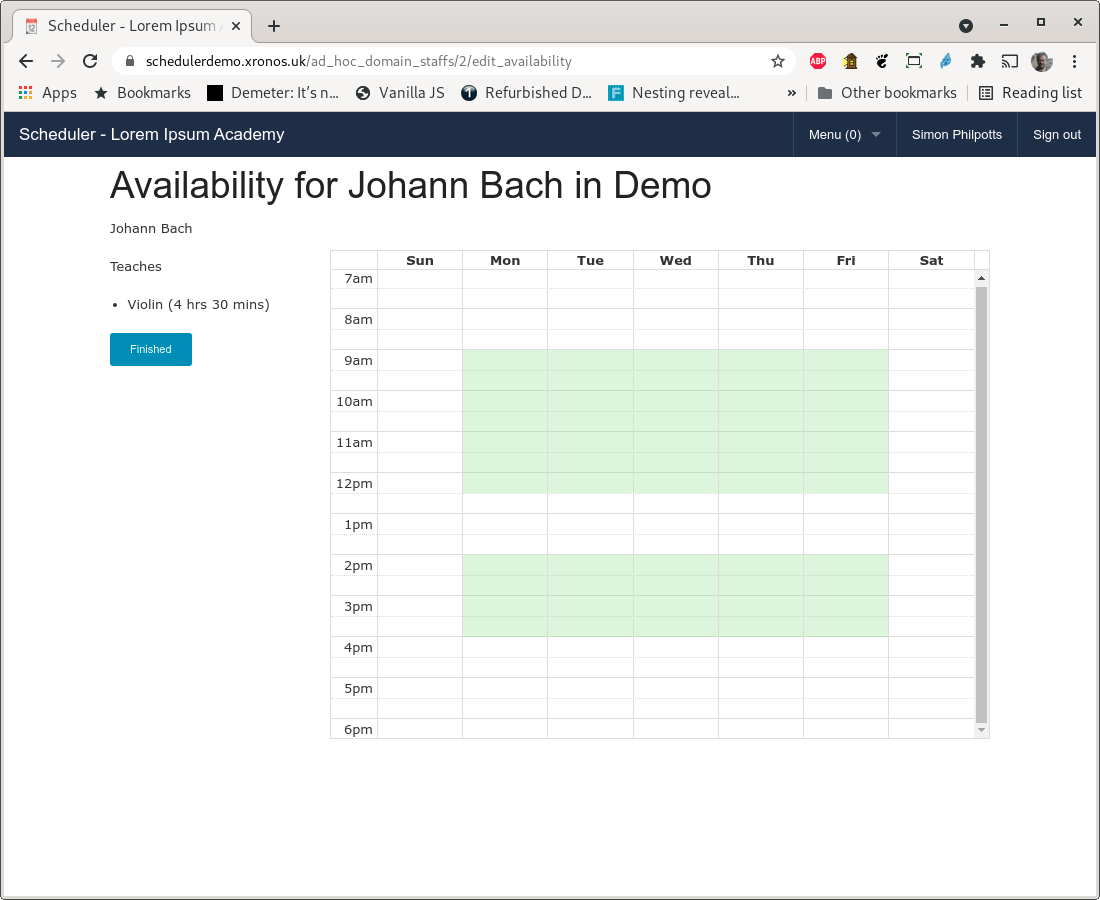
The background periods shown on this screen were defined by your system administrator when the Ad Hoc category was set up. They should reflect the normal times when teachers would be available.
In our case, JSB teaches all day on Monday, plus Tuesday morning until 11am.
Click on the background periods for each of these slots to create an availability schedule for JSB. Then drag the end of the Tuesday morning one to 11 o’clock.
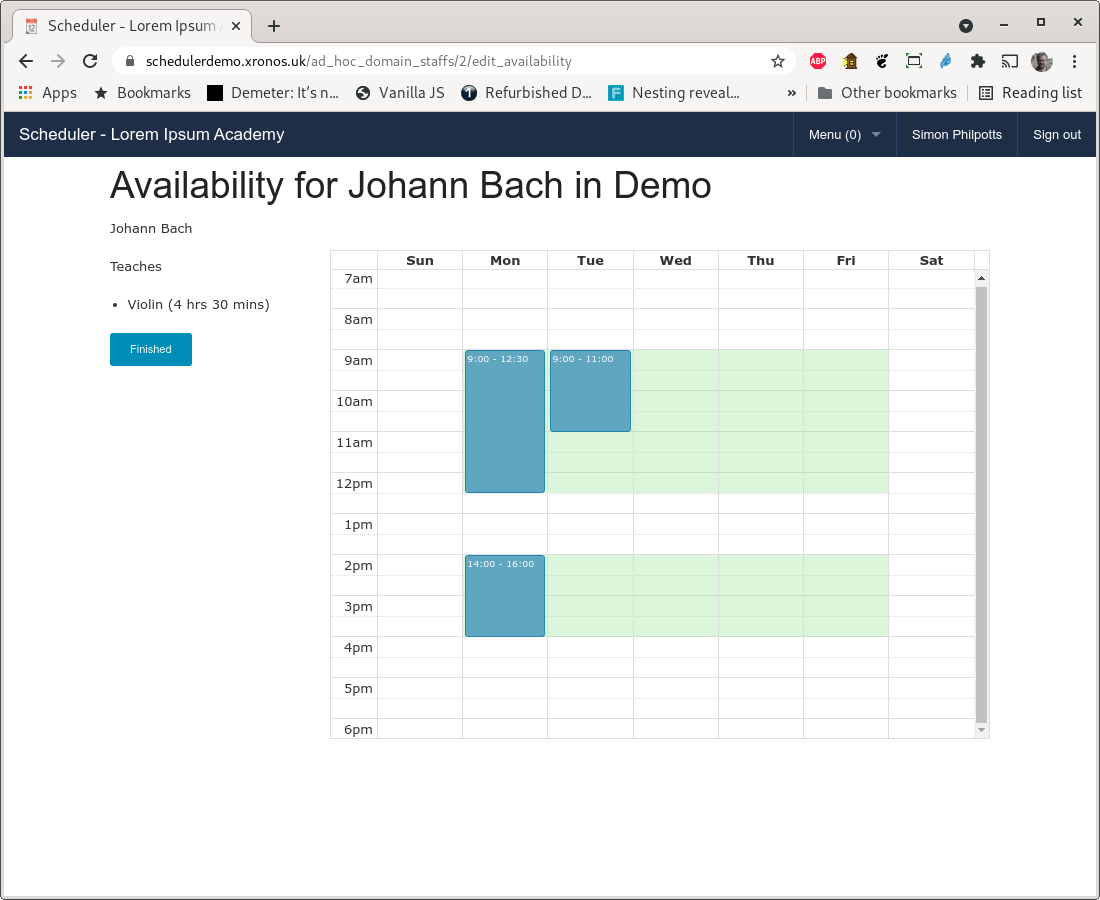
To delete a slot entered in error, just click on it again.
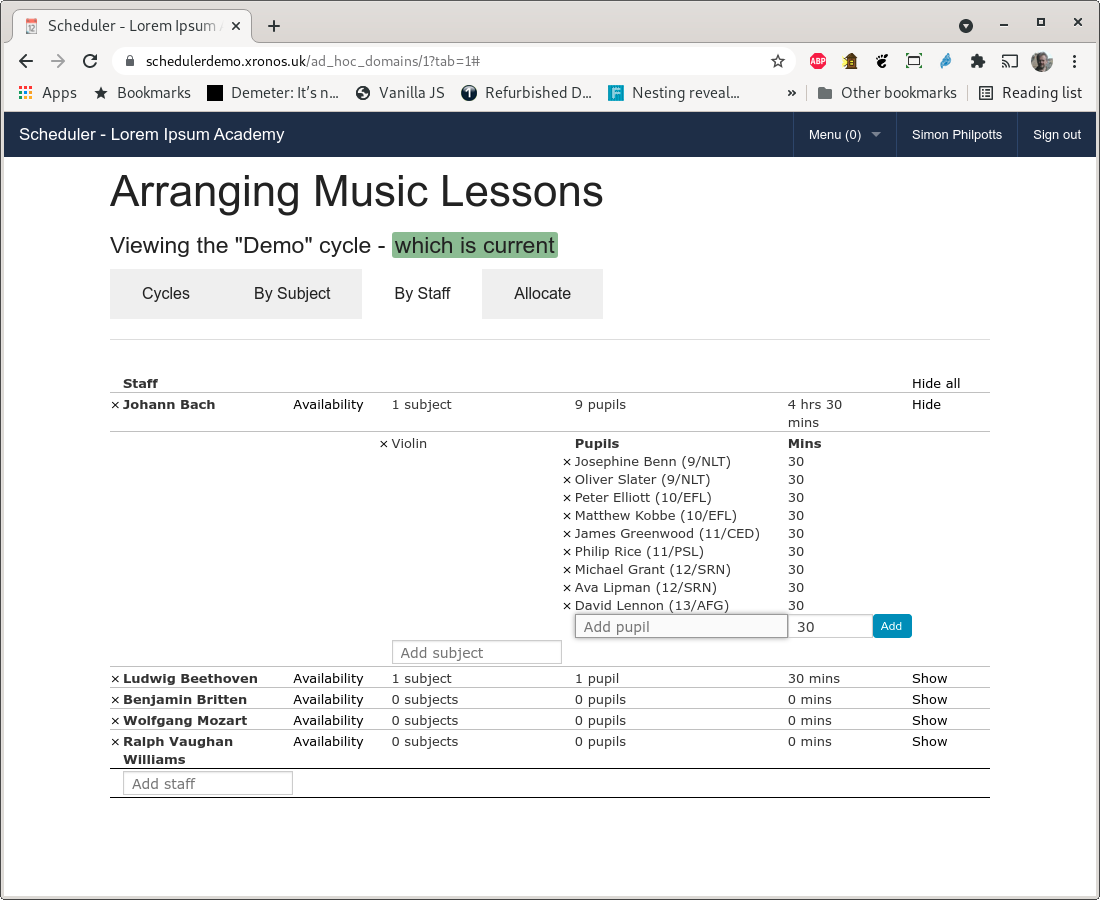
Pupils
Enter pupils on either of those two tabs under the staff and subjects where they are due to have lessons. The lesson duration defaults to the number of minutes which were set when the Ad Hoc category was created but you can increase or decrease the duration as required.
If a pupil has been entered with the wrong duration of lesson, just click on the number of minutes and you can change it.
Allocation
Will all the above information entered, you can now think about doing some actual scheduling.
It is assumed that you might want to have more than one go at this for a given cycle to try to find the best fit (fewest academic lessons missed). For that reason you can create more than one Allocation within a Cycle and then decide later which one you like best.
Click on the “Allocate” tab to see a list of your allocations - currently empty.
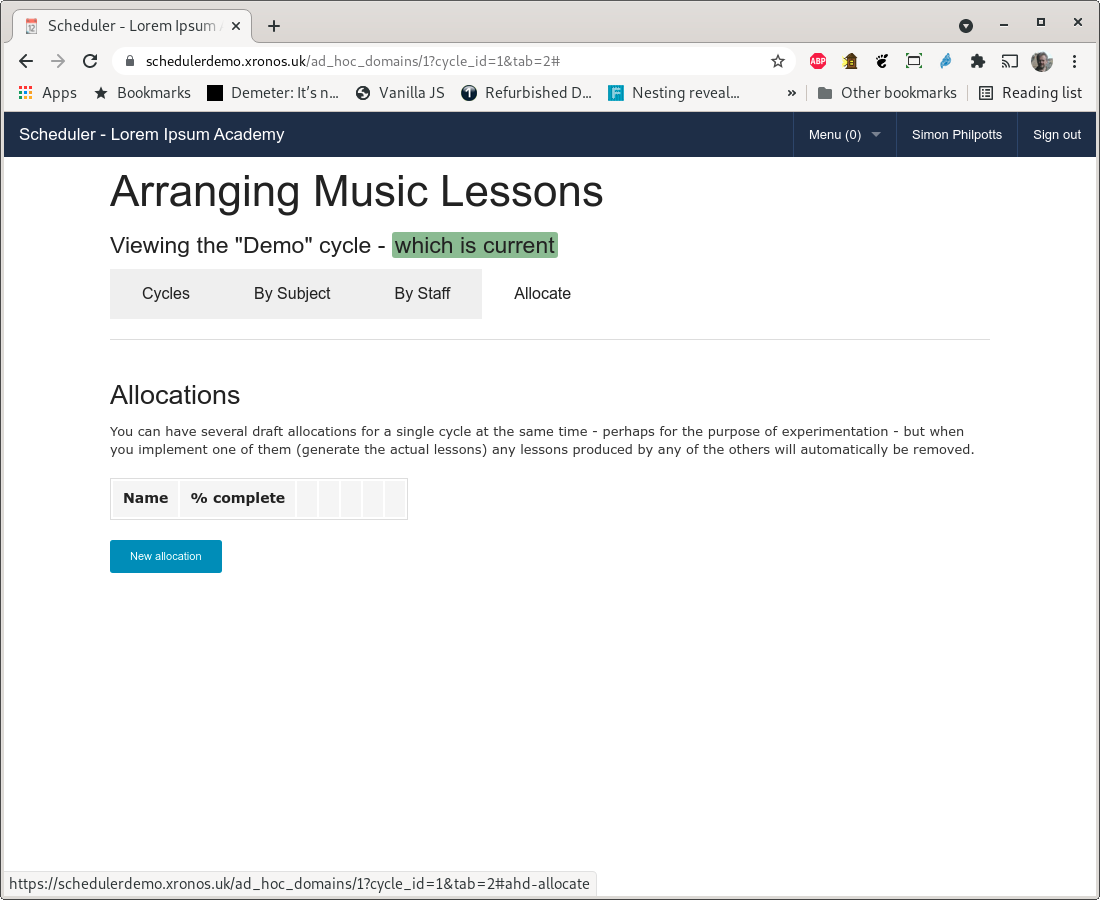
Click on the “New allocation” button and the only information which you need to give is a name to identify it.
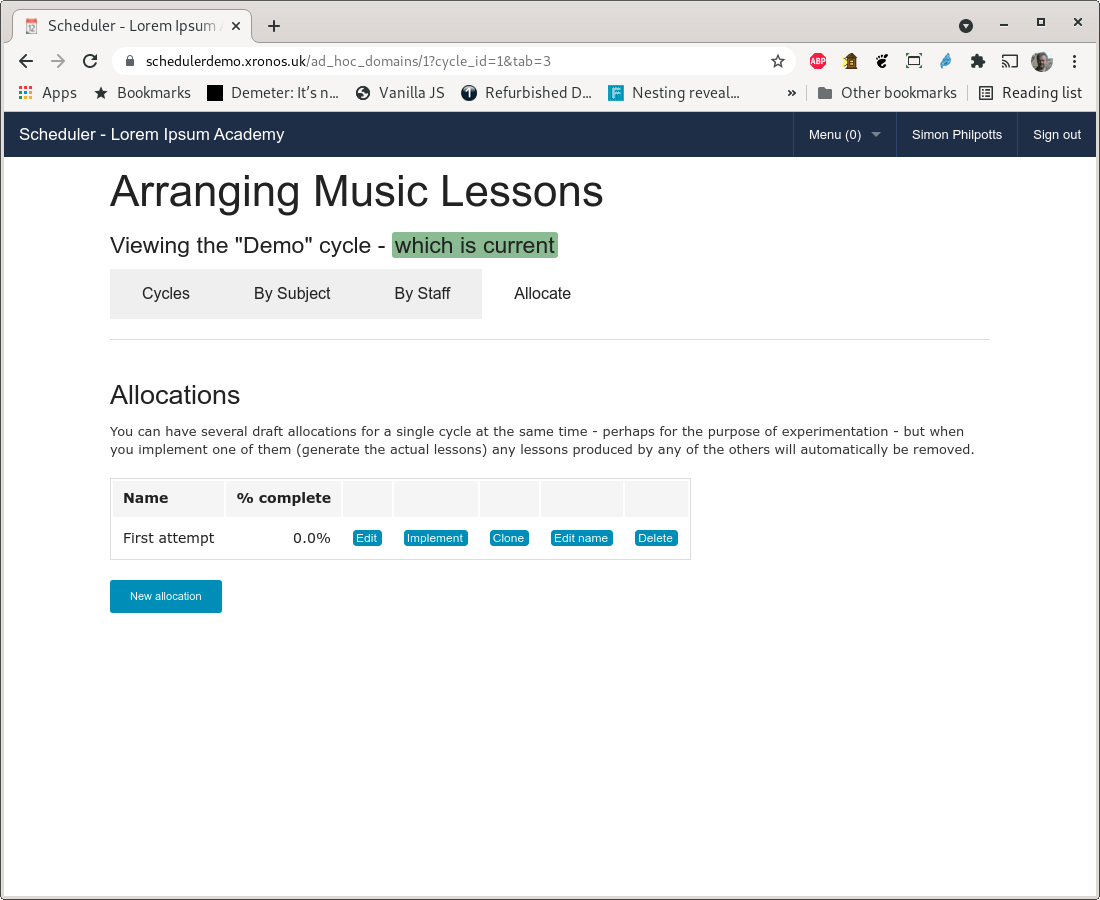
Then click on your new allocation’s “Edit” button to start placing lessons.
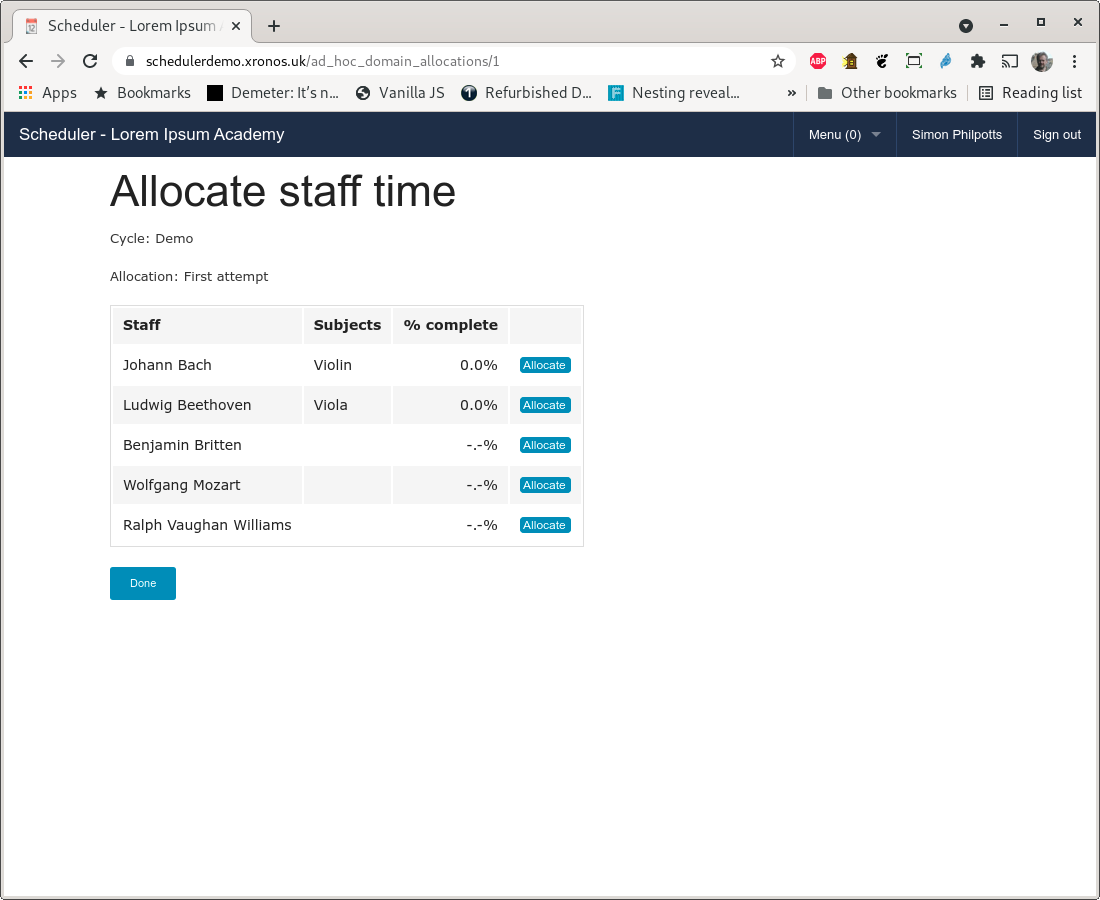
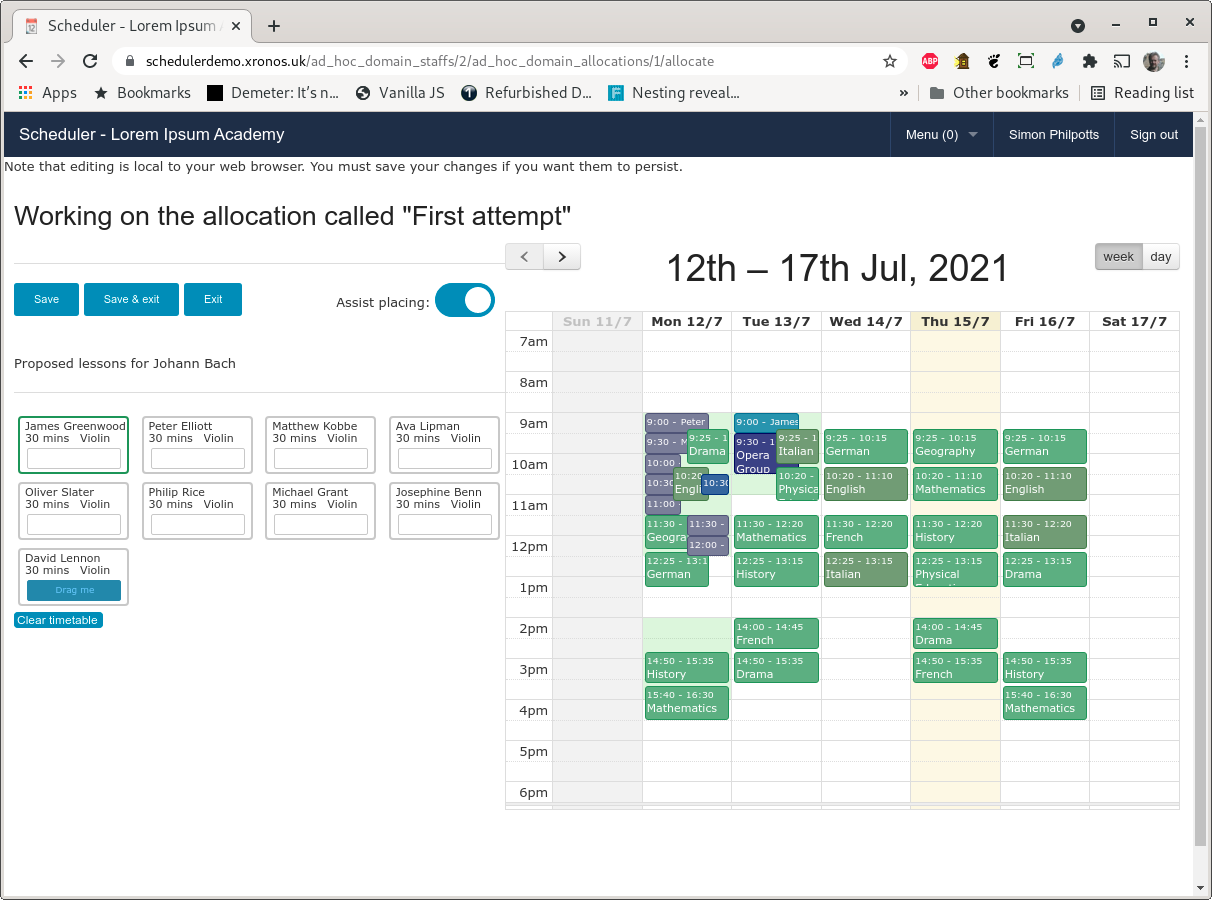
Click on JSB’s “Allocate” button and you should get a screen much like this:
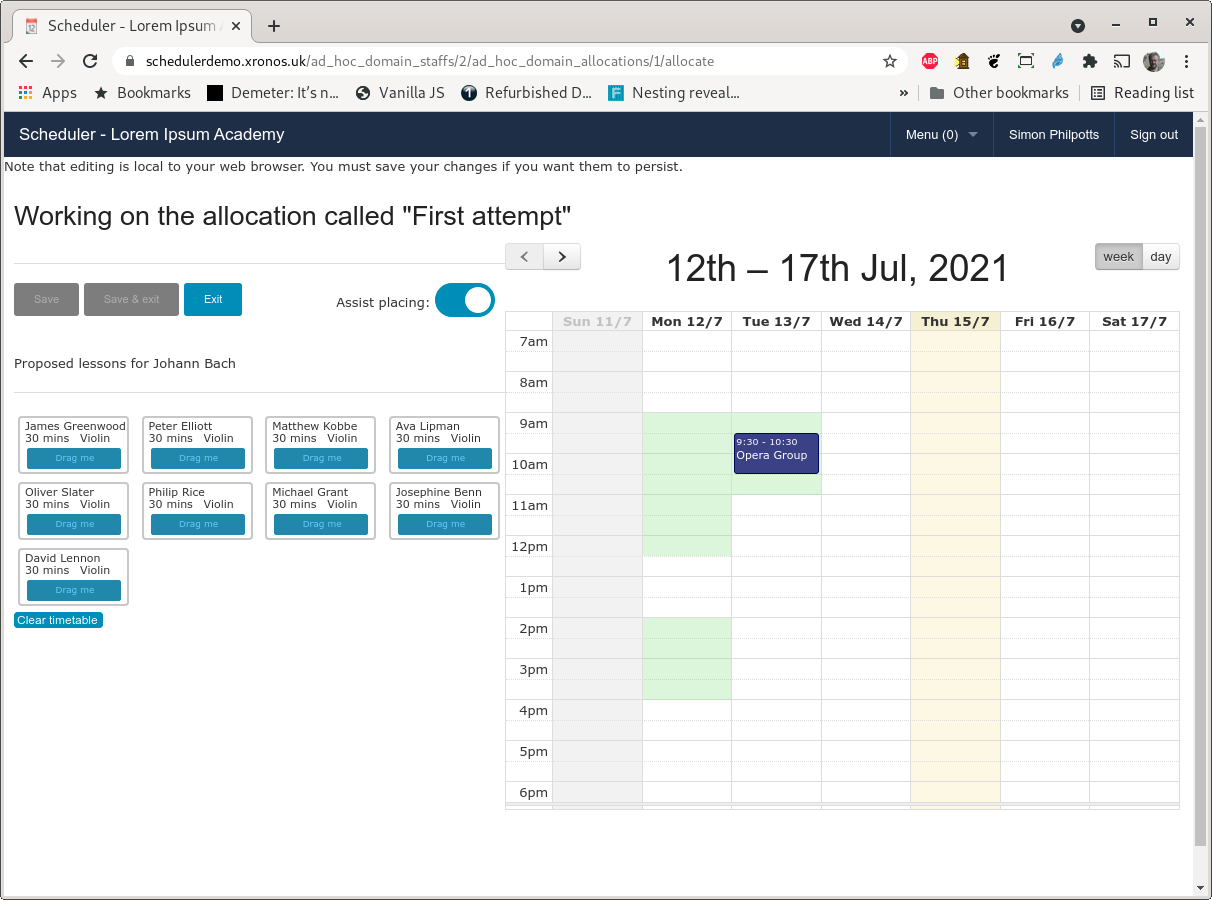
This is one of the more complex screens with quite a bit to take in.
On the right we have a calendar showing the first week of the cycle and with JSB’s availability shown by means of background periods. There is also an existing event involving JSB (entered through Scheduler’s normal event editing facilities) which means he isn’t available for teaching for part of Tuesday morning.
On the left we have one cell for each of the pupils needing a lesson scheduled. Above that there are some buttons for saving your work and exiting the screen, plus a switch for turning on and off assisted placement.
Warning
All your allocation work is done locally within your web browser. You need to save your work back to the server if you want to keep it.
If you have assisted placement turned on then the program will position each lesson intelligently within the availability slot to which you have dragged it, avoiding gaps between lessons etc. If you turn it off then each lesson will simply be placed exactly where you put it.
What you need to know when scheduling lessons for individual pupils is the individual academic timetable for each pupil, plus how often they have already missed particular subjects. If you click on Peter Elliott’s cell on the left hand side, his timetable will appear in the schedule on the right.
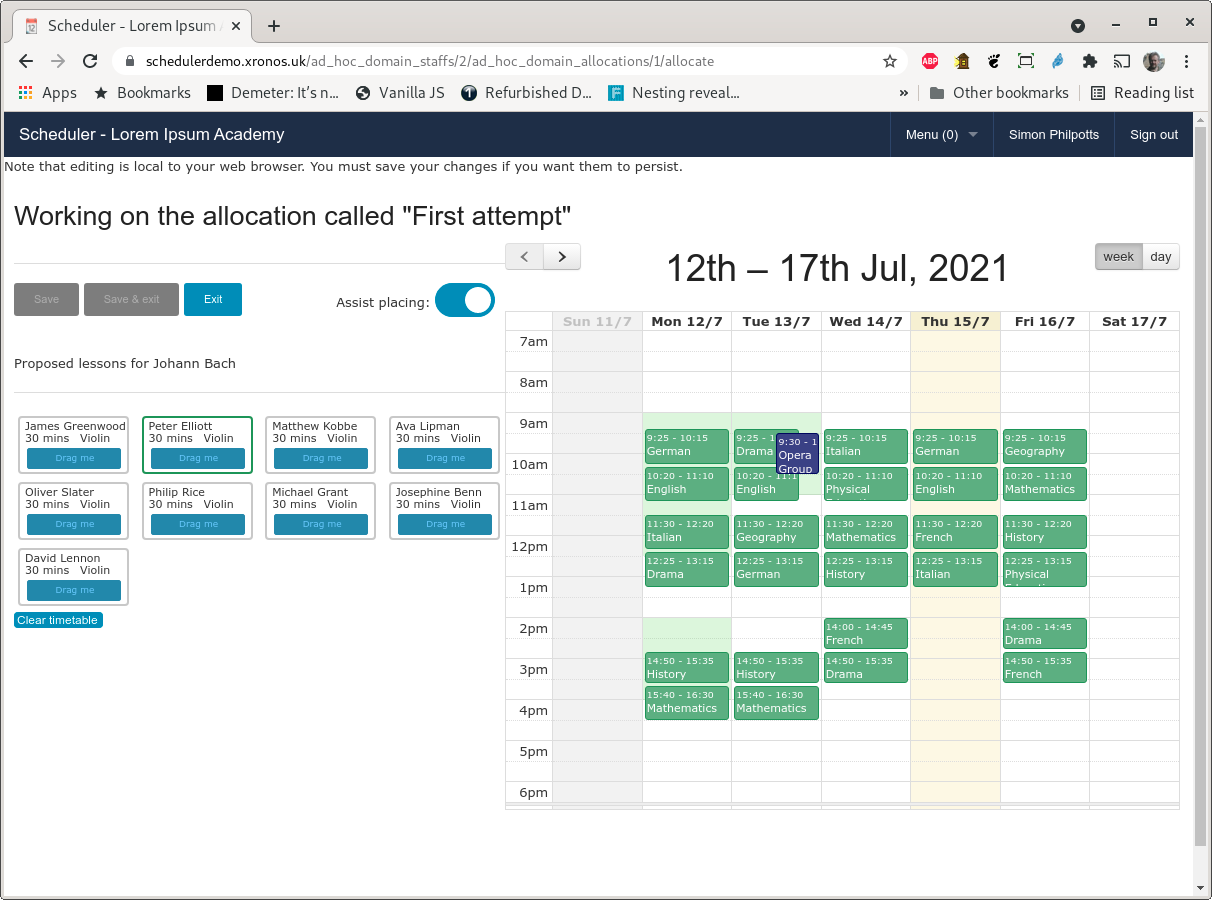
All the lessons are green indicating that he has not yet missed any lessons in those subjects. Drag the blue “Drag me” box from Peter’s cell on the left onto the Monday morning area and it will be positioned automatically at the start of that slot.
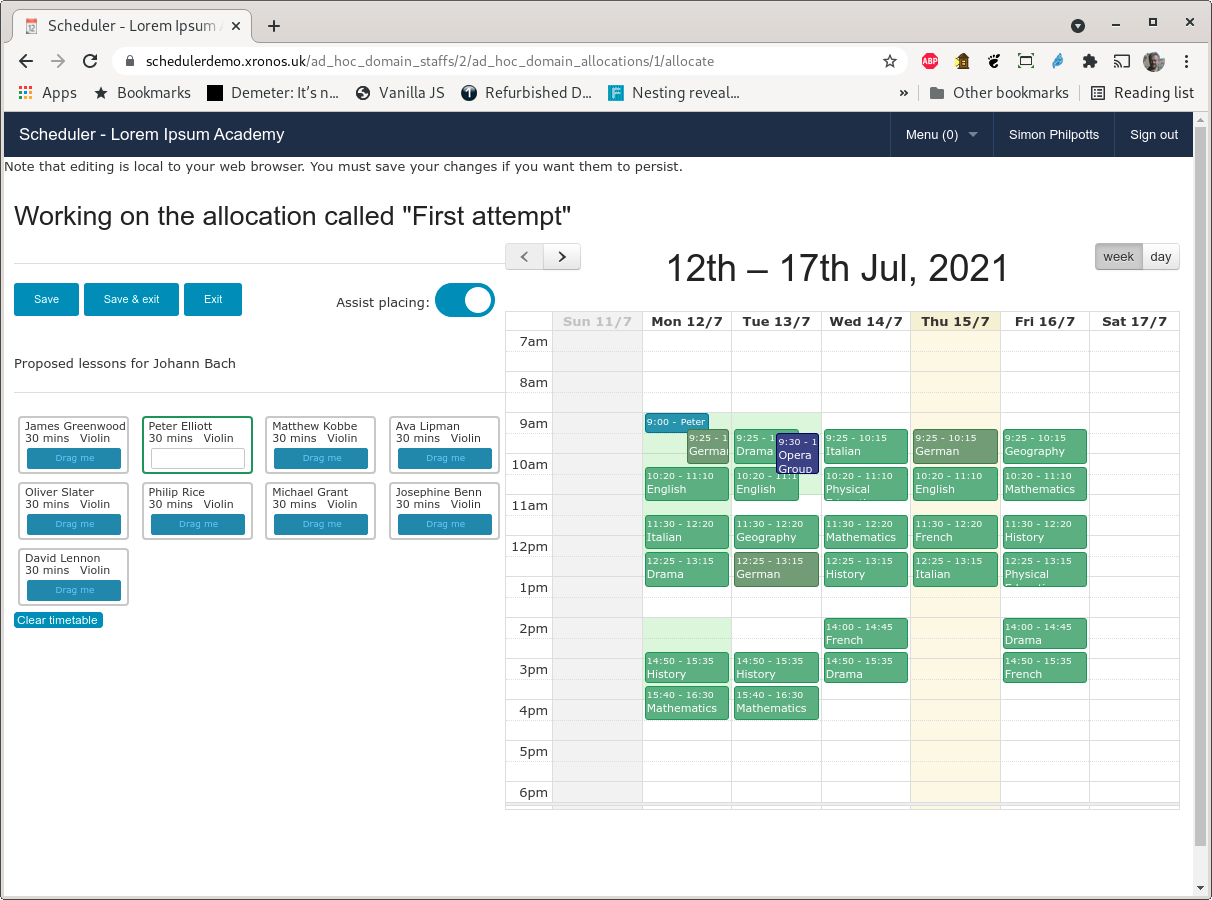
Note that all Peter’s German lessons have now changed colour because he has missed at least part of a German lesson in this cycle.
Continue by dragging lessons for other students onto the schedule. At any time you can change whose timetable is showing by clicking either on the student’s cell on the left, or on an already placed music lesson. You can remove timetables entirely by clicking on the “Clear timetable” button under the student cells.
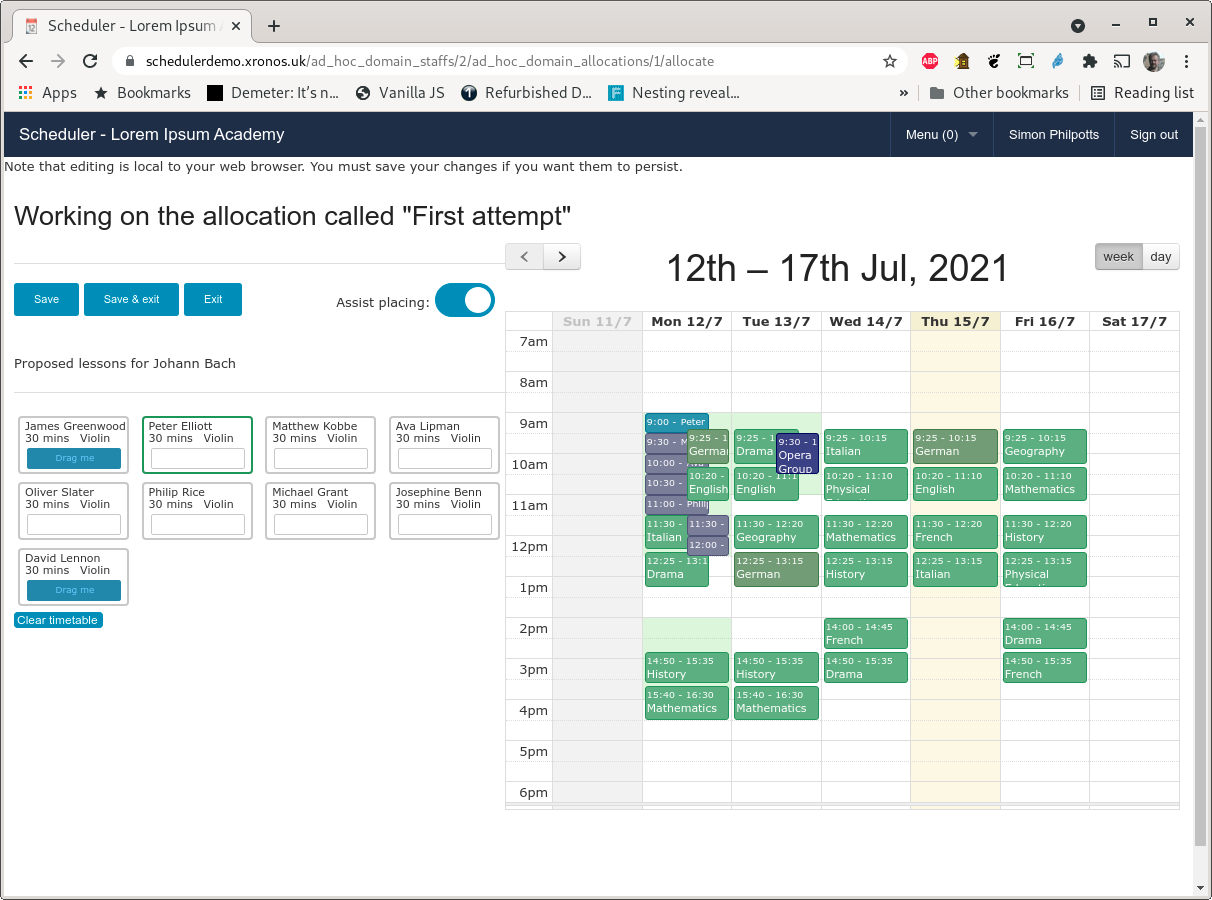
On the above screen, most of the week’s lessons have been scheduled and we’ve gone back to looking at Peter Elliott’s timetable. Note that his music lesson is in pale blue, whilst all the other students’ lessons are in grey. This enables you to tell quickly which music lesson relates to the timetable currently being displayed.
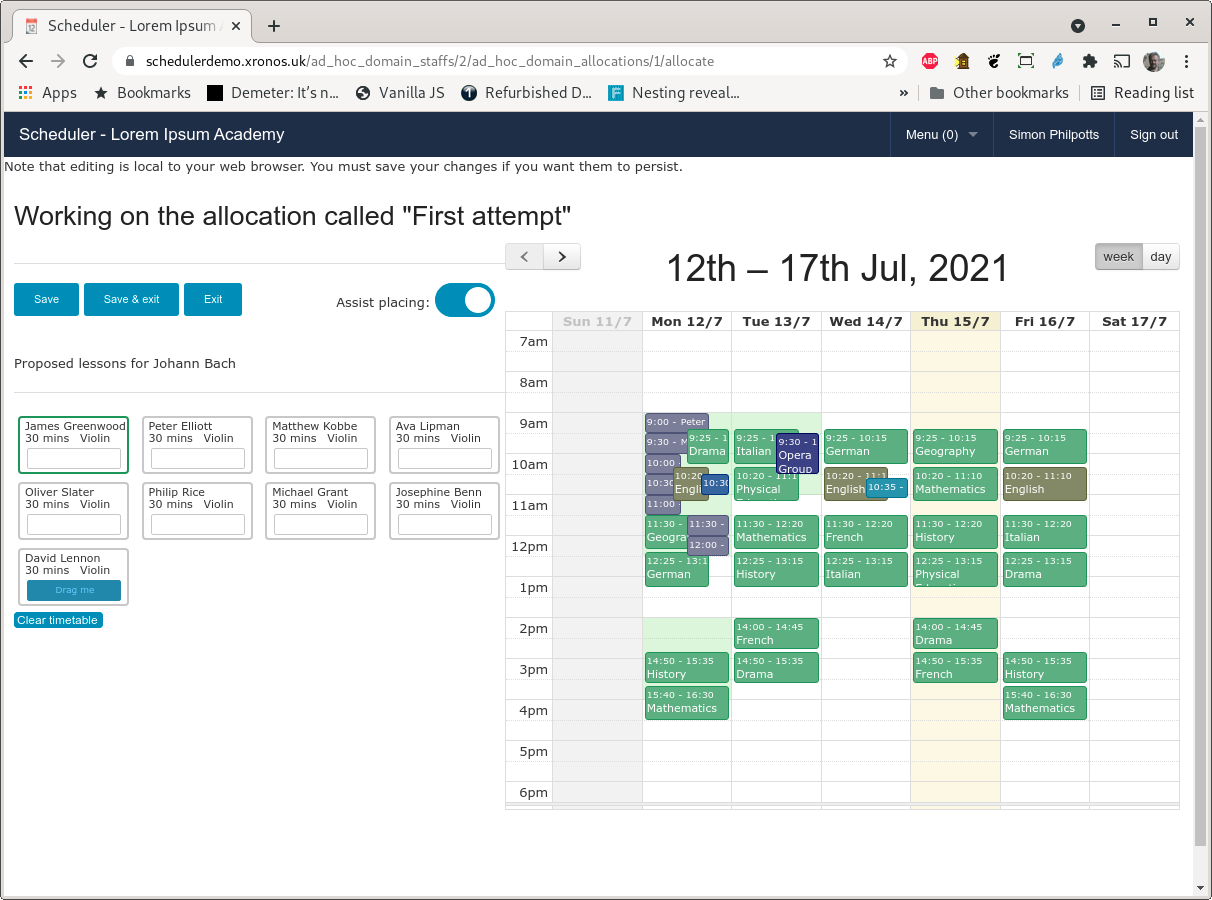
If you now click on James Greenwood’s cell on the left, another little nuance appears.

His timetable has appeared as expected, but also another music lesson. This is because he studies Viola as well, and his Viola lesson for this week has already been scheduled within this allocation. It appears here because obviously he can’t have both his lessons at the same time. The colour of his English lessons has also been changed to indicate that he has missed an English lesson, even though it wasn’t for the Violin lessons which we are currently considering.
First thing on Tuesday looks like a good time for his Violin lesson so we can put it there.
Note that, whilst Scheduler will attempt to assist you in placing lessons, you can always override it and go for something apparently less than sensible. You could drag that freshly placed lesson and put it in the middle of James’s English lesson on Wednesday morning, despite JSB not being apparently available then, and it being a lesson which James has already missed one of.
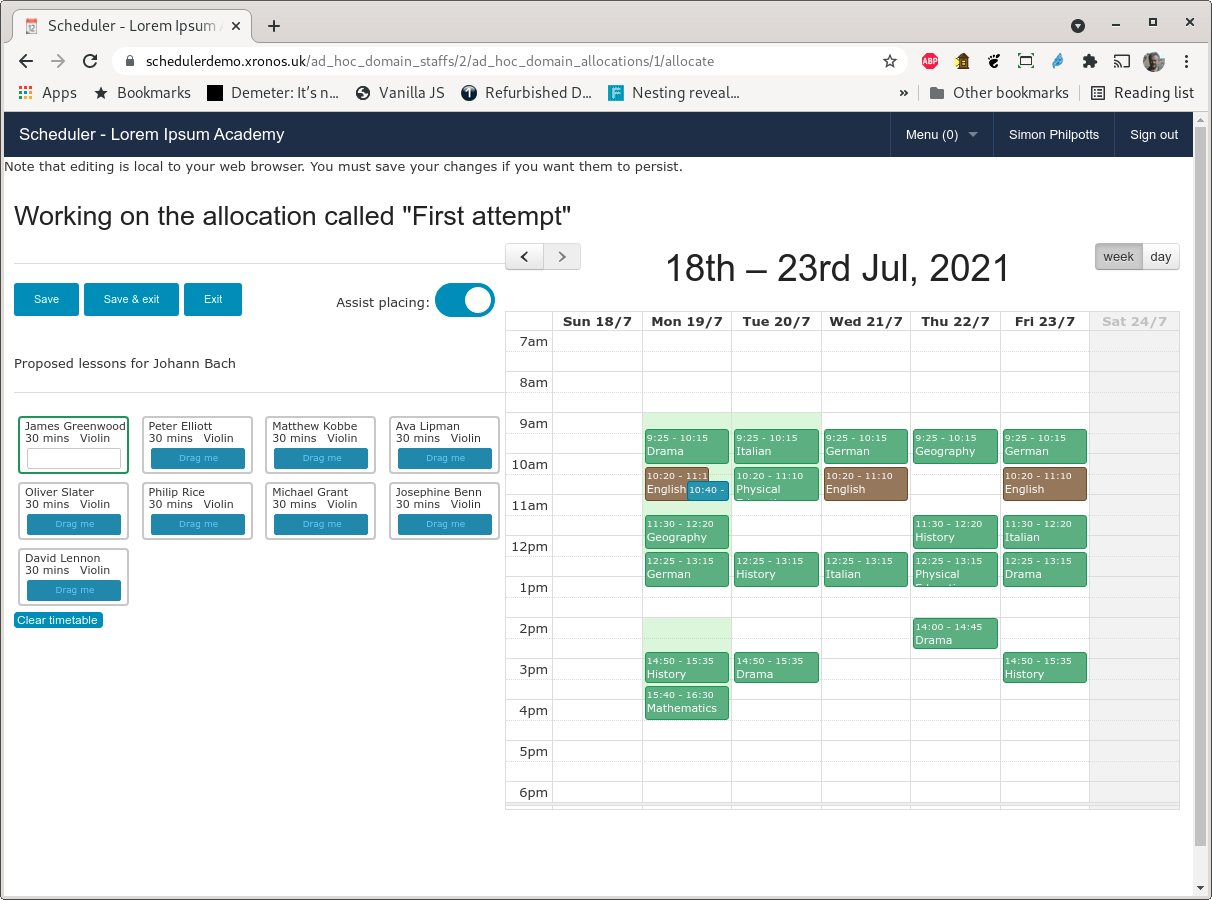
Note that the English lessons have moved further from green towards red because James is now missing two of them. If we move on to the next week and again deliberately put James’s lesson in an English lesson it gets even worse.
When you’re happy with what you’ve done, click on “Save & exit” and you’re taken back to the list of staff to be allocated. Note the indication of how much more you have to do.

At any time, you can clone an Allocation and do further work on the clone. This can be useful to try out “what if?” scenarios.
Implementation
Once you have an Allocation with which you are happy you can publish it by clicking on the “Implement” button on the listing of allocations.
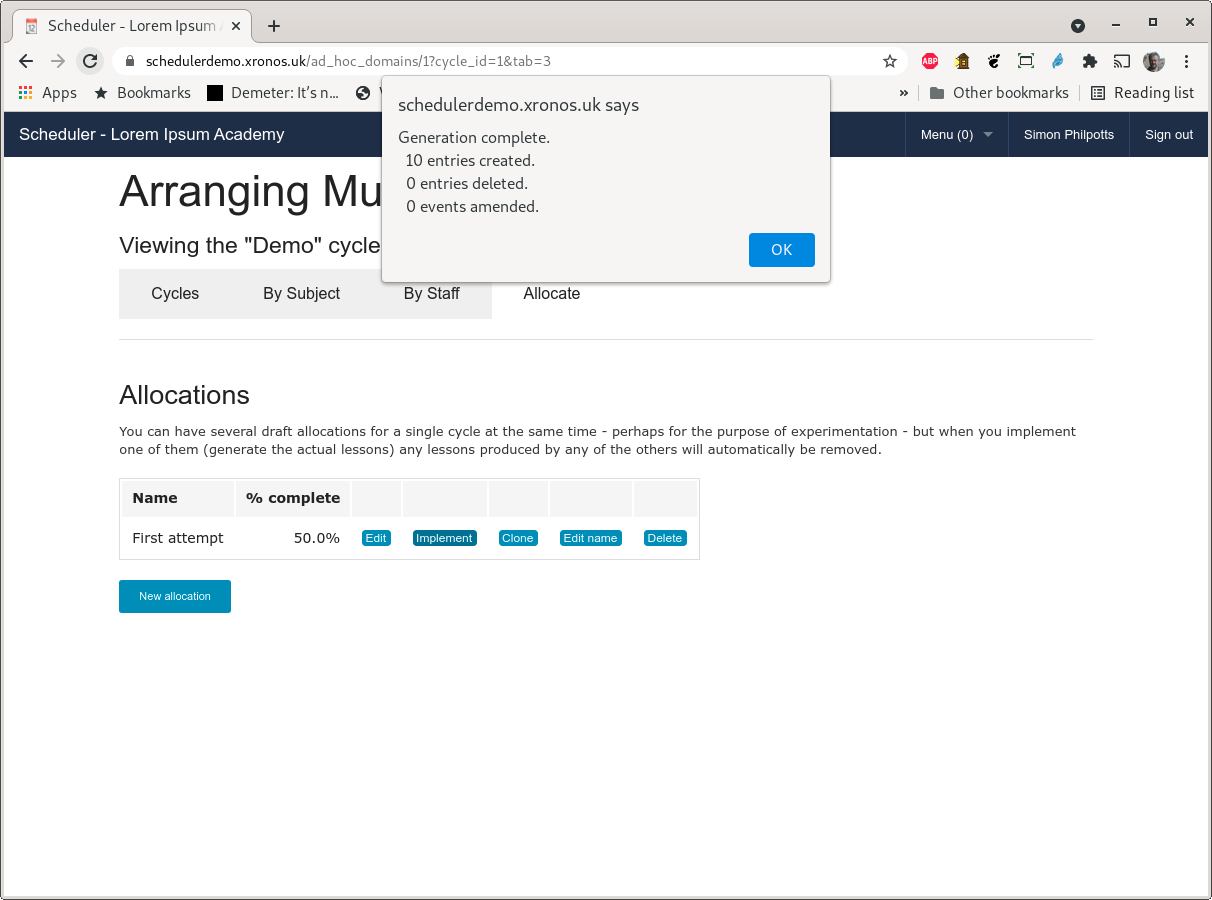
Doing this will cause all the lessons in the allocation to be created in Scheduler’s main event database, making them visible to staff and pupils alike. They will supersede any events created by a previous allocation within this cycle. (Any other events with the same Event Source, as configured when the Ad Hoc category was set up.)