Editing forms
Overview
If you control a resource within Scheduler, it is likely that your system administrator will have given you the ability to create and edit forms. These allow you to gather more information about what the end user requires from your resource.
A typical example of this would be the catering department gathering more information about the exact type and quantity of catering required for an event.
Note that there is a single pool of forms within the system - they do not belong to individual users. If you have form editing permission you will therefore be able to edit any of them. Changing one in use by another department will probably not be a good idea.
Forms can potentially be used by more than one resource. The workflow is first to create the form, then attach it to whichever resource(s) need it.
Listing
To list the forms in the system (assuming you have the necessary permission) choose Menu => Forms from the top menu bar. You will see a screen something like this:
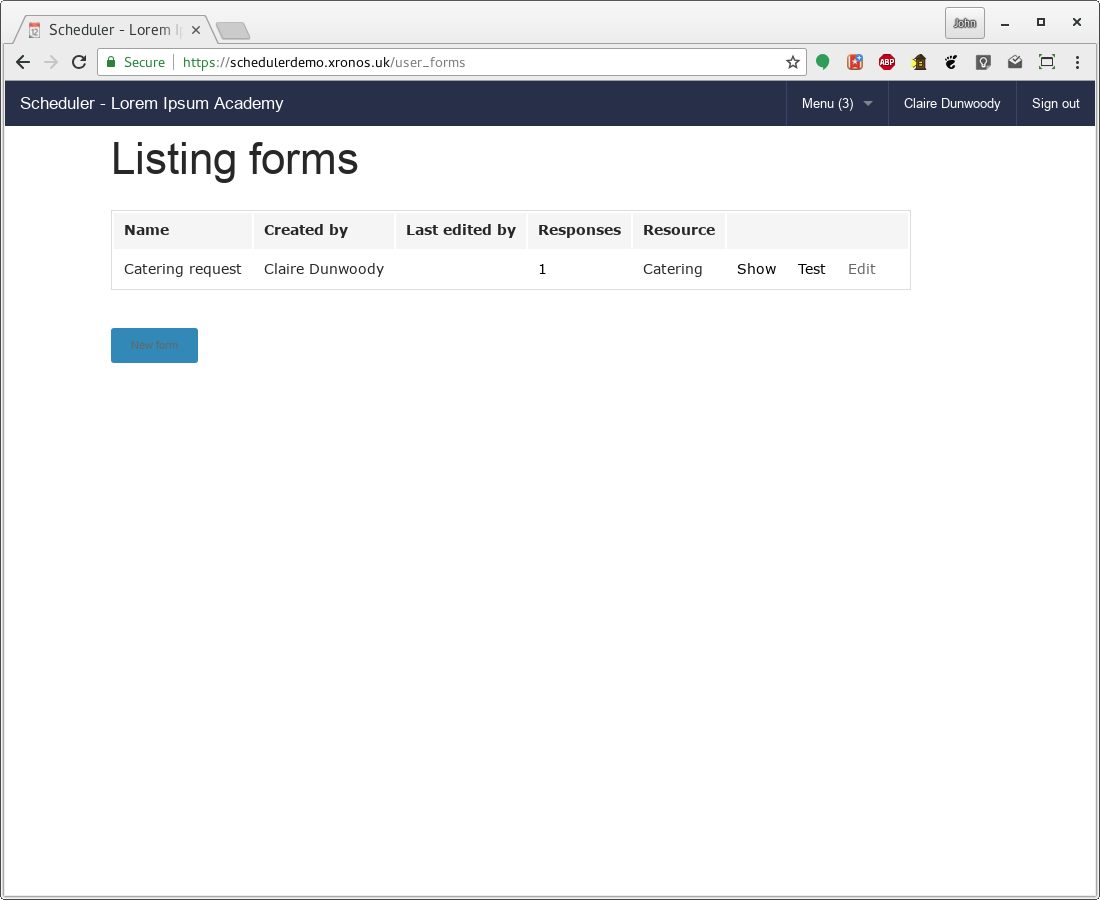
The form listed here is created by default in the demonstration system and is the one used to document forms in the basic user guide.
Editing
To edit this existing form, click on the “Edit” button to the right of its listing entry and you’ll get a screen like this:
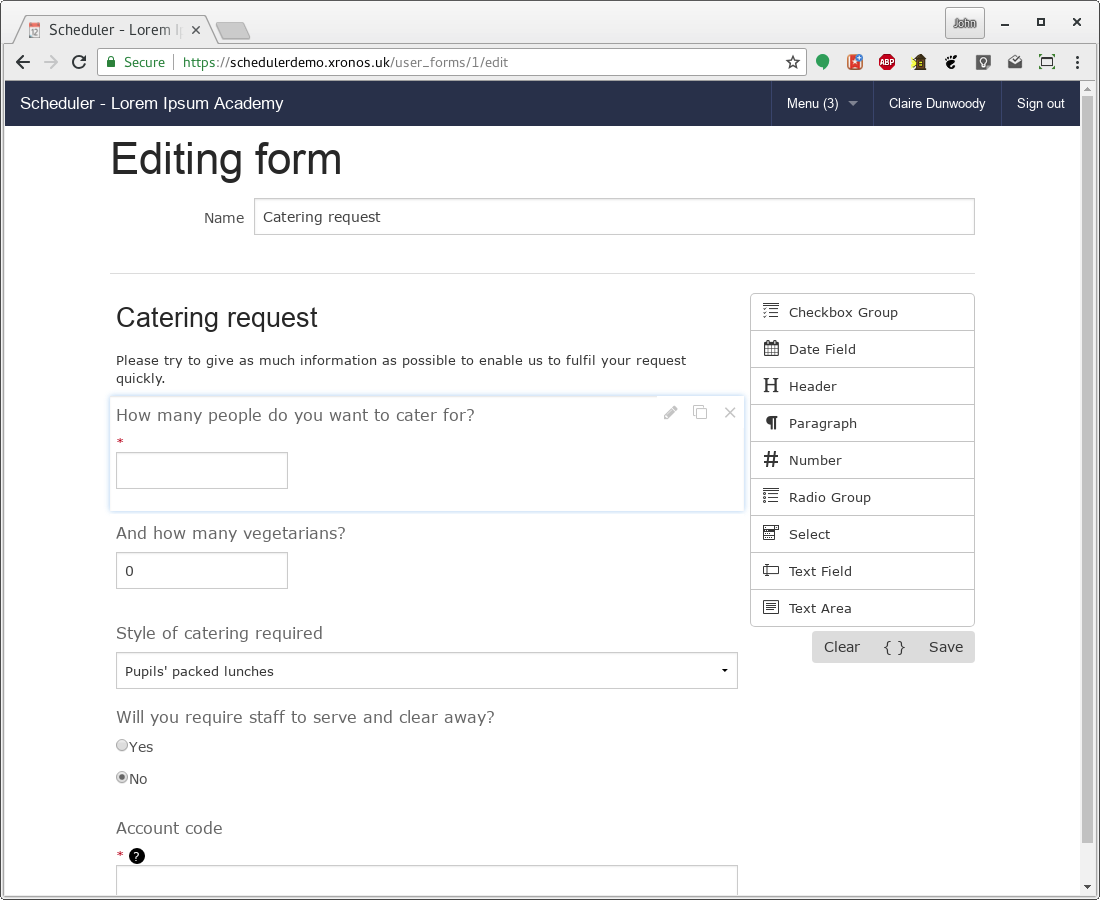
The name of the form is given in the field at the top, and then everything below that provides a drag-and-drop interface for adding or removing fields.
Warning
If you remove a field from a form which has already been used (that is - one which has had copies filled in by users) then the contents of that field for each of the existing responses will become effectively unavailable.
On the right you have a list of the kinds of fields which are available. To create one, simply drag it onto the main body of the form at the place where you want the field to be.
Let’s say we want to provide a field for the user to give a general description of their event. Drag the “Text area” item from the right to just above the “Style of catering” field and we have:

The default name of “Text area” isn’t terribly helpful, but you can click on the little pen icon and adjust various properties of the field.
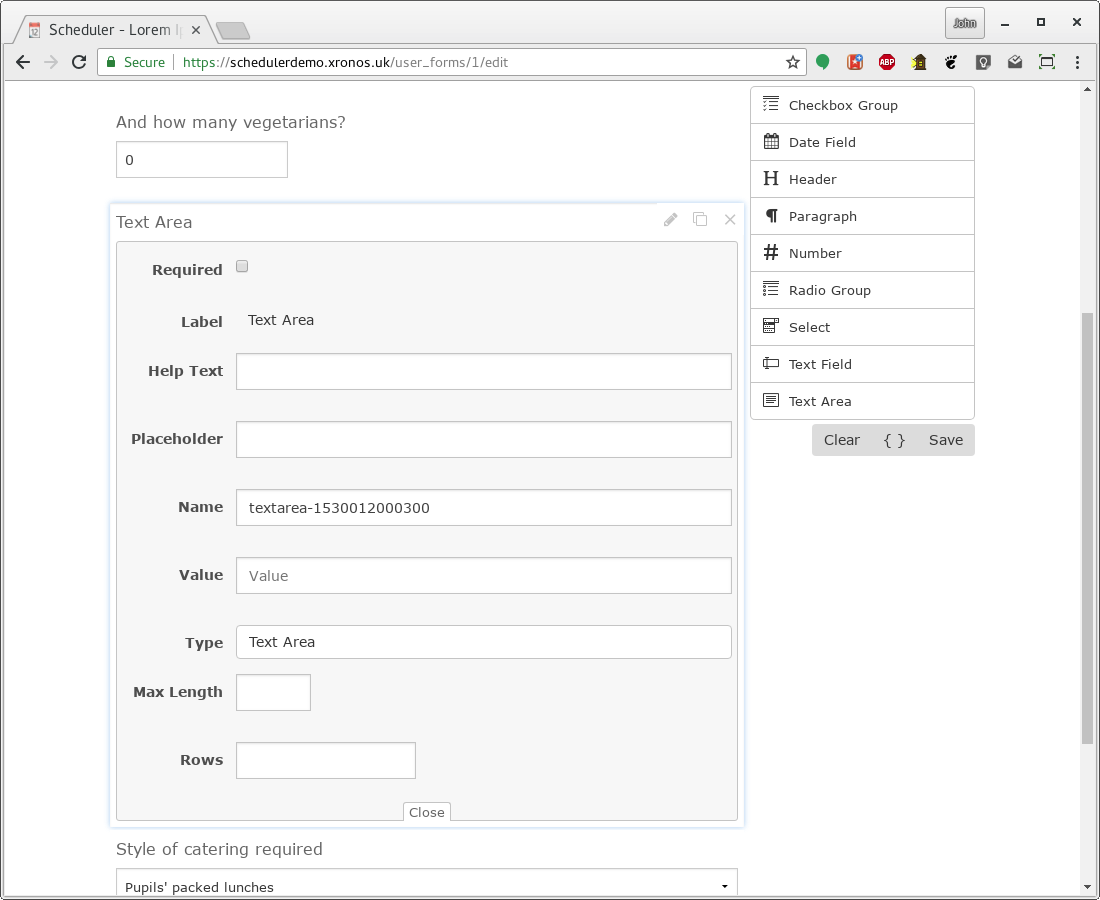
If you click on the label (“Text area”) you can change it, and likewise you can provide help text, placeholder text and default contents.
The Name is particularly important. Provided you leave this alone you can change any other aspect of the field and the system will recognize it as being the same field. If you change the Name, then it will become a different field, causing problems with any existing responses held within the system.
When you’ve finished tweaking the field, click on “Close” at the bottom of the box and it will collapse back to being just a field. I’ve called it “Event description” and given it some help text (which causes the black question mark) and some placeholder text.
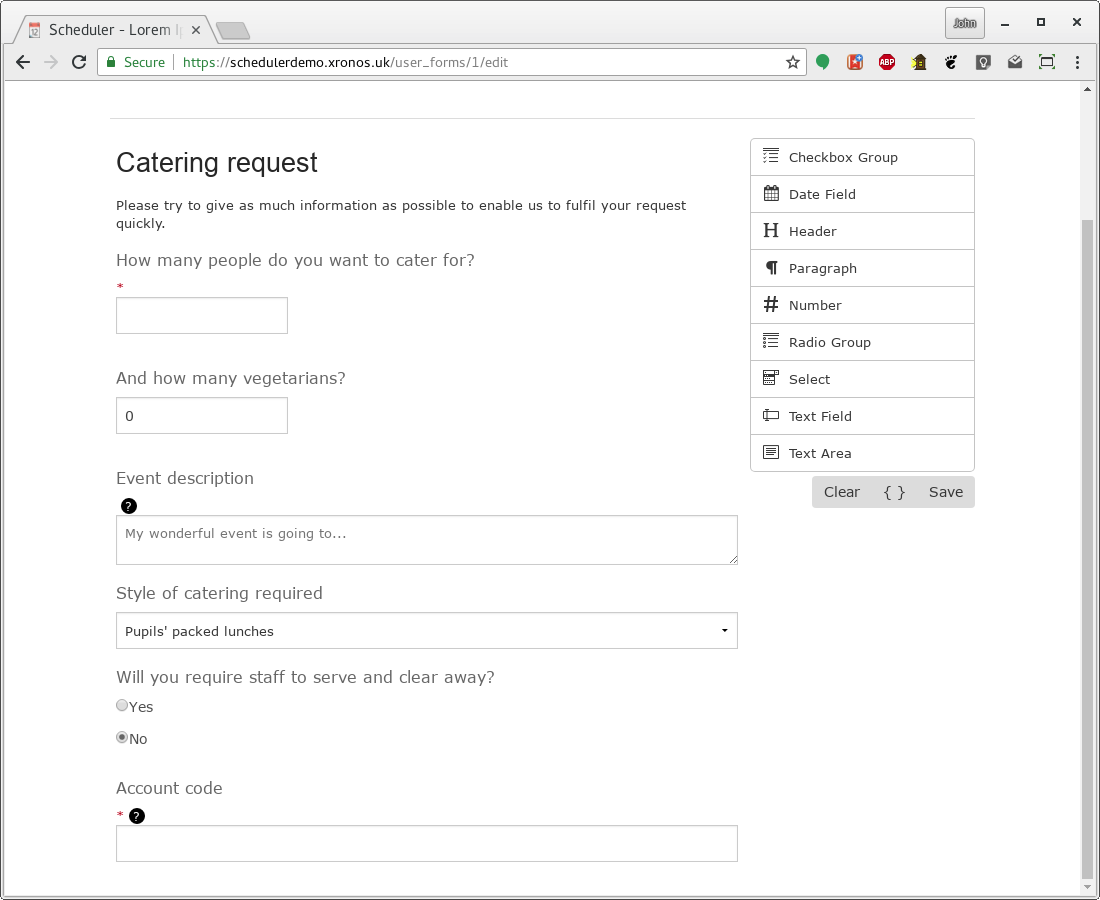
When you’ve finished setting up your form the way you want, click “Save” on the right hand side and you’ll be taken back to the listing.
Creating
To create a new form, click on the “New form” button in the forms listing, give it a name, and then proceeed as for editing above.
Attach to resource
Note
You don’t need to have form editing permission to be able to attach a form to your resource - you just need to be a controller of the resource.
Likewise, you could have form editing permission, but not be the controller for any resource, in which case you can create forms but not attach them.
All this is under the control of your system administrator.
Once created, the form can be attached to a resource which you control. To do this, click on the name of the resource on the left hand side in your main calendar display and you’ll get a screen like this:
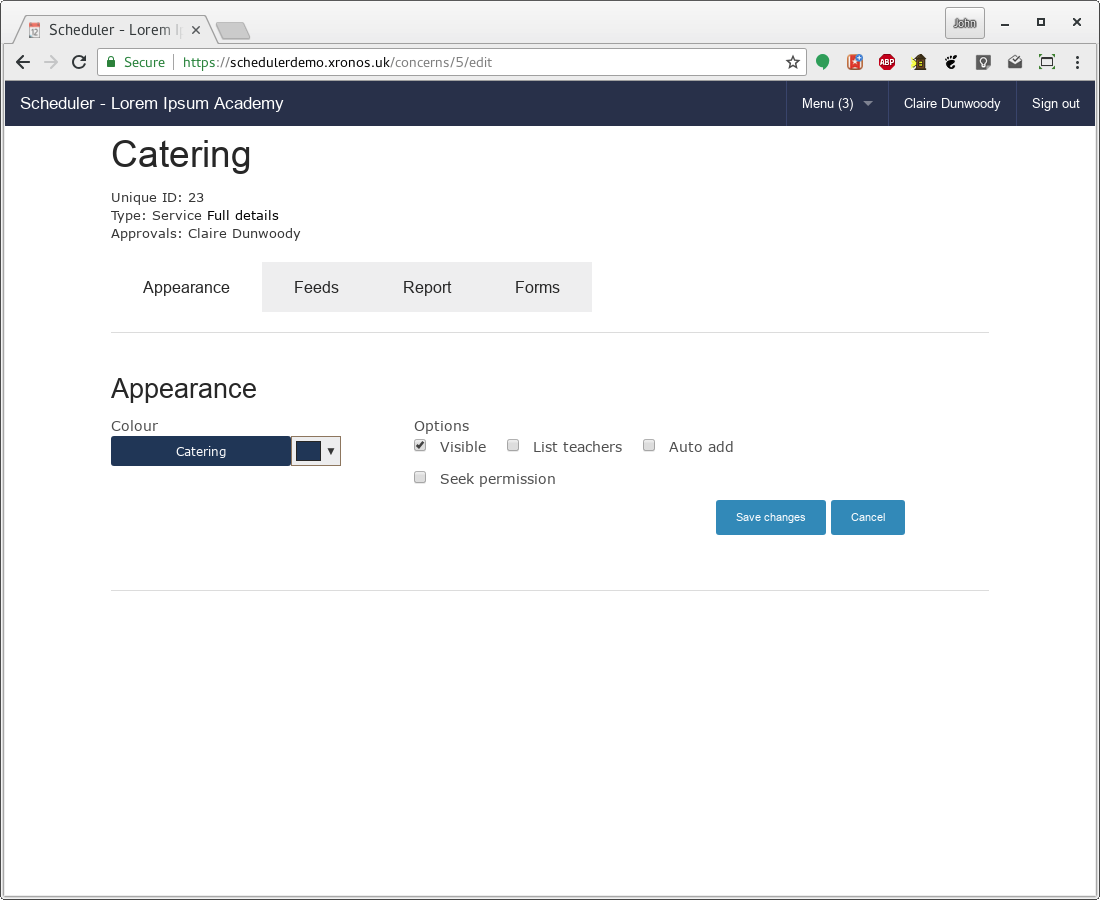
This is the normal screen for seeing more about a resource, but because the current user is a controller of the resource there’s an extra tab - “Forms”. Click on the Forms tab and you’ll see:

The field labelled “Form to use” is the usual kind of predictive text field. Just start typing the name of the form which you want, select it, and then click the “Set” button.
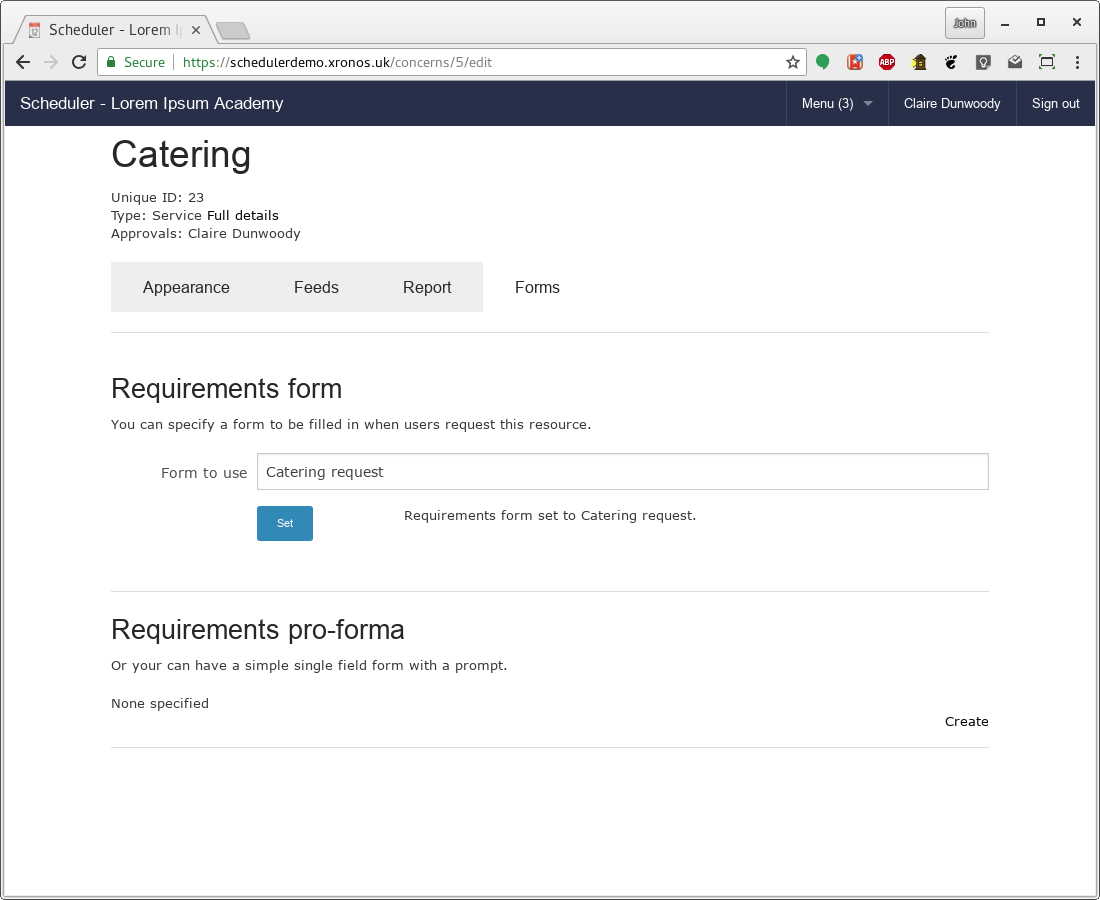
In this case, the form for the resource has been set to be the one called “Catering request”.
Once a form is attached to the resource, all users requesting the resource will be required to fill in the form.
View and approve
Once forms have been set up and then filled in, the viewing of them fits in to the rest of the Event approvals procedure.